

Looking to learn more advanced stained glass skills or one on one private help? Join my Patreon - I dive into more advanced techniques there and you support me in the process of teaching you! (Patreon Link) .
Hello Friends :)! I’m back with a short and super visual stained glass blog post talking about my favorite step in the process of making stained glass art - FOILING!! I’ve been looking forward to writing a post about foiling since I started my blog because in my mind it is the most fun step in all of the process. I mean hey who doesn’t like to sit back into the couch watching old episodes The Hills AND getting to make art simultaneously?! Jokes aside foiling is a fun step but it does require a great attention to detail if you want to correctly prep your project to solder smoothly. So lets jump in so I can share my tips to help you master turning that spool of copper tape and all those little glass pieces into one!
*Disclaimer: As an Amazon Associate, I earn from qualifying purchases. Thanks for your support :)
WHAT IS COPPER FOIL TAPE AND WHY DO I NEED IT?
Your project pieces should be all shiny and beautiful after you gave them a good bath post-grinding and now comes time for them to be covered in copper tape. Copper foil tape is a small spool of thin copper coated tape with a sticky back that you will use to wrap around every single piece glass in your project. SPOILER: lead doesn’t stick to glass. This fact absolutely blew my mind as a beginner because seeing glass art as an admirer you aren’t privy to seeing copper tape pretty much ever! The copper tape’s purpose other than briefly being so dang eye catching is it helps the lead to stick to your glass and becomes somewhat invisible skeleton that holds your project together. Without copper foil tape you won’t have a finished project.
WHAT THE FID?!
You need just a couple of tools in order to foil your pieces and you may have a some in your home already! You’ll first need a flat work surface, I like to use my desk or I have a laptop lap-desk I use for when I’m watching tv + foiling. You’ll also need to snag a pair of scissors, maybe the ones you’ve had from elementary school that you now only use to cut itchy tags off your clothes (not talking about myself or anything).
The other items you NEED that most likely aren’t around your home include…
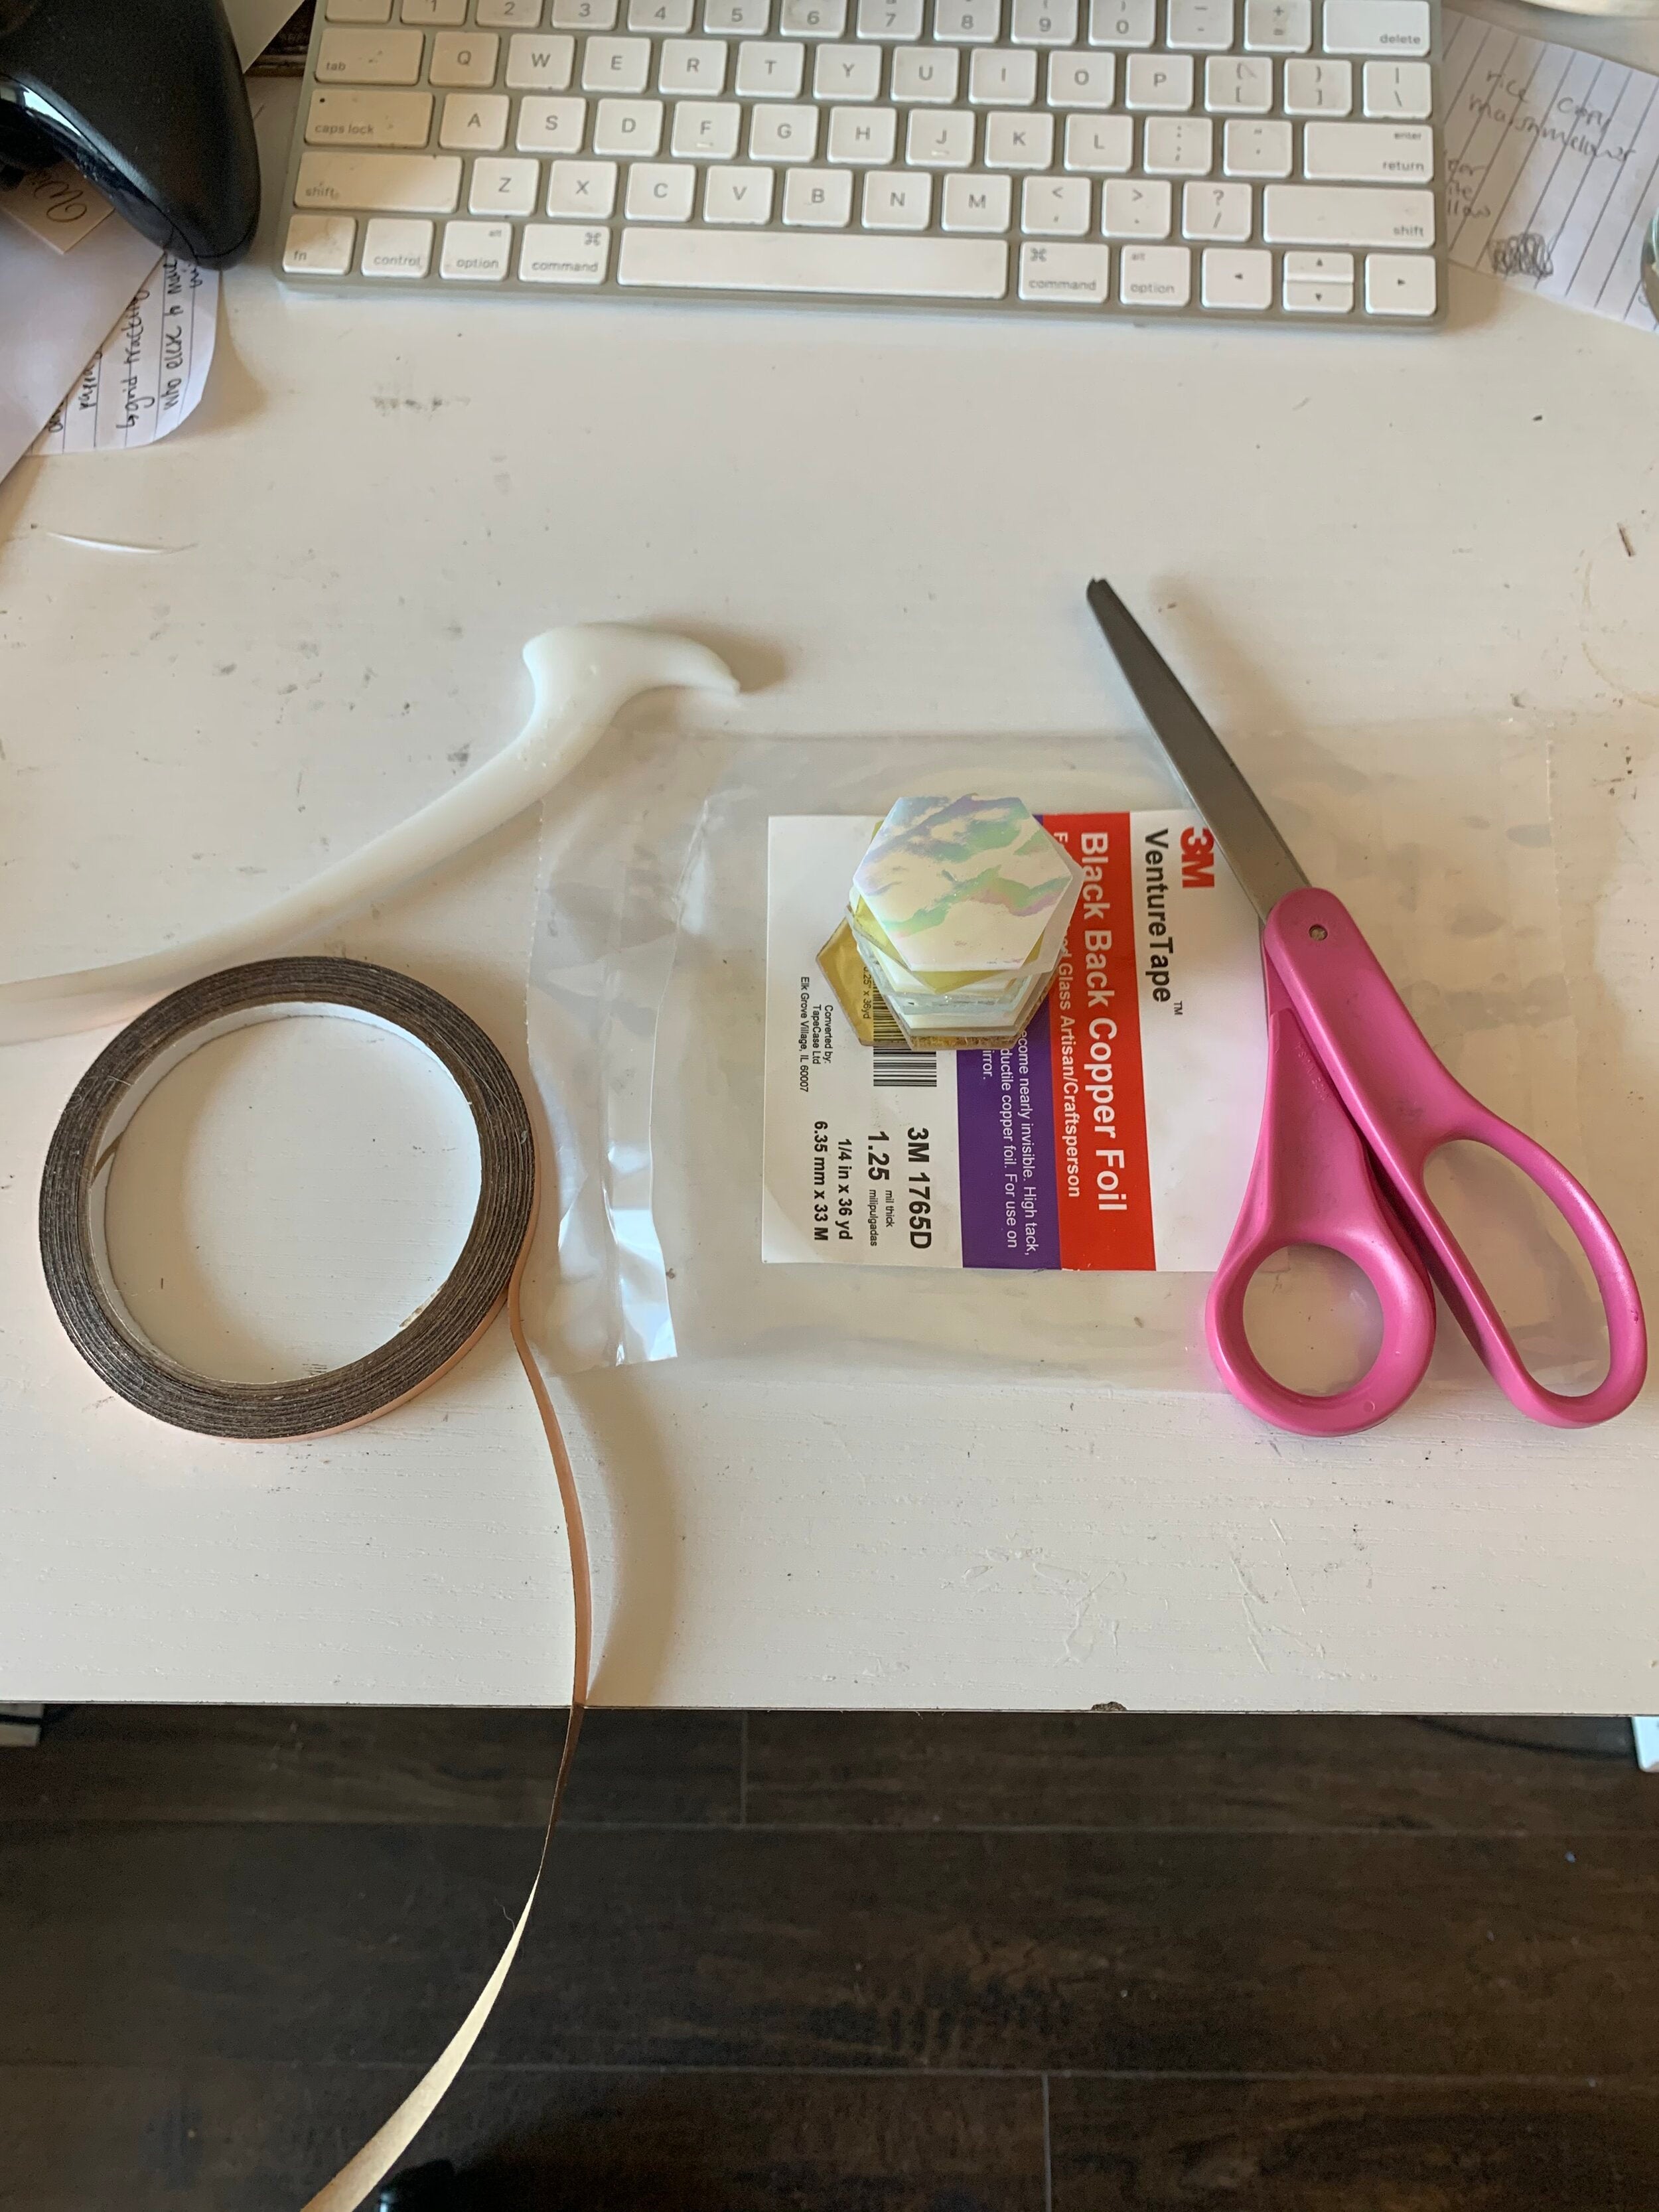
- Copper Foil Tape - (Find of Amazon) - The thin copper tape I mentioned just a moment ago. It comes in different sizes and colored backings (black, copper, silver). I swear by black backed copper foil tape ONLY because I feel as though it has the strongest grip to glass. I never use copper and silver nor do I recommend them. I have had to completely redo several projects when using copper backed tape. Again personal preference so up to you. The idea of the different tape back colors is that they will eventually match the color of your solder if you choose to apply patina (a liquid that causes the lead to change color). I personally feel the idea is great in theory but the backing generally looks much shiner than the patinated lead actually ever does. For me black backed just looks like the shadow of the lead line and much more “natural”. Aside from ascetic you should know copper tape comes in different widths. When starting out I recommend you use the standard 7/32 inch tape as it will cover most glass you use for projects as a beginner. If you have a thicker or thinner piece of glass you can always purchase other sizes of copper tape but for the most part that standard size will cover you!
- Fid - (Find of Amazon) - You're going to use this funky piece of plastic to smooth down your copper foiled pieces, this ensures a firm hold to your glass, ultimately making your project more secure. If you don’t want to purchase one of these guys (they aren't that expensive) you can always use a popsicle stick - I’ve been told it works just as well.
- X-acto Knife - (Find of Amazon) - Definitely a must to have sitting close by you when foiling, an X-acto knife assists in taking off overlapping tape and can be a great help with it comes to patching accidents.
- Painters Tape - (Find of Amazon) - So this is a bit unique to me as I like to carefully tape my pieces together before I solder. By using painters tape there is no residue left over and its a quick/secure way to get my project ready for soldering. Many artists like to nail their projects or use tacks to secure them. I prefer to tape my project because once I get done soldering one side it is easier to flip and get working on the other side no hassle. Nails in my opinion can literally tack on extra time.
*If you'd like to get more specific visuals on these required tools check out my blog post on all the tools you need to make stained glass
THINGS TO CONSIDER BEFORE WRAPPING YOUR PROJECT IN COPPER TAPE
Before we go full steam ahead on foiling its always good to revisit your plans for the end product. In some instances it isn’t necessary to foil your entire project if you are planning on adding lead came around the edges as a frame. Depending on what size lead came you plan to use foil may show though so its best to leave the edges of your project without foil (see the below pictures to better see what I am saying). It is worth mentioning with a larger lead came border you can leave the copper foil tape on and the came will cover it completely. Most of the time I foil my projects in entirely because I use the larger lead came UNLESS I’m using that very thin border came pictured below and in that case I do not foil the edges.

HOW TO FOIL LIKE A STAINED GLASS MASTER
Now that you got your tools and framing plans figured out its time to kick back, press play on that Netflix docuseries, and get your foiling on. I’m going to teach you how to foil like a master with by sharing my process with some pictures…
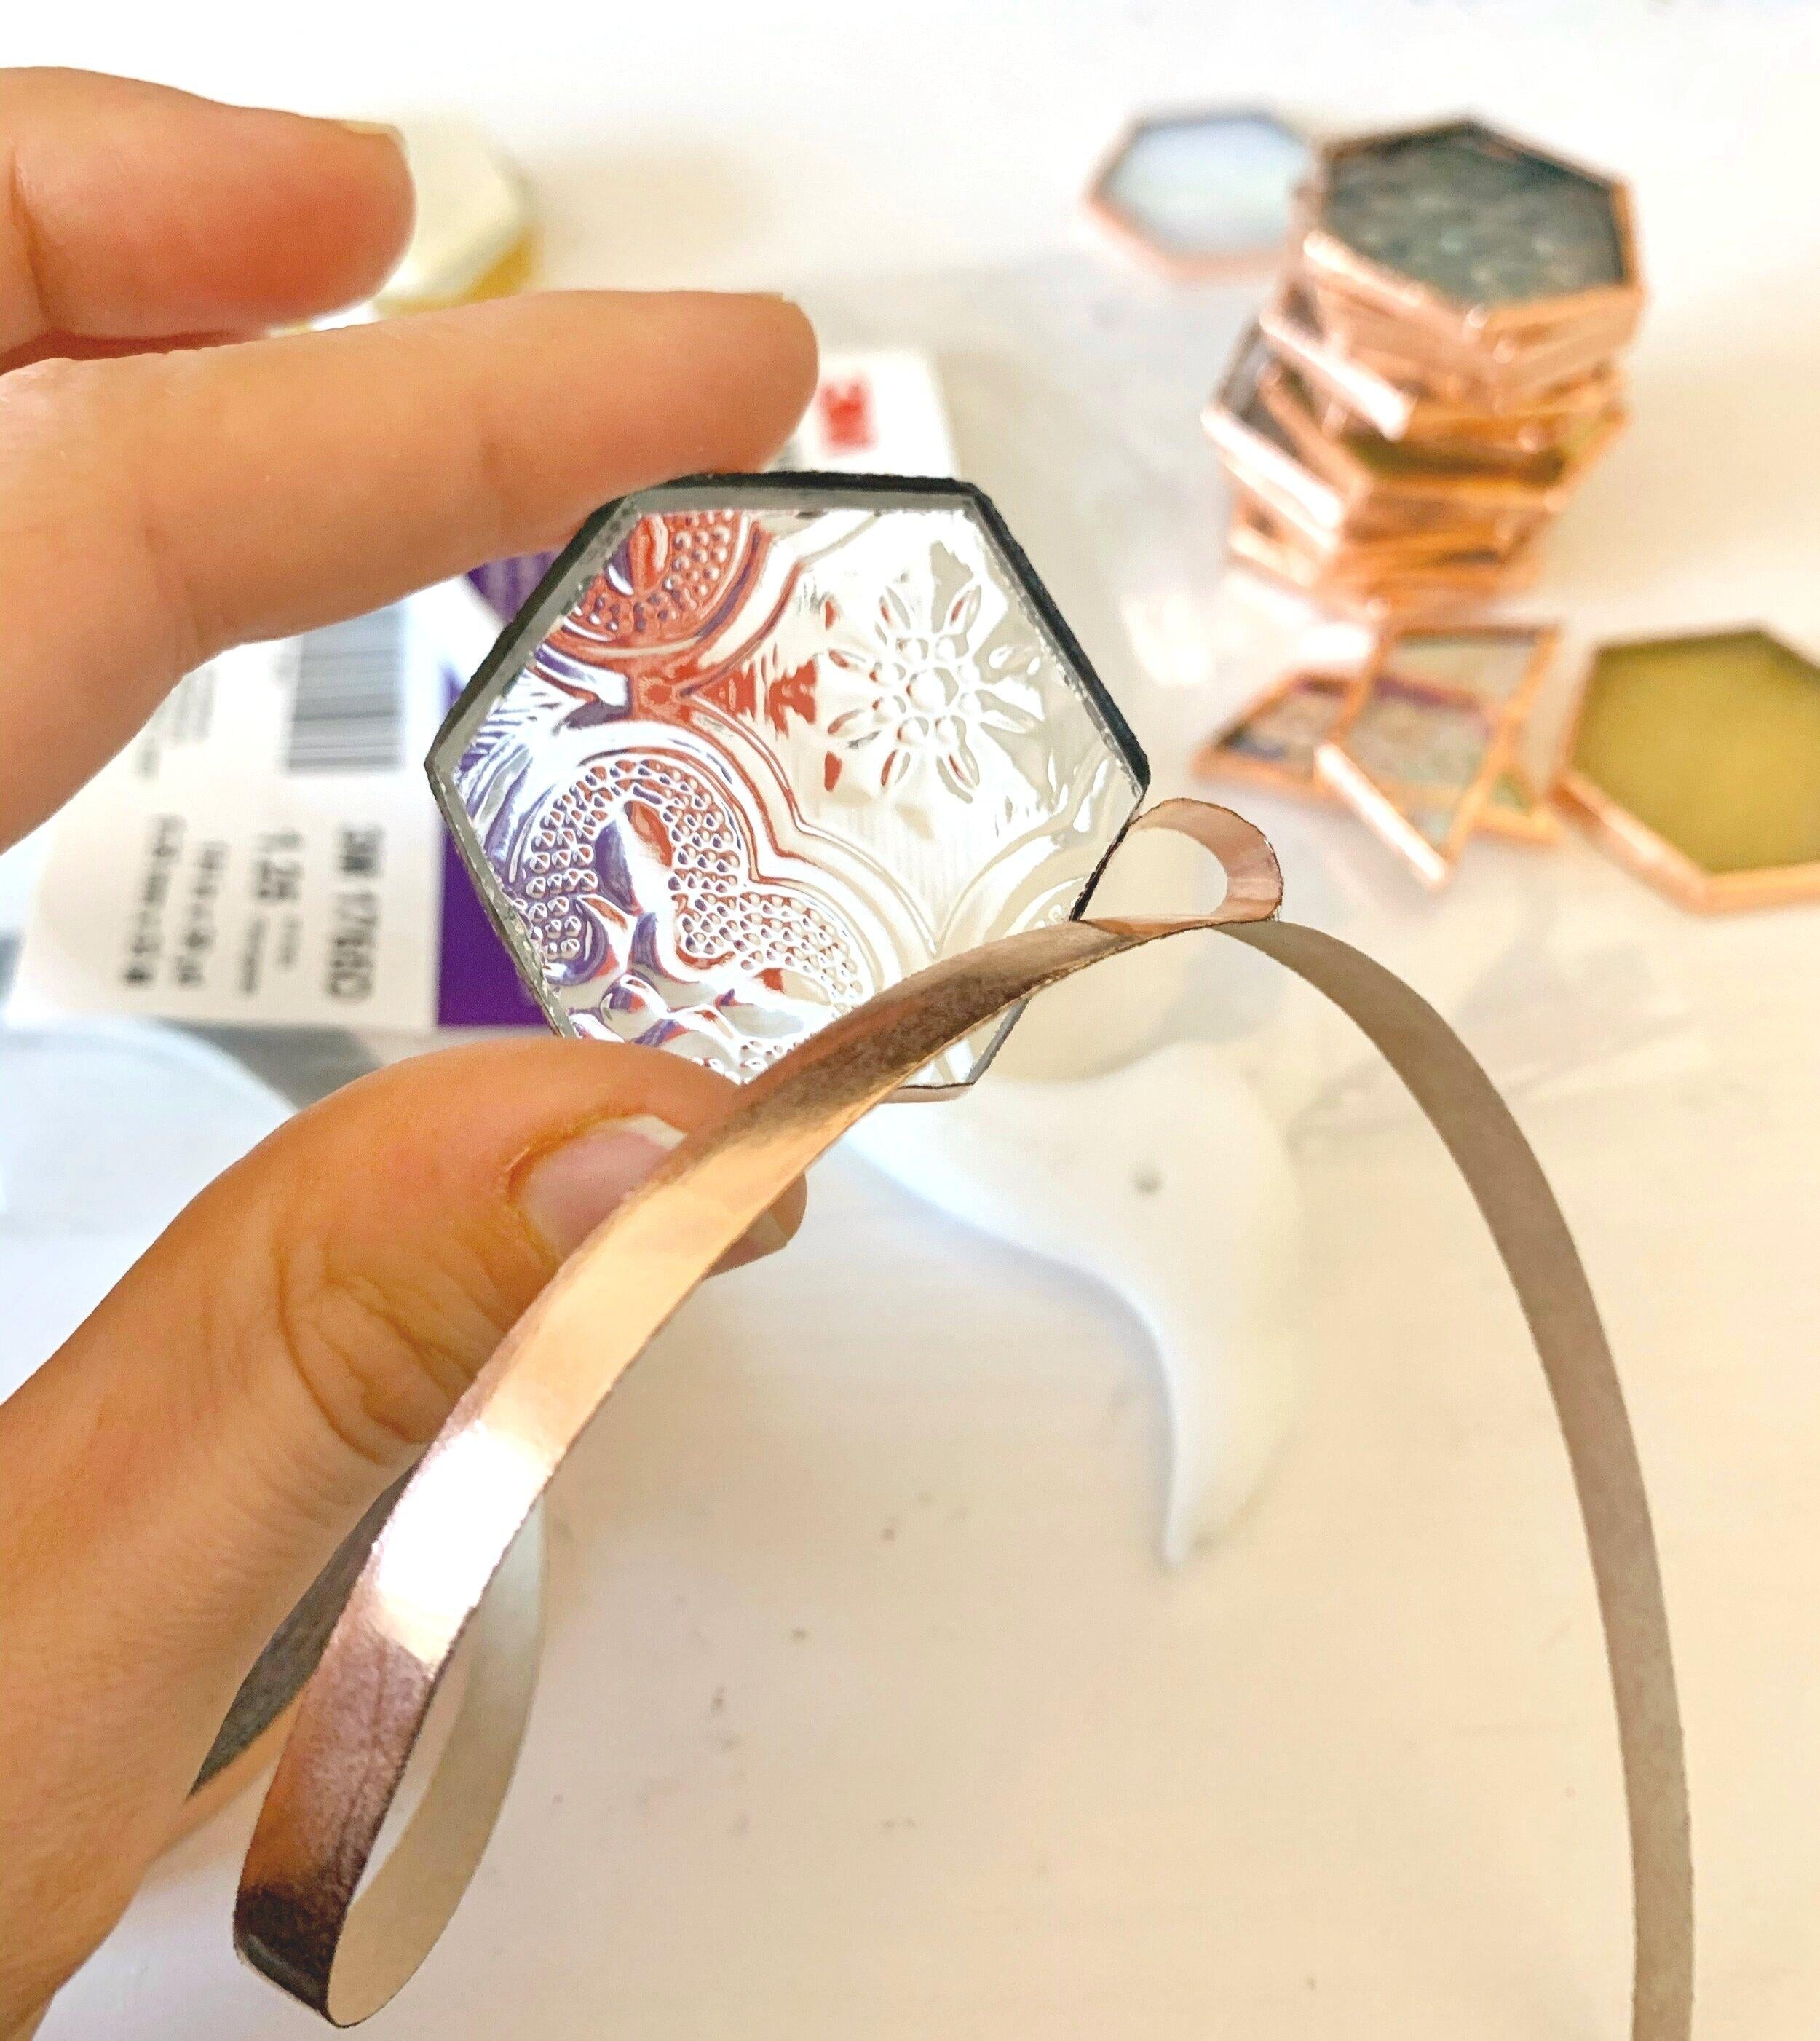
First you will gently peel back your copper tape and grab one of one of your glass pieces.

You will press your copper tape onto the middle of an edge of that glass piece, making sure its centered.

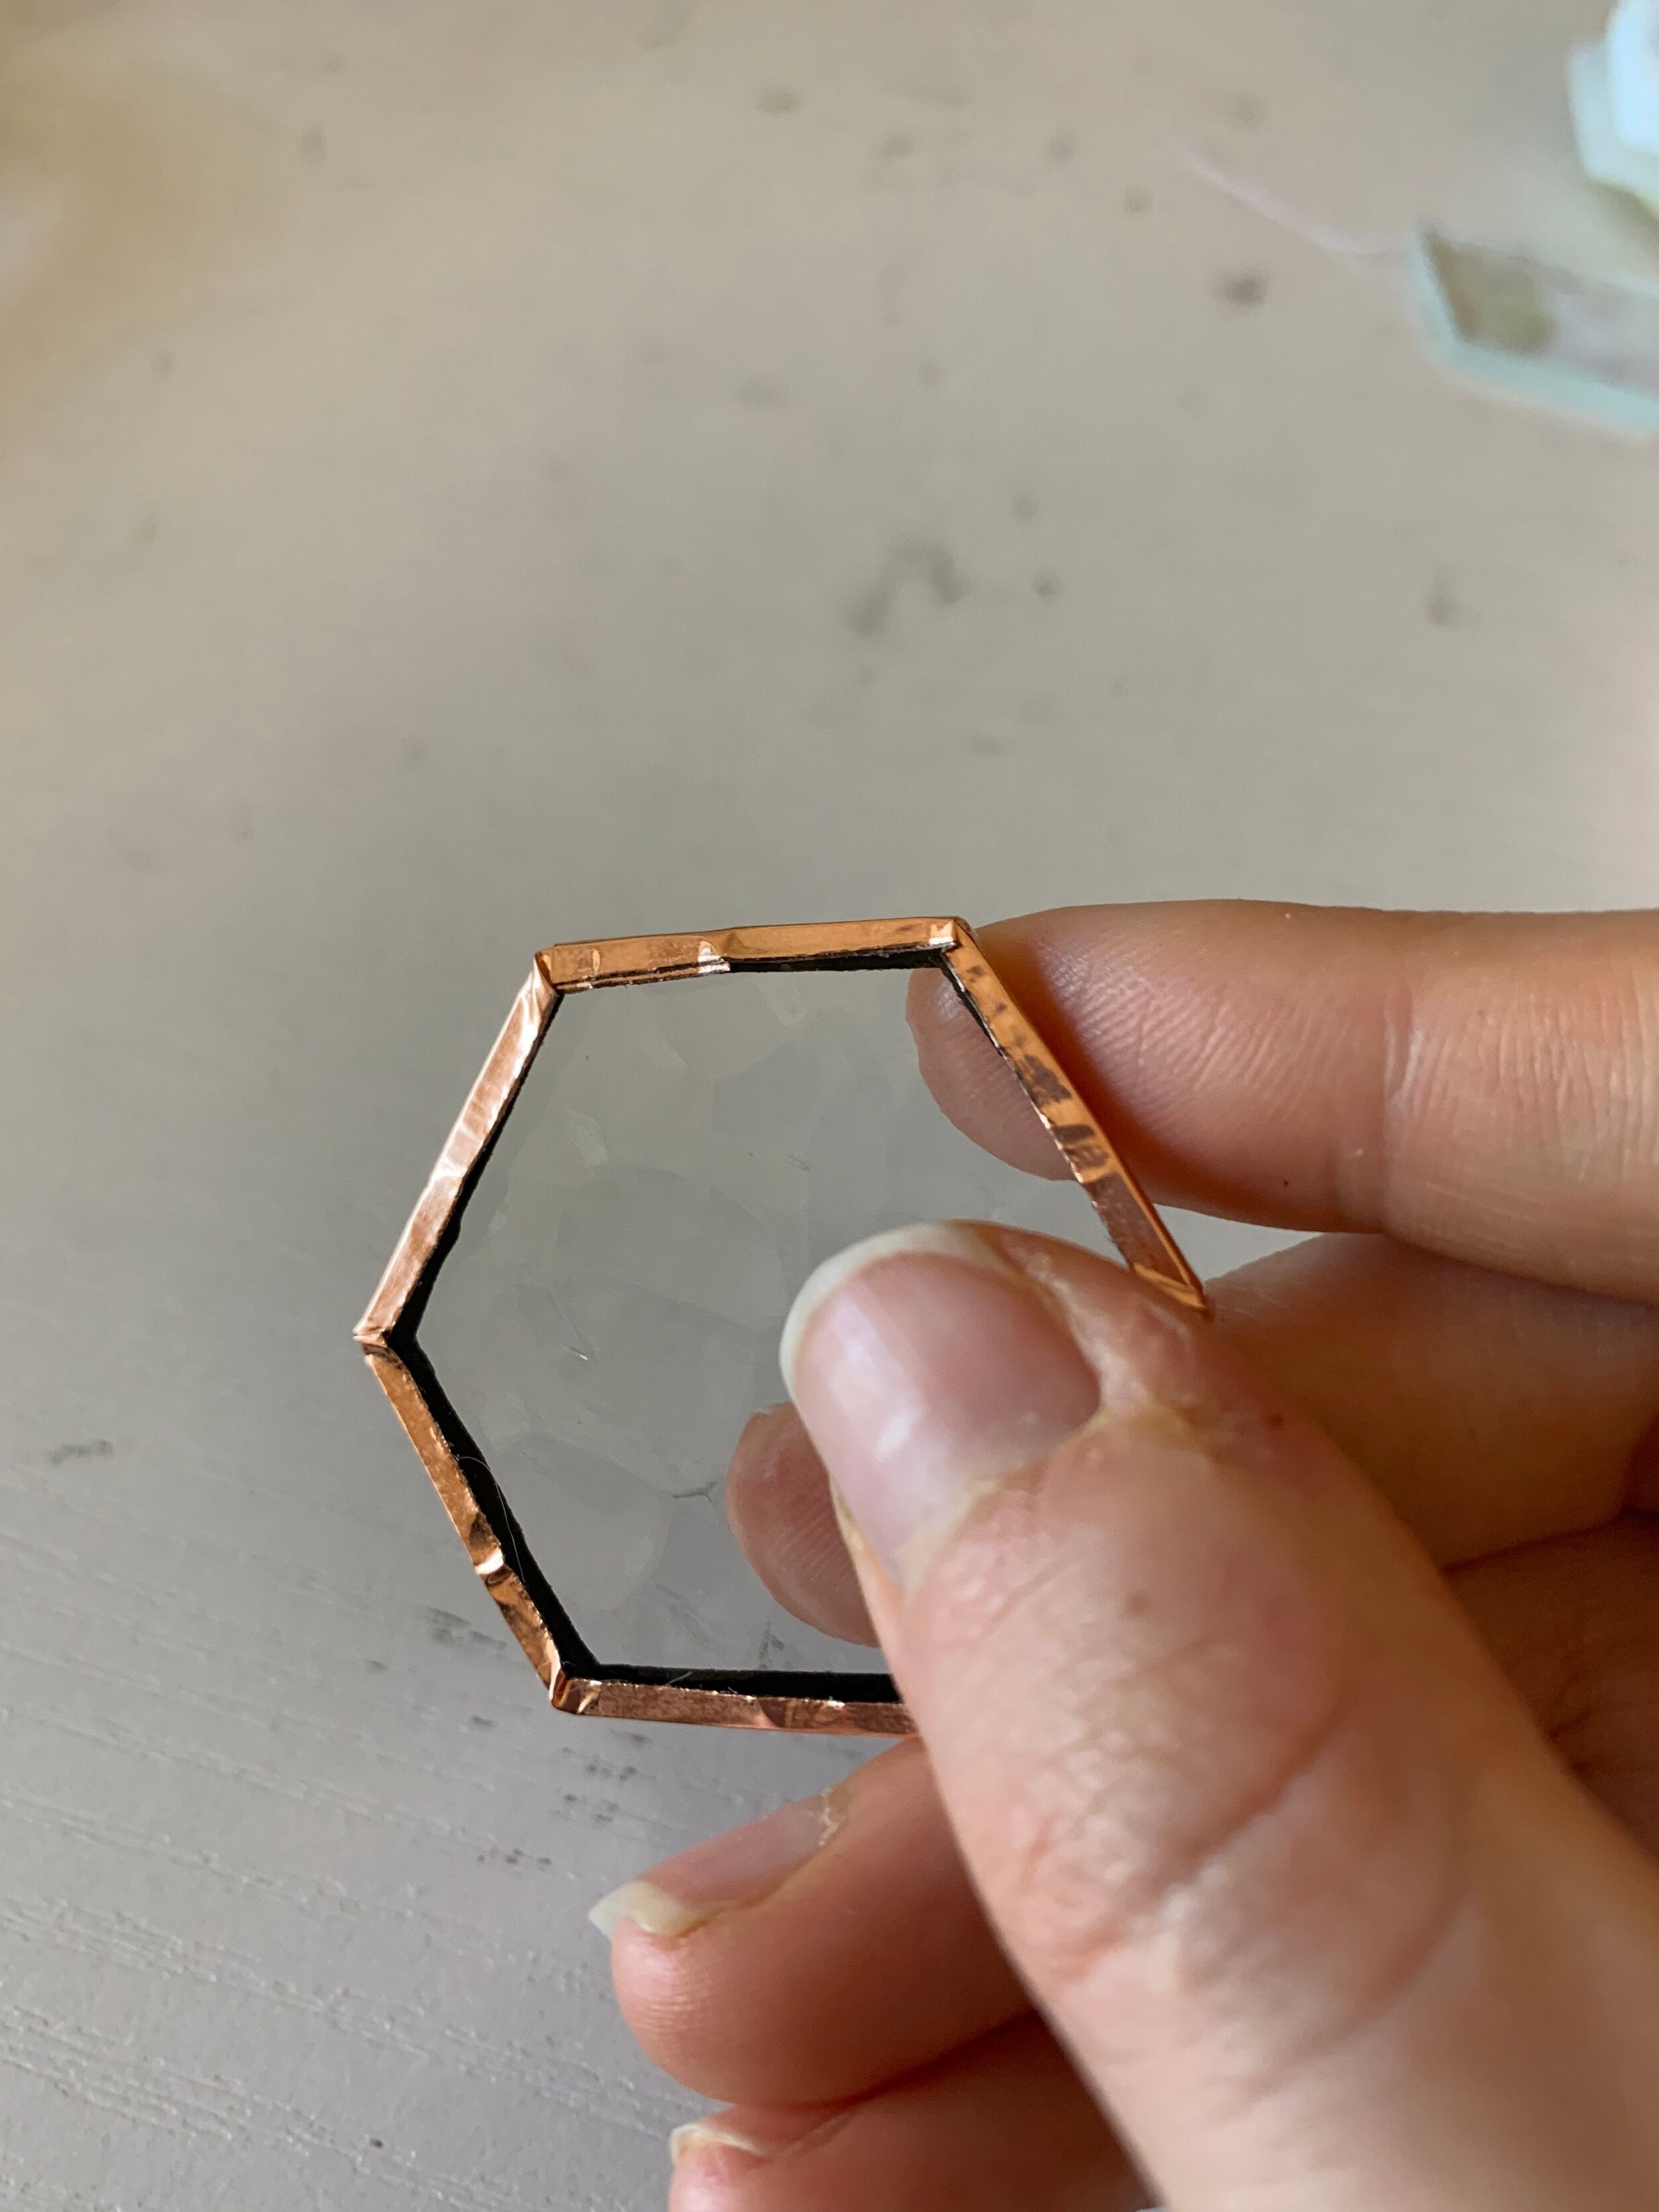
You then wrap the tape around all the edges. IMPORTANT: be careful in making sure the piece of copper tape is centered at all times, if it is not in the center of your glass piece it will be able to be seen though the other side of your glass and will look sloppy (see my example further down in this post). Even if it means pulling back your tape and re-sticking it or completely pulling off the tape and starting over you need to make sure it is continuously placed evenly.
As you get close to completely wrapping it you must make sure to have the tape meet but not overlap too much. As the soldering iron heats the tape some of the stickiness melts into to the glass strengthening its bond. If you have too much overlapping tape this bond doesn't happen and it instead peels and your project will fall apart.


You will cut the tape and press the tape down around your entire piece using your fingers. The copper tape should sit mostly flat on both sides of your piece.

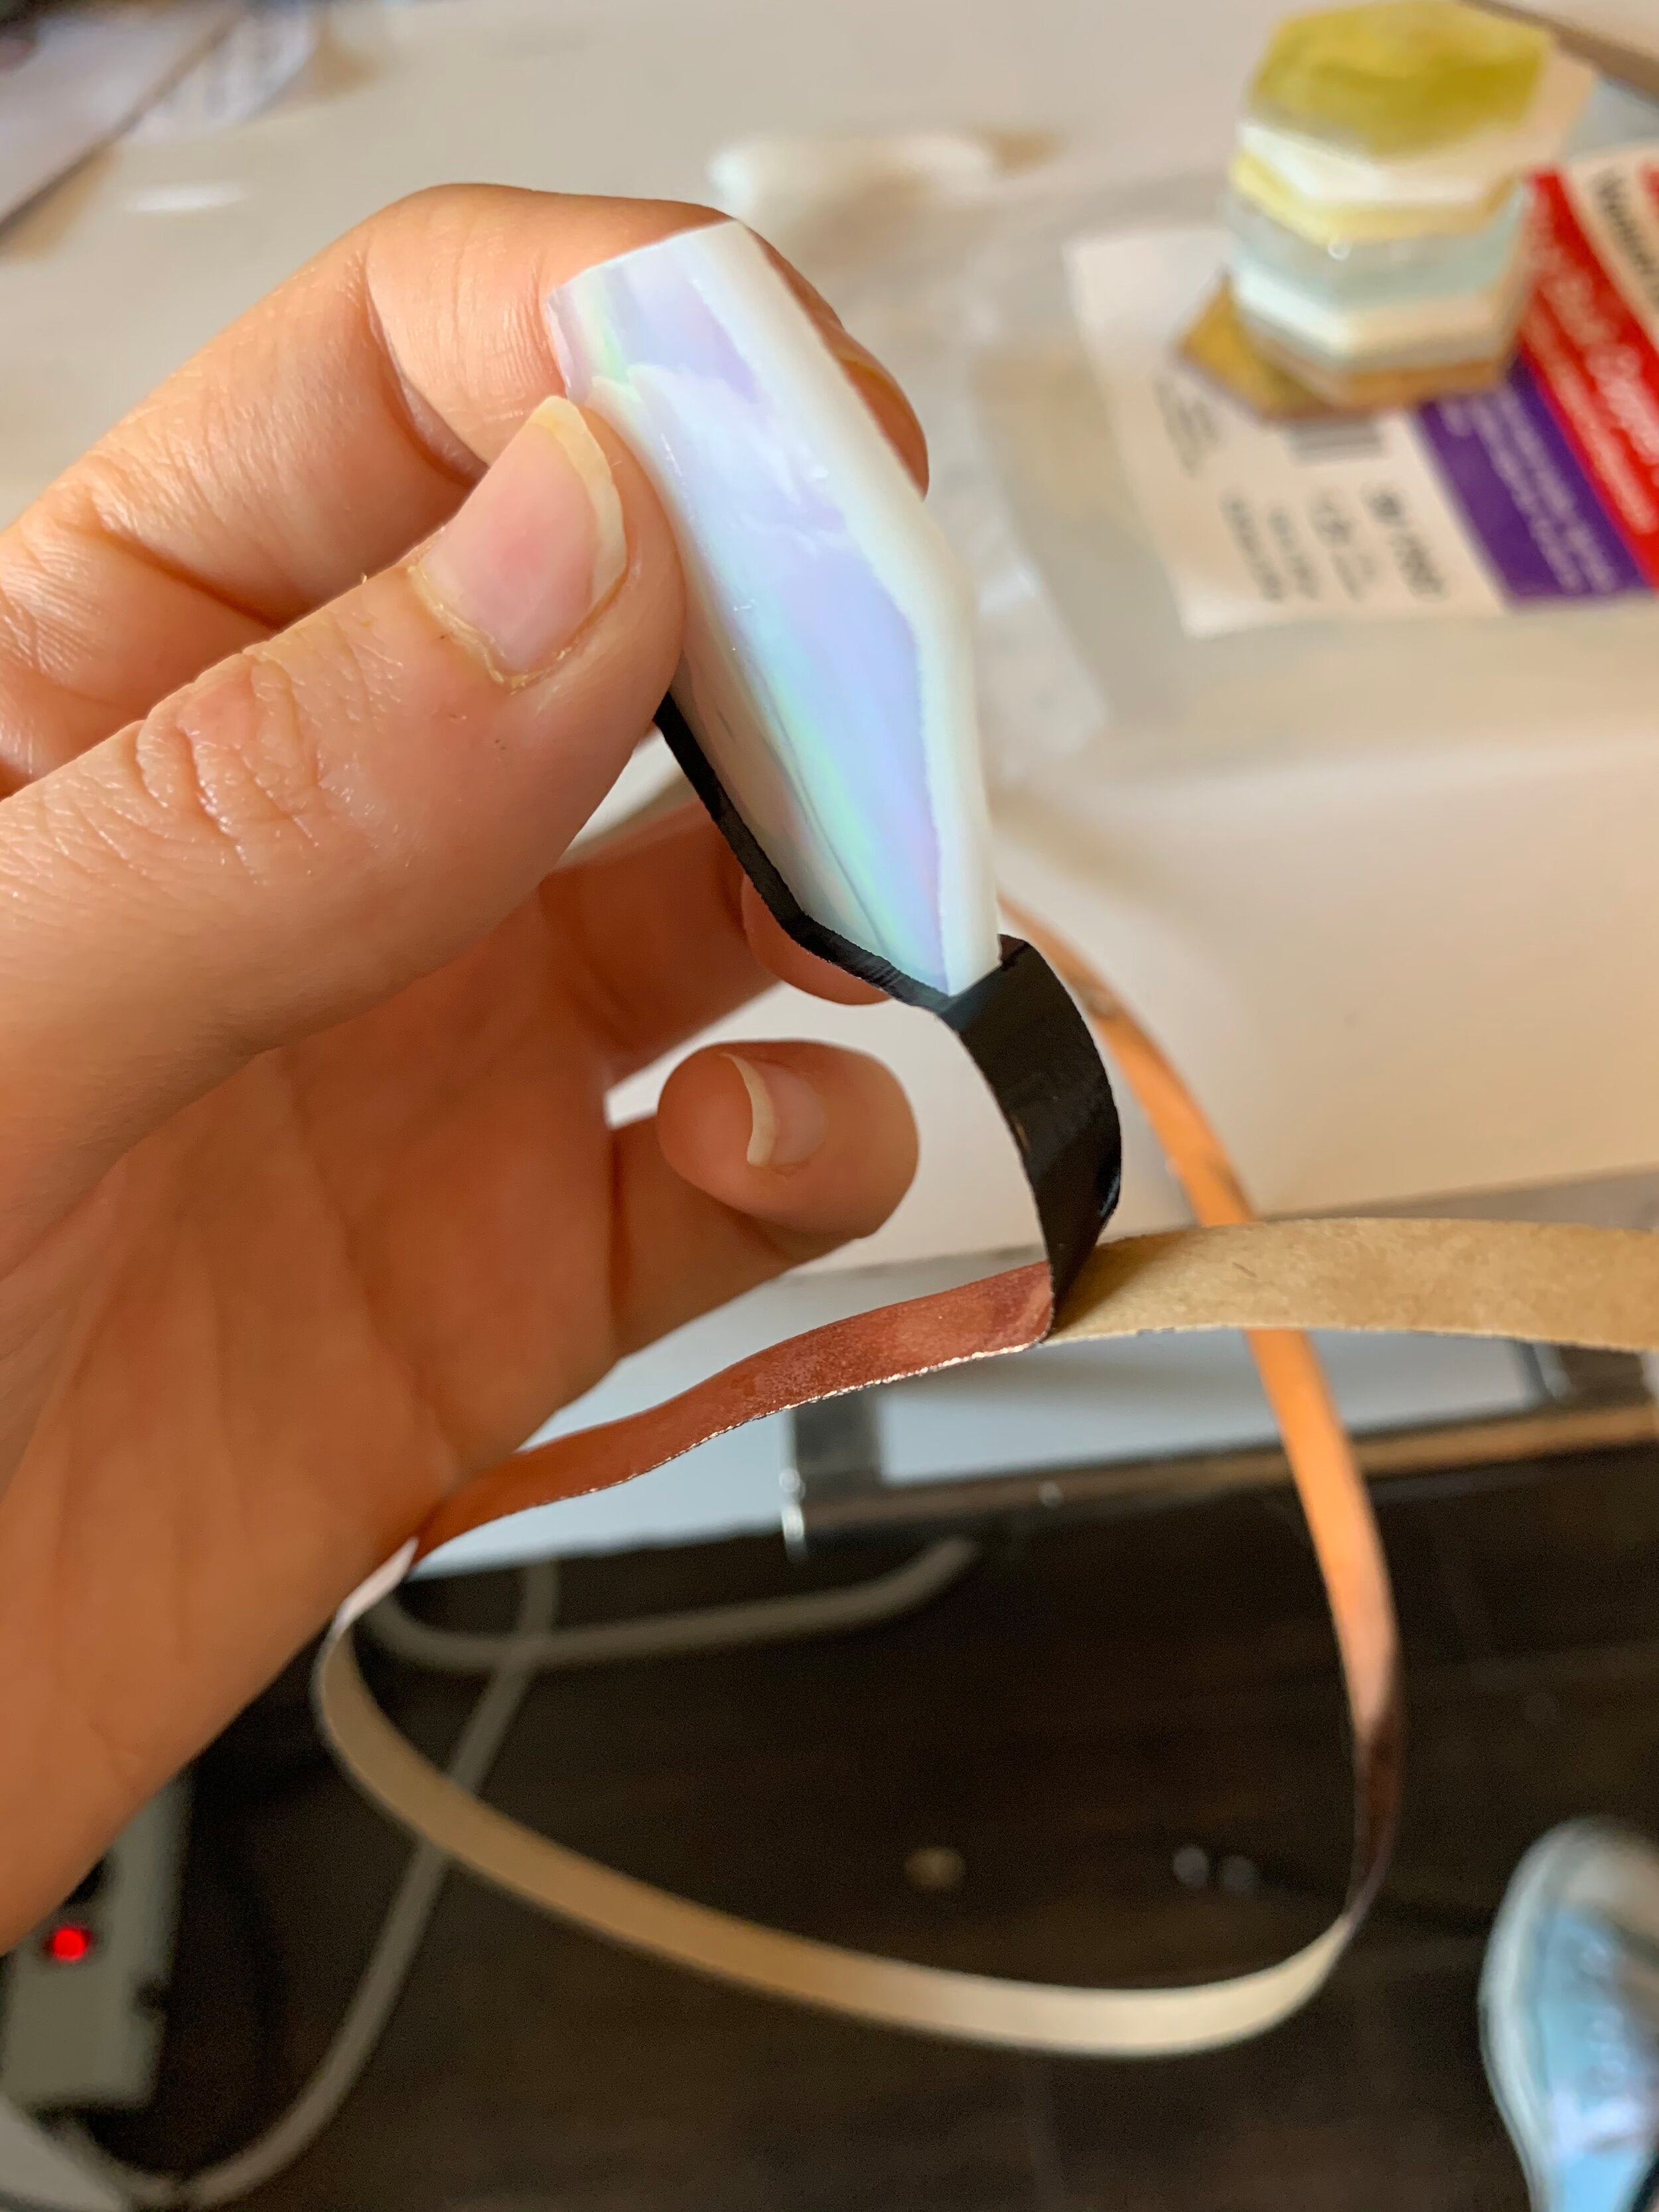
You will then take your fid and apply pressure to the taped piece of glass by pressing down and firmly moving the fid in a firm back & foward motion.

Smooth down the outside edges of the piece first, then the front side, then the back side.
Repeat this process for all of your pieces until they are all covered in smoothed copper tape!

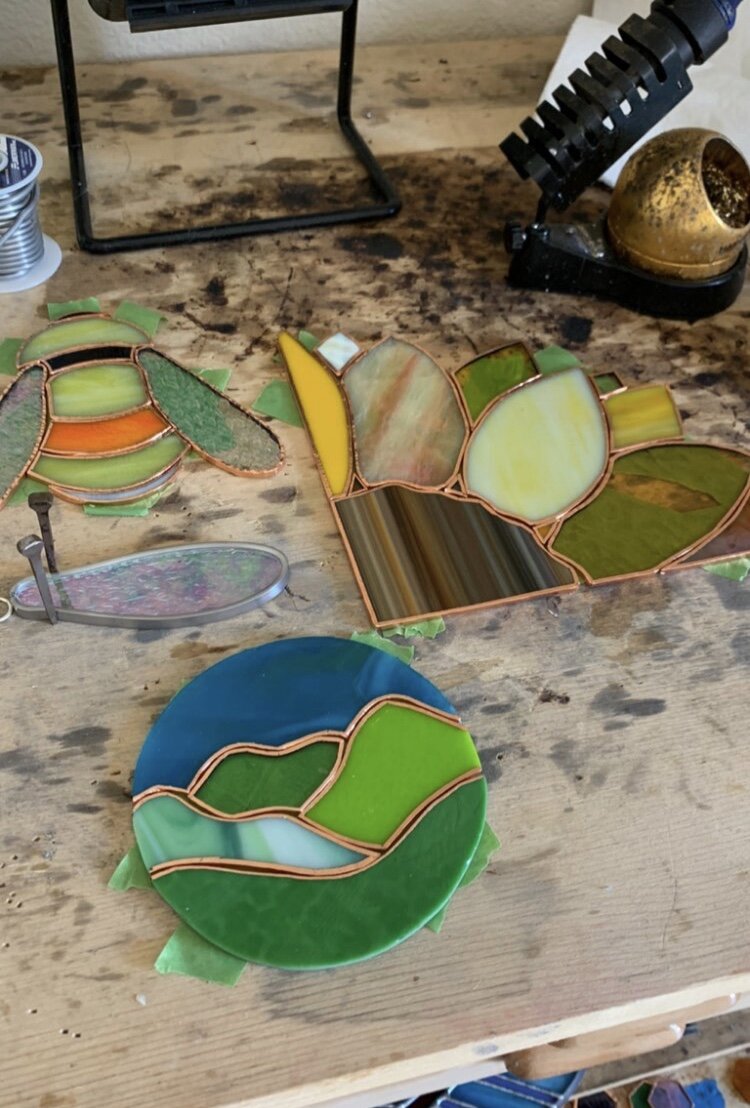
When finished they should all look smooth like this!

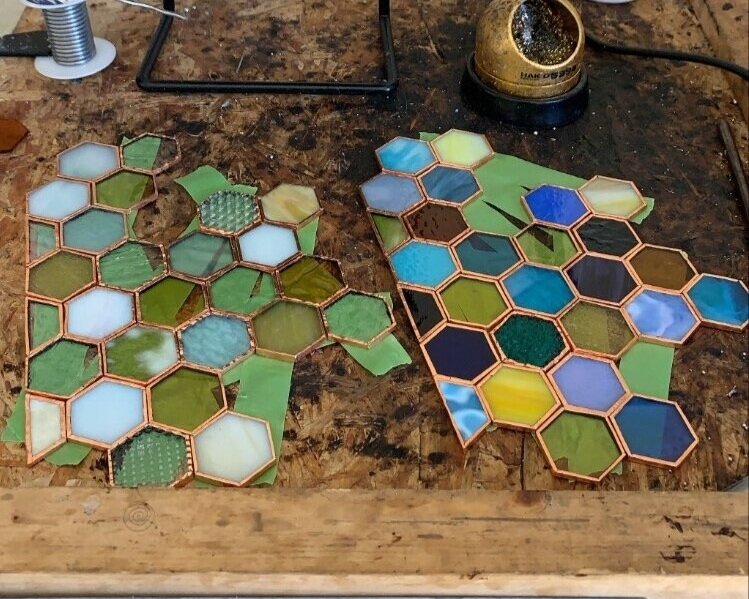
Once all your pieces are foiled you are going to place them back into your master pattern and make sure they fit nicely together. At this point you’ll want to secure the pieces for soldering whether that be with tape, nails, or tacks, etc!
*if you live in a humid climate do not let your foil sit longer than a couple days, over time the humidity will ruin the copper tape and it will make it harder to solder.
LITTLE ISSUES —> BIG SOLUTIONS
Like all steps in the stained glass process copper foiling comes with its own hiccups and isn’t always smooth sailing. Heres what to do if some of these scenarios happen to you…
-
Cracking tape - Usually happens on inside/outside curves. In this case you are going to use a small piece of copper foil and tape a patch over it. Then use your X-acto knife to cut off the excess.
-
Overlapping tape - Use your X-acto knife to cut off the extra tape so it is has an even appearance.
-
Uneven tape - Depending on how severe the unevenness is you can 1. use an X-acto knife to cut off the excess to better match or 2. (what I recommend) Pull off the tape and start over - it won’t kill you and it is better to have uniform looking copper foil.
-
Tight corners - You may have to play with the copper tape a bit by doing the same method as what you’d do when patching. I’d recommend applying the tape in pieces then using the X-acto knife to match the rest of the copper tape lines. Easier said than done.
-
Thin glass and thick tape - A shortcut I like to use instead of purchasing smaller copper tape is I use my scissors and cut down my copper tape to be smaller. This does the trick on those littler or thinner glass pieces and you don’t have to purchase a small roll of copper tape that sits around never getting used!
-
Old/tarnished copper tape - THROW IT OUT, as sad as it is humidity and the oils from our hands over time ruin copper tape. If you by chance happen to inherit a box of old supplies, chuck the tape. It won’t work well when you go to solder solder and will just cause you heartache than its worth.


ET FIN
And in the blink of an eye you are all prepped to solder. Foiling may be short and sweet but it is a very important step to take the time to do correctly. By being patient and making sure every single on of your pieces are foiled to perfection you’re setting yourself up for smooth sailing when it comes to the next step, the most difficult step, soldering! See you soon :)!
<3 Meggy
stained glass foiling, how to foil stained glass, stained glass copper foil tape, best copper foil for stained glass, stained glass foiling techniques, tips for foiling stained glass, stained glass foiling mistakes, stained glass foiling tutorial, how to apply copper foil to stained glass, stained glass copper foil process, stained glass foiling tools, stained glass foiling step by step, copper tape for stained glass, stained glass foiling tips and tricks, stained glass foiling issues, stained glass project preparation, how to fix copper foil mistakes, copper foil vs lead came, choosing the right copper foil tape, foiling stained glass edges, stained glass soldering prep, stained glass foiling patterns, stained glass foiling best practices, DIY stained glass foiling, foiling stained glass art, stained glass foiling troubleshooting, stained glass foil peeling fix, stained glass foiling for beginners, stained glass project finishing, stained glass foiling techniques for smooth edges, stained glass foil application guide, how to smooth copper foil, common foiling errors in stained glass, stained glass foiling and soldering, stained glass prep work, stained glass tools and materials, foiling stained glass at home, stained glass foil sizing guide, stained glass foiling humidity effects, stained glass project setup, stained glass DIY foiling guide, stained glass workshop tips.