

Looking to learn more advanced stained glass skills or one on one private help? Join my Patreon - I dive into more advanced techniques there and you support me in the process of teaching you! (Patreon Link) .
In the midst of all thats going on in the world I think now would be perfect time to drive right into talking about things other than craziness of our current reality. Since we are all confined to our homes, now more than ever, its time to lean into the things we love to do and are grateful for. For me that is stained glass so I want to do what I can to share some positivity and guidance for those of you stuck at home who are also needing to use this time to create glasswork or are new to stained glass thanks to needing and new hobby haha. My last post I shared my go to’s for cutting glass so naturally the next step in working on your stained glass project is: Grinding!
*Disclaimer: As an Amazon Associate, I earn from qualifying purchases. Thanks for your support :)
FIRST TIME GLASS GRINDER?
Okay so you’ve cut out all your pieces, excellent! But like any human working with a material as fragile as glass your cuts aren’t flawless and your project doesn’t fit together perfectly. This is where an amazing tool called a grinder comes in and saves your day and LOTS of time (the alternative is hand grinding with a stone like they did in medieval times…no thanks). A glass grinder is a kind of wet sander specifically made for sanding glass. It has a diamond drill bit that helps slowly sand off the unwanted excess glass on your pieces and turns them into perfect puzzle pieces that fit together. If a wet grinder is a new concept you aren’t alone. I was completely confused when I saw one for the first time - um mixing electricity with water - what? Anyways they are perfectly safe (the worst they can do is shave down your fingernail) and I promise not as dangerous as those wood shop sanders you vaguely remember being afraid of in middle school. Your grinder has a diamond bit that sits in the center and rapidly spins around once you flip the on switch. Usually you will have a sponge touching it as it spins. The sponge is there to prevent glass dust going into the air, by supplying water so it catches the glass particles. The sponge touching the bit is also in contact with the water reservoir below to consistently deliver water against your grinder and glass piece. Grinders aren’t horribly loud, are surprisingly small, and smooth the glass A LOT slower than you think they would. Some makers find this part of the process tedious but I don’t think its all too bad if you have some loud music playing in the background.


GRINDER RECCOMENDATIONS
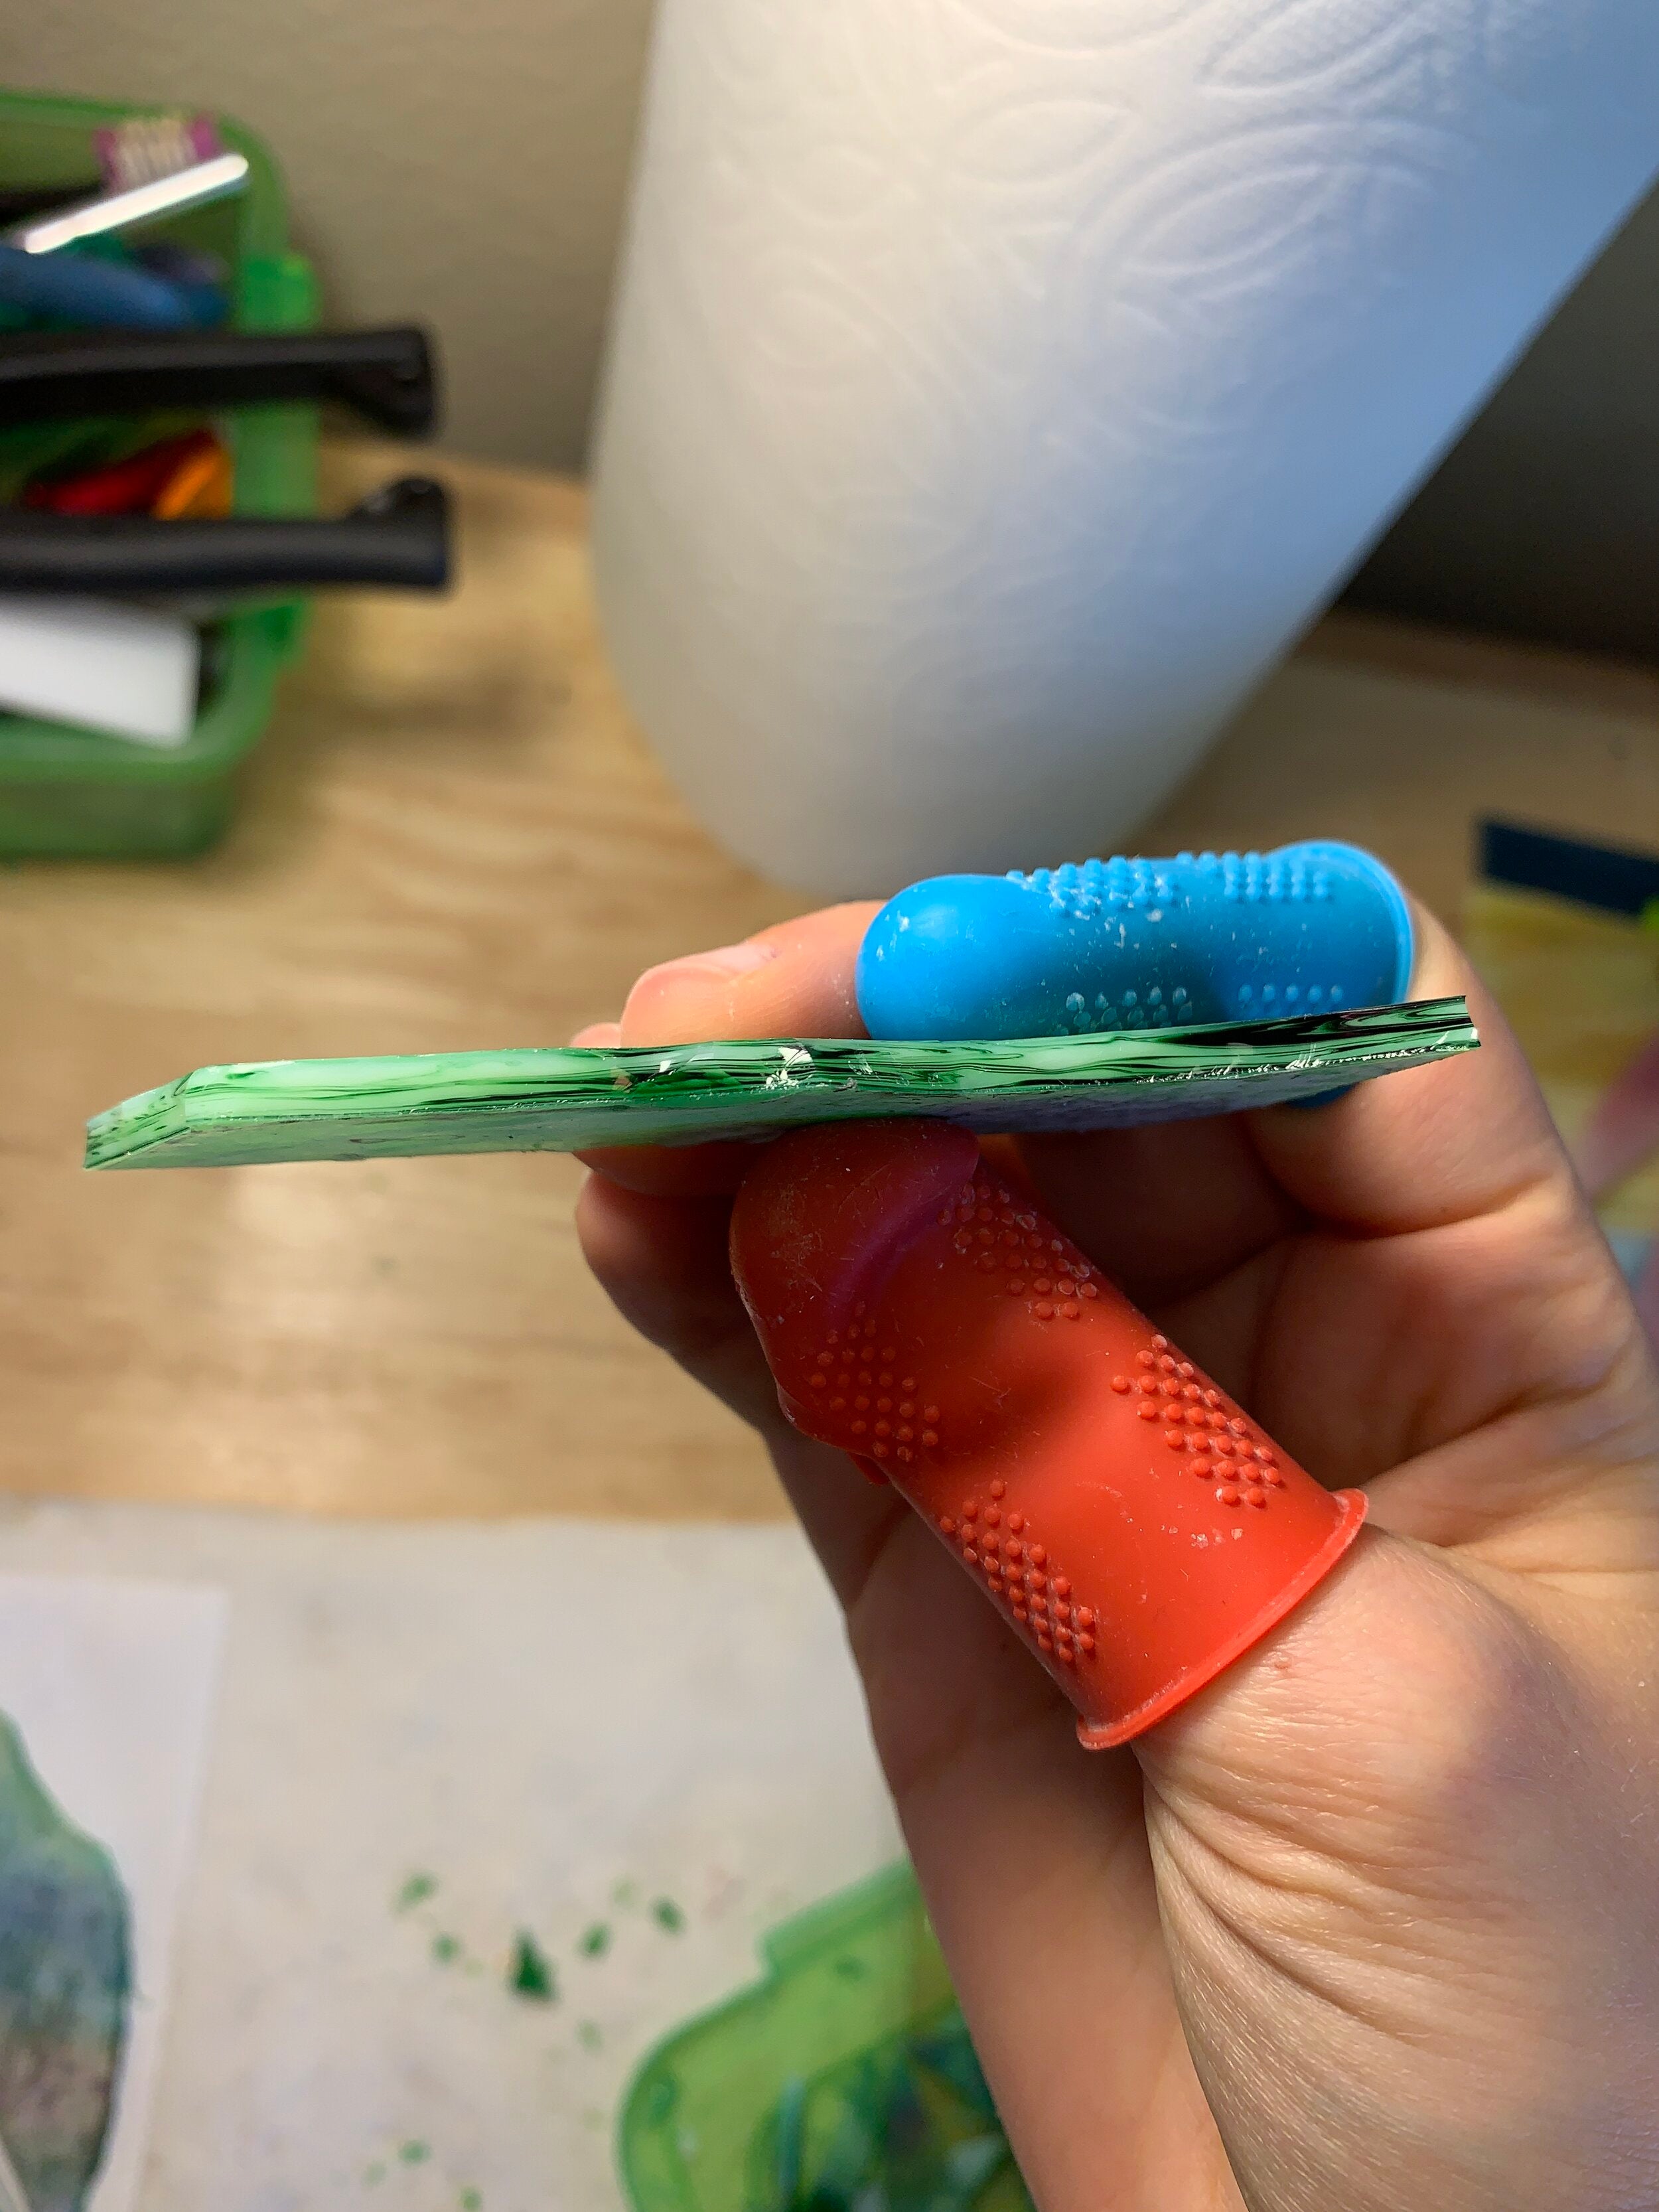
Owning a grinder is a necessity if you’re going to make stained glass projects and unfortunately its one of the most expensive tools you’ll have to purchase. When it comes to buying grinders I don’t have any big preferences as of now. Personally I own the cheaper Power Max II grinder (find on Amazon) . It was the grinder that I purchased at Hobby Lobby when I was first starting out making stained glass and has served me well over the past two + years. I know there are better grinders out there like Galstar’s grinder (find on Amazon) and Techniglass Corp’s “The Grinder” (find on Amazon) . I’d love to invest in one of these but for now I’m going to use the one I have until it goes kaput. Other tools I can recommend that are helpful to have while grinding but are not necessary are rubber finger protectors (find on Amazon) , a grinder mate (find on Amazon) , a grinder shield - if your grinder doesn’t have one like mine (find on Amazon) , exta grinder bit sizes if needed (find on Amazon) , and some form of ear protection (find on Amazon) . If you’d like more information on these extra items check out my blog post about The Tools You Need to Make Stained Glass . There I cover my thoughts on these optional items and go into more detail about why they are helpful to have!
SAFETY…I KNOW…BUT IT IS IMPORTANT (AGAIN)
Feel free to skip this if you’ve read it in my other posts - I’ll be repeating myself because hey I’m always going to be your crazy overbearing stained glass mom. First safety glasses are a MUST (find on Amazon) ! The amount of people I see not wearing eye protection during glass cutting and grinding is staggering. Please save yourself a trip to the ER and always wear eye protection when dealing with small shards of glass because you never know where they can fly. I can tell you from watching my dad go into the ER after getting a piece of metal removed from his eye it is INCREDIBLY painful and expensive. Also if you want to be extra safe like me wear a mask while cutting to protect from glass dust like I do (find on Amazon) . Over exposure to glass dust can cause Silicosis which leads to future serious lung problems. So save yourself the monetary/physical punishment and just buy some safety glasses and a dust mask they cost less than future medical treatments!
TIME TO GET ORGANIZED
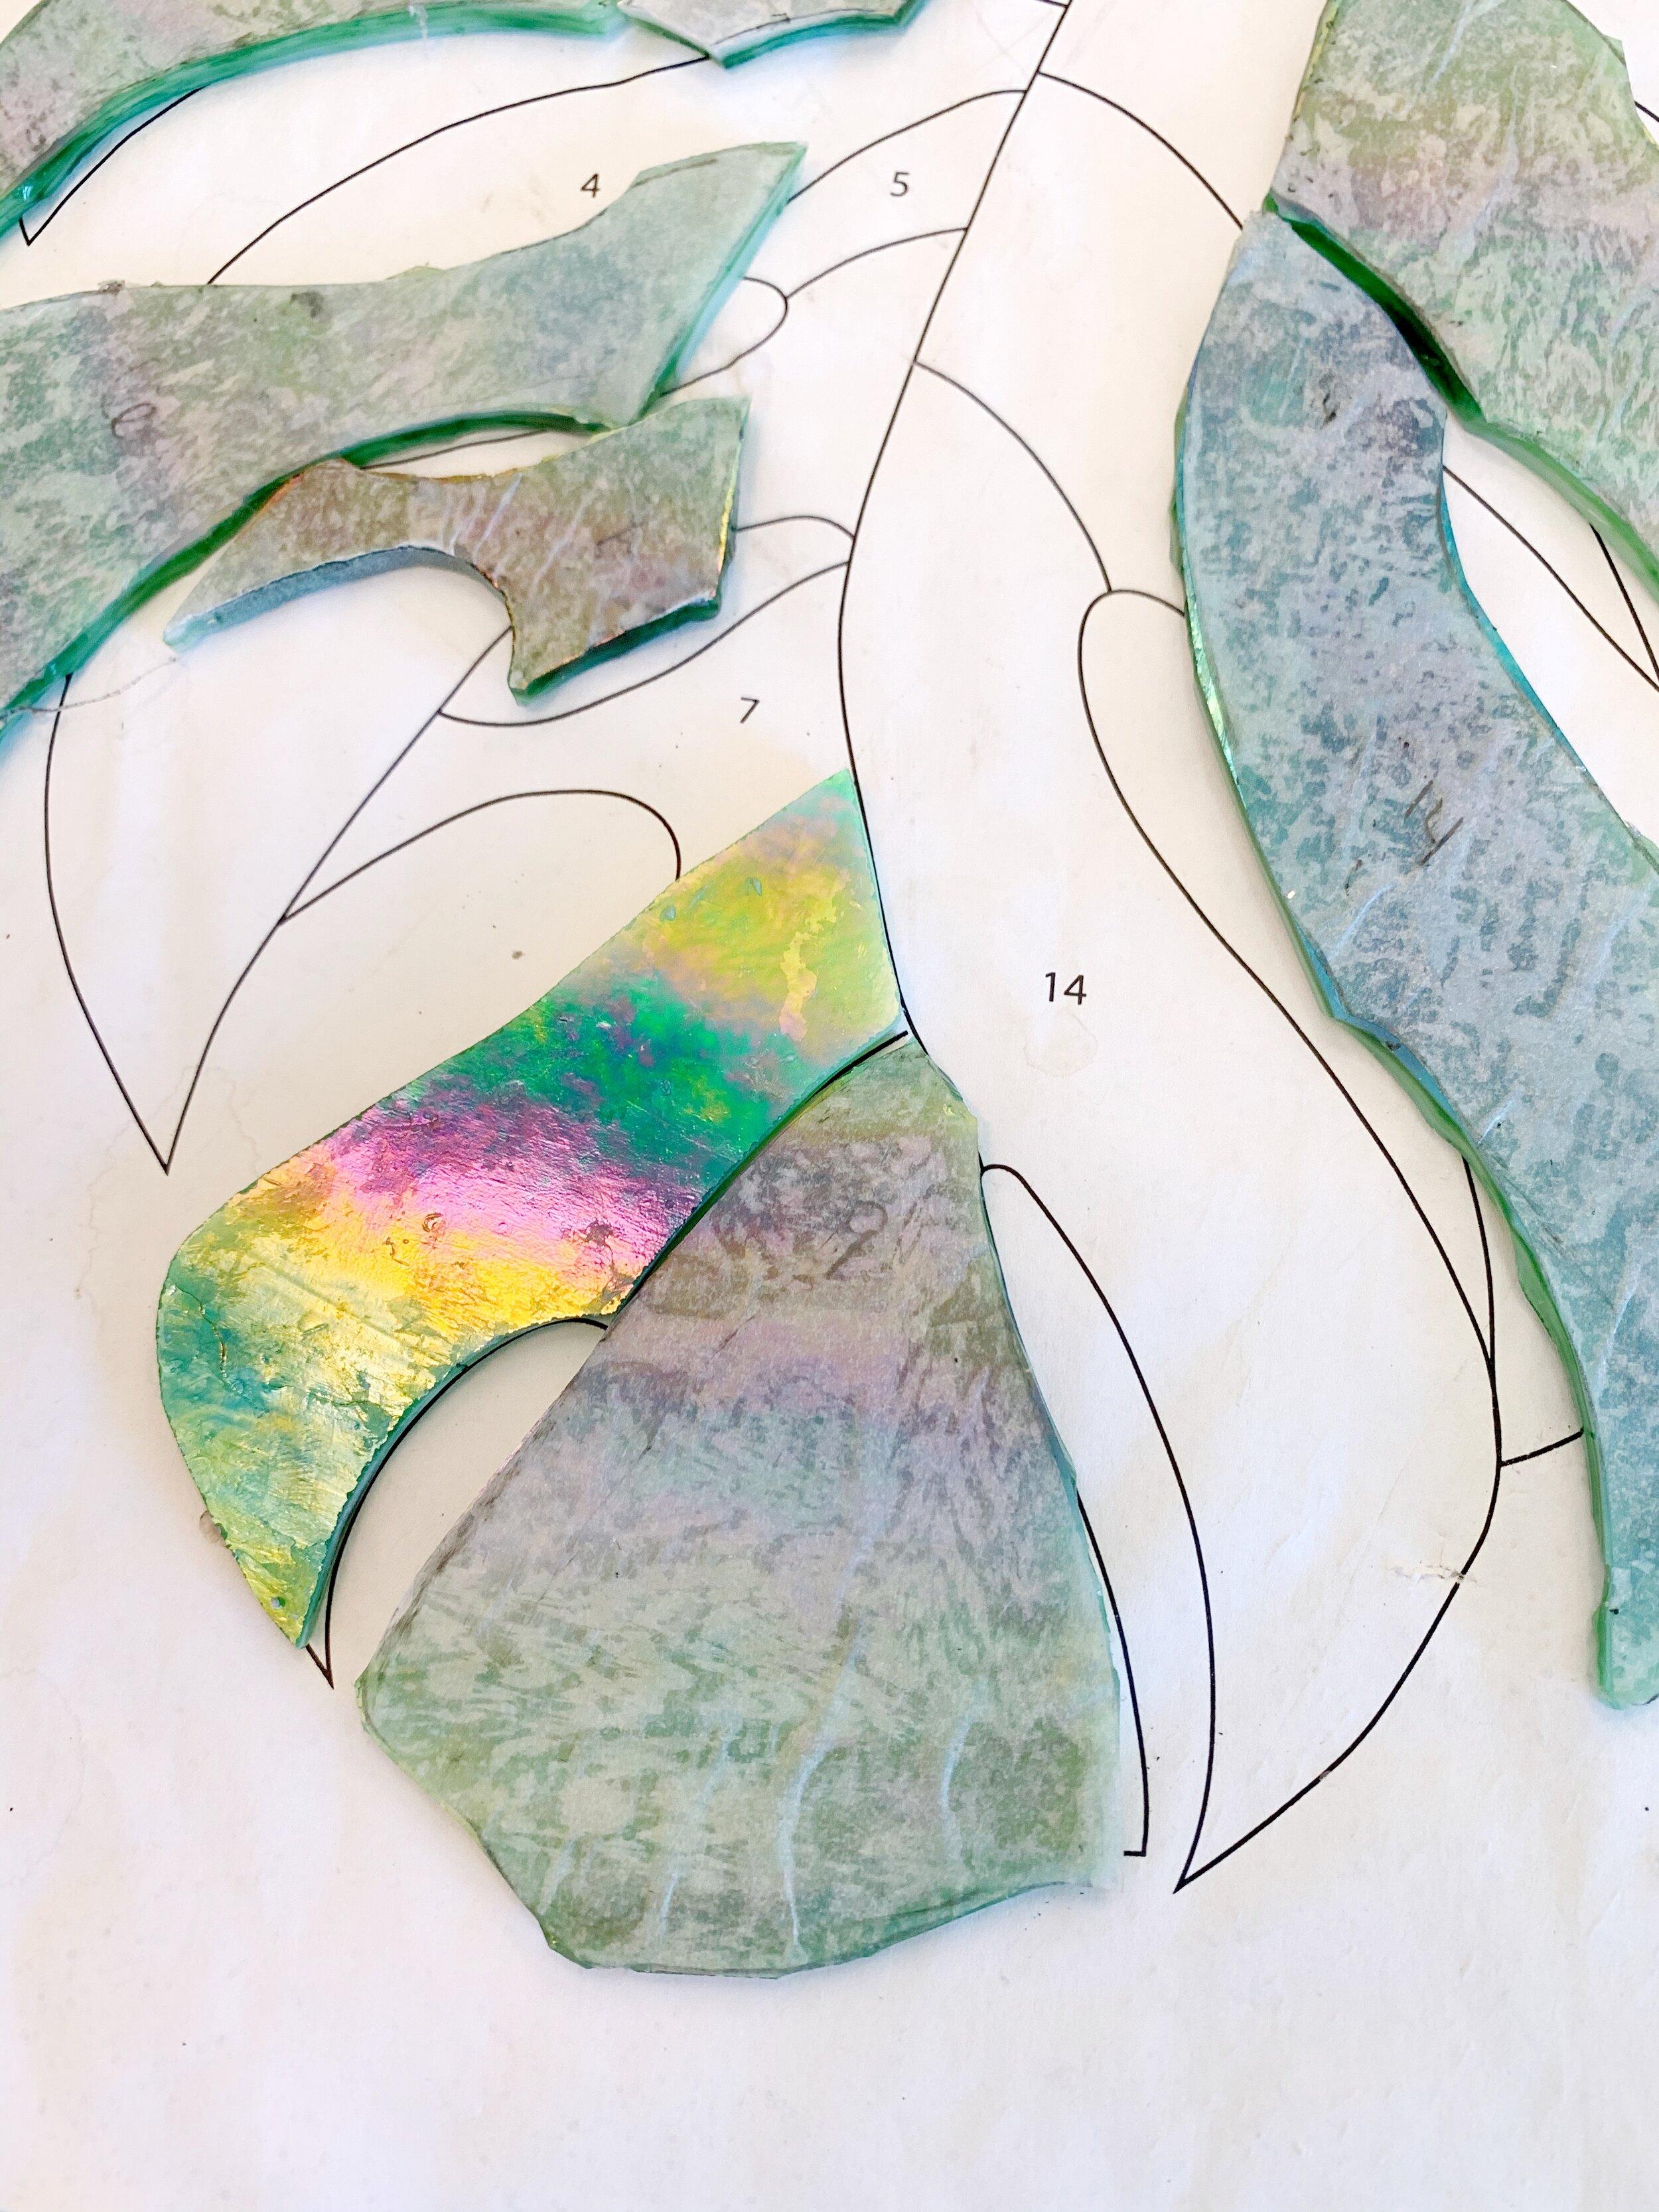
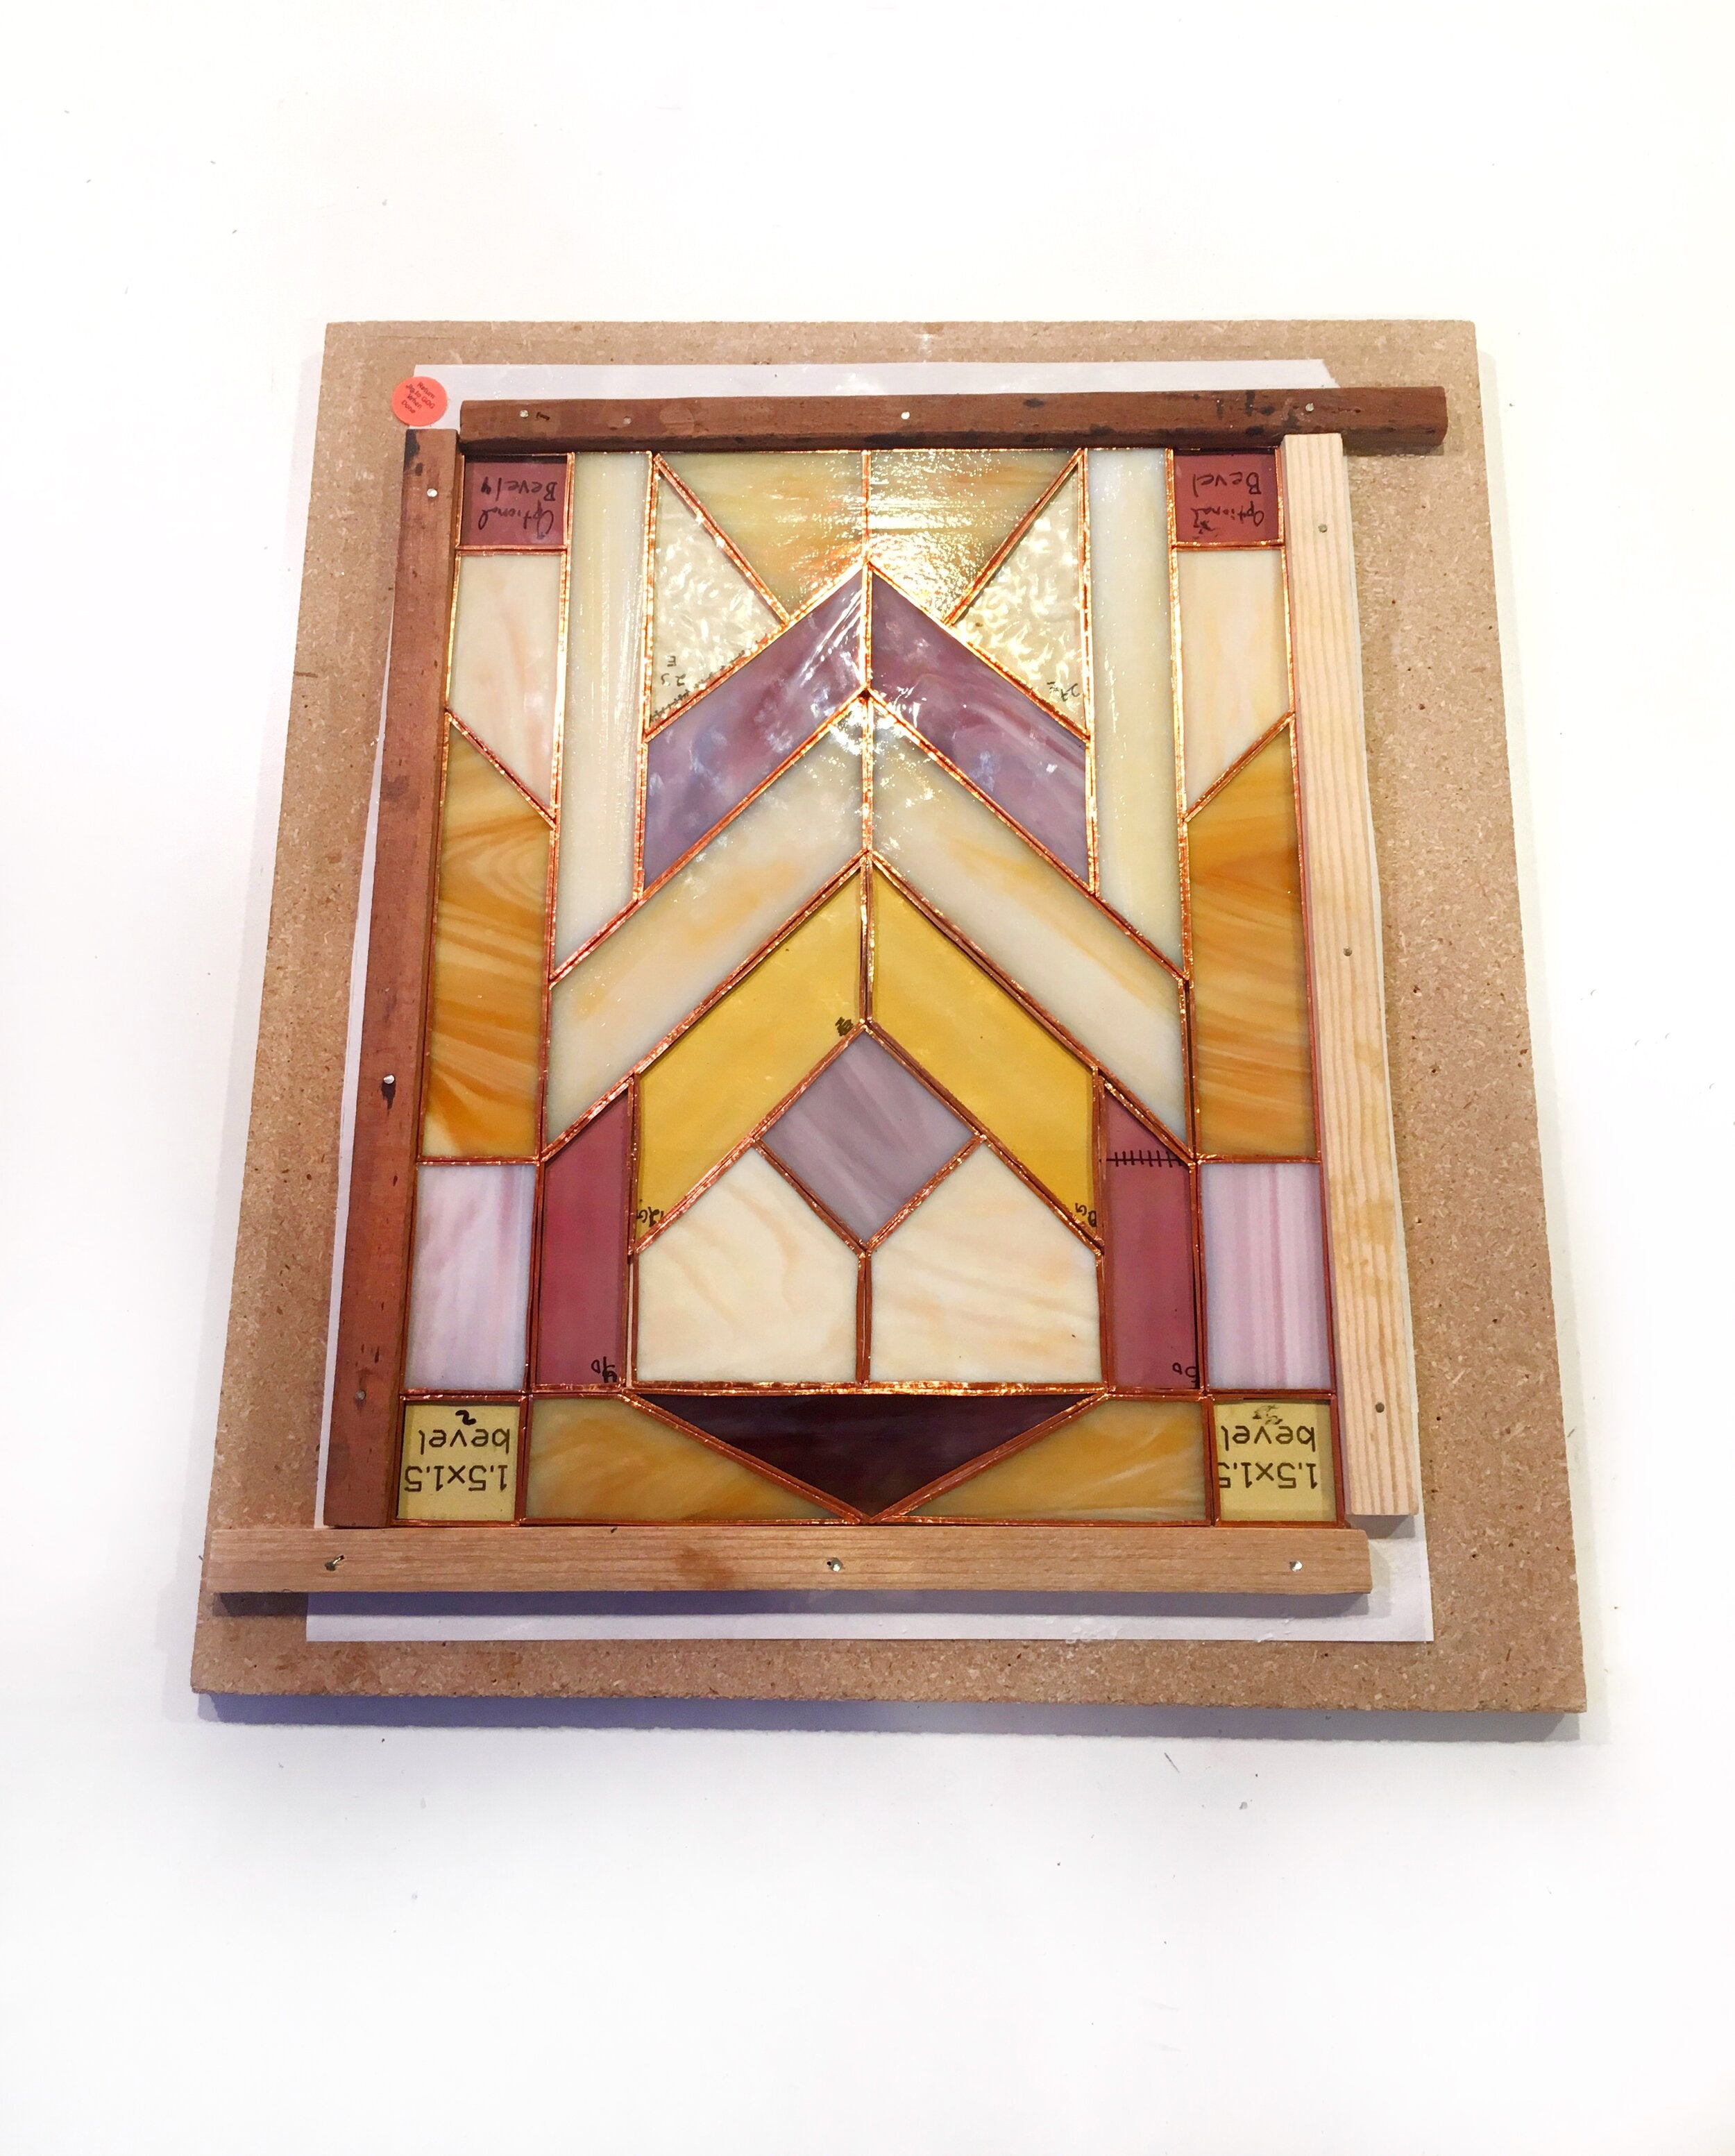
Now that tools and safety have been covered we can jump into grinding prep. What I mean by this is you need to organize your pieces to know where to start before you get grinding. To do this I try to fit all my pieces together using my original pattern guide, most of the time they are sloppy and overlap, thats okay for now. I do this because in order to accurately grind your pieces to fit together you will need a system to check as you go - you’ll be using your pattern guide as the reference. Not only do we need to get our glass organized but we also need a way to keep our pieces secured so as we grind so we know they fit together perfectly. I know many other people like to use tacks or nails to hold their pieces in place. As you go you will secure each cleanly grinded piece with a nail or tack into cork board to keep them organized and in place. Another way people secure their projects are by using a wooden frame and nailing a guide to the outside of their pattern to make sure everything fits inside, this works best for a rectangular or square shaped project. When I started doing stained glass I didn’t have much money or any tools to do either so I don’t use these methods. For me I instead use the outline of my pattern as my guide and make sure as I grind all pieces fit within the outside boundary lines (see the below picture that better explain what I am trying to say). With this method you will need to have a lot of patience and a careful eye because you will be doing lots of adjusting as you grind. So beginners I really recommend if you can to find some way to secure or nail your projects, and for more advanced artists or those of us working on a thin budget you can try my way and see what you think!
Another organizational skill that I recommend when grinding is working bottom to top. Looking at an entire project needing to be grinded can be very overwhelming. I find by breaking a project into “layers” this not only takes the scariness away but gives you a layer by layer set of pieces to grind. In a way you almost want to be building upon what you are grinding, if you use this organizational method over choosing arbitrary pieces to grind you will save time and a have a clearer idea of what pieces need adjustment. See what I’m talking about in these pictures…


FLIP THAT LITTLE SWITCH TO ON!
You’ve been patient and organized all your pieces so its now almost time for them to hit that grinder before you do here are some of my grinding go to tips…
-
Don’t forget to be suited up with goggles and maybe a dust mask!
-
Make sure there is plenty of water in your grinder before you get started and your sponge is fully saturated with water. It is a must for your grinder to function perfectly, stay cooled down, and keep your lungs safe.
-
Hold your glass either flat resting on the bottom part of your grinder against your bit or secured in two hands against the middle of the bit.
-
Use two hands when holding your pieces to keep them secure with the movement of the bit they can easily slip from your hands - especially small pieces.
-
Slow movements as you want the edges to be smooth and uniform.
-
You want to grind down to your marker or tracing paper lines as close as possible, extra glass is bad in this case, you want to be as exact as can be. Think of your project like a puzzle if the piece isn’t a perfect match it won’t fit.
-
Do not press hard against the bit it will not make grinding go faster. Grinding takes time and patience, this will only hurt your grinder over time. Allow the bit to do the work not your wrists.
-
Sand every edge of your pieces of glass, we want them all to be rough so the copper tape sticks better.
-
When grinding remember its better to under-grind than over-grind because we can always take off more glass we can’t put the glass back once it gets taken off. Over-grinding = recutting a new piece and starting over.
-
If you need to take off more glass but your pattern piece or pattern line has washed off, dry the surface of your glass and then use a sharpie/glass marker to mark what else you need to grind off. Continue to do this each time if you need to go back and grind more.
-
Grind in organized layers: start bottom to top.
-
After grinding the front side of your glass piece flip it over and make sure the back side looks even and smooth as well!
-
Don’t leave your grinder on when you’re not using it.
-
Keep a rag near by to wipe off the excess residue and water from your pieces so you can accurately check often what more needs to be grinded if necessary.
-
Don’t stress if you have some gaps, you aren’t going to be perfect at grinding hell I’m still not and I grind weekly. It takes some time to get the hang of it, I will explain a bit later about what to do about gaps between your pieces and when it becomes an issue. Most the time you can compensate the extra spacing when you go to solder your project.
-
Make sure your project fits as perfectly together as possible before moving on to foiling (the step that comes after grinding).
If you’ve never grinded before take a piece of scrap glass to test and get the hang of it before you start with your actual project. Unfortunately this is an experience that is hard for me to explain without me being able to show you myself. But you will understand when you do it yourself and play around a bit :).


THE SECRET TO GRINDING THE RIGHT WAY
Okay trick statement, the secret is being an amazing grinder is just doing it over and over like many technical skills require to become a master. The closest thing I can offer as the golden ticket to success is when you grind is to be sure your pieces fit perfectly into your pattern. Let me repeat myself because this is really the game changer if you want a nice final product: MAKE SURE YOUR PIECES FIT ALMOST PERFECTLY INTO YOUR PATTERN LINES. If you don’t make sure your pieces fit perfectly you are going to have a bummer of a project that will look misshapen or won’t fit in a frame once you’re done soldering it together. You’ve come so far and worked so hard on your project to this point by being sloppy and not grinding correctly your end product will surely suffer. Grinding can take up to a few hours depending on the amount of pieces you have and how precise you are at cutting glass. So please BE PATIENT and take your time, it will be worth it I promise.
WHEN THAT GAP GOES FROM BEING FASHIONABLE TO UN-WORKABLE
You grinded your little heart out and you have a huge-ass gap…well its happened to all of us glass artists. Here is the good news, gaps aren’t the end of the world and most of the time they can be covered in solder*. See that asterisk? Not all the time. You aren’t to the step of soldering yet but at this stage you have to think of all of your gaps as holes when you go to melt your lead, the liquid lead needs to fill out that hole. Its hard to describe the nature of lead if you haven’t played with it but its very quick to melt and then harden. With a bigger gap the lead will melt quickly and will not build easily because once it gets hit with heat it wants to melt again. Also keep in mind the larger the gap the wider your lead line will be, so if you have mostly normal leadlines and this mega chunky leadline its just going to look off and your eye is going to go to that large leadline next to all the normal ones. So if your gap is too big its better to cut a new piece of glass and regrind it to fit nicely. Again much more worth it to do that than have a sloppy looking project. Check out the below example of a few acceptable gaps and a gap whose size isn’t acceptable. Again we want to aim not to have these gaps but they do happen and certainly aren’t a project ruiner if we make them few and far between.


MAKING THE FINAL FIT
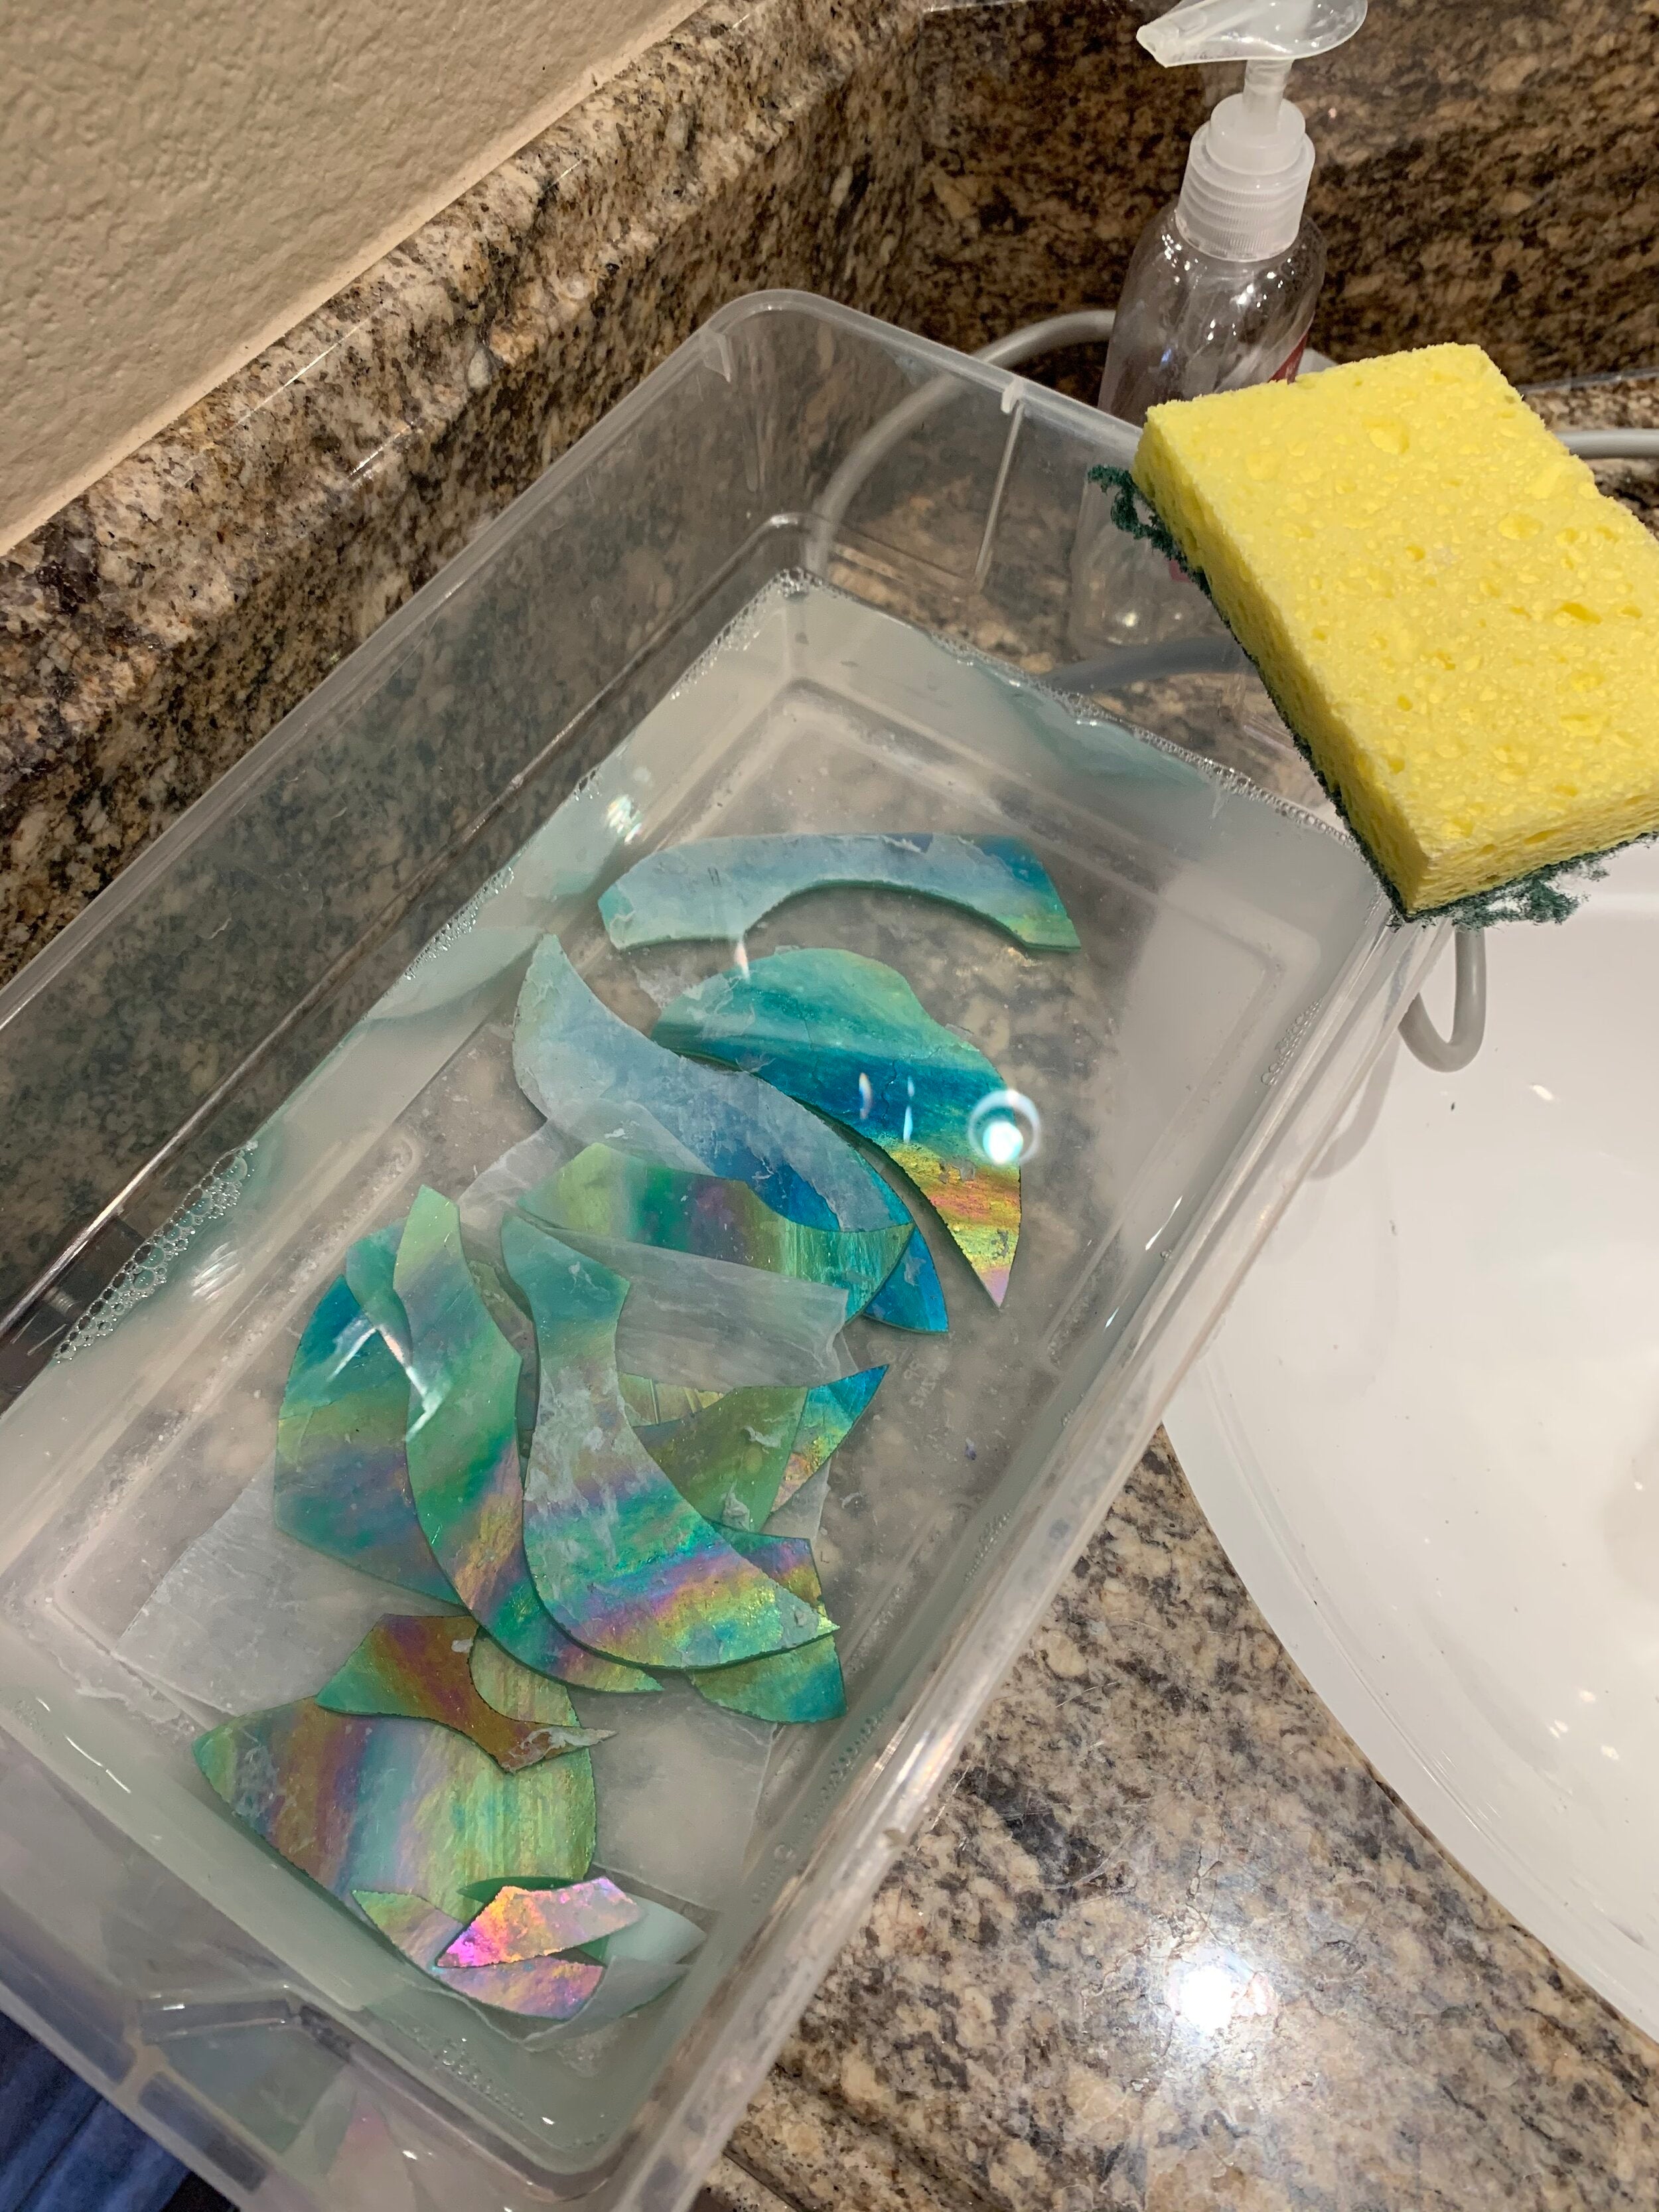
You’ve grinded all your pieces and they fit perfectly together - excellent work on your part! Most likely they are covered in goop either glass dust residue, sharpie, and or tracing paper remnants. Once you’ve given that final glance at your project and it looks perfectly fit its time to give your pieces a good wash. This step is important because we want to be sure our pieces are squeaky clean and ready to be covered in copper tape. Copper tape is finicky and won’t stick if there is any residual glass dust. My trick to giving my pieces a good bath: a warm tub of water and dawn dish soap. Once your pieces have soaked for a bit all that gunk should come off easily. We then want to give each piece a little scrub with the rough side of a sponge. After I’ve done this with all my pieces I will leave them to dry for a bit then pat off the excess water on them. Boom you’ve got some clean beautiful perfectly grinded pieces of glass ready for some taping.

GRIND TIME BABY!
As the french say: Et Voila! You are ready to put your glass to the metal and get to sanding those pieces down. Think of this part of the process as an interactive puzzle or whatever you have to frame it as to make it more fun and less of a chore! So much of learning to work with a grinder is doing, I really cannot recommend enough to sit at your bench and just play and discover the limits of the grinder. For the all painful dull moments you’ll have sitting at it wishing you were finished with grinding it really does take your sloppy project and turn it into a true masterpiece. So without further ado GET GRINDIN’!
<3 Meggy
stained glass grinding, how to grind stained glass, stained glass grinder tips, best stained glass grinders, beginner stained glass grinding, glass grinding techniques, stained glass smoothing tips, stained glass grinder safety, glass grinding tools, how to use a stained glass grinder, stained glass grinder reviews, stained glass project preparation, fixing stained glass edges, grinding stained glass pieces, DIY stained glass grinding, stained glass shaping techniques, stained glass tool guide, glass grinder maintenance, troubleshooting stained glass grinding, stained glass grinding mistakes, cleaning stained glass after grinding, stained glass fit and finish, organizing stained glass projects, stained glass puzzle fitting, stained glass project assembly, reducing gaps in stained glass, stained glass pattern fitting, wet grinding stained glass, stained glass grinder setup, glass grinder accessories, tips for better stained glass grinding, stained glass grinding workspace, stained glass safety gear, avoiding over grinding stained glass, glass dust safety tips, stained glass grinding hacks, how to remove sharp edges on stained glass, stained glass grinder water setup, stained glass grinder noise level, choosing the right glass grinder, improving stained glass accuracy, maintaining stained glass tools, grinding stained glass with precision.