


Looking to learn more advanced stained glass skills or one on one private help? Join my Patreon - I dive into more advanced techniques there and you support me in the process of teaching you! (Patreon Link) .
2022 Update: I now sell tools on my own website!! If you don’t want to support amazon you can instead support my small biz and purchase tools from me glass shop directly :)!!
https://coglassworks.com/suppliesmaterials
Hey there!! I’m going to finally make the big dive into all of the tools you need to make stained glass! I have been excited to create this specific post this for a long time and partly dreading it too because it’s such a huge undertaking (you’ll see how with many tools are required). Nonetheless I think this is arguably one of the most important blog posts I’ll share with you so it had to be written! NOTE this tool list is geared towards the copper foil method not the lead came method. (Copper Foil = sun-catchers and “smaller” projects) (Lead Came = fully installable stained glass windows that you see in churches or homes).
Seven years ago a fire ignited my curiosity to learn how to make stained glass. The first thing I did was sign up for a beginners class. The second thing I did was search google for “tools needed to make stained glass”. What felt like a very straightforward search ended up being not so straightforward. Sure, many websites had a long list of all the supplies needed but looking at them with zero experience I just saw a giant list of things I wasn’t sure were truly necessary. I don’t know about you but I’m not the kind of girl to go out and drop hundreds of dollars on tools for fun. Also there were no price tags and as a dedicated budgeter this freaked me out . So I want to share with you a different kind of list with visuals and descriptions. That way you have a better idea what the tools look like, what they will be used for, if you actually need them, and what to expect cost wise when getting into this hobby.
*Disclaimer: As an Amazon Associate, I earn from qualifying purchases. Thanks for your support :)
HOW MUCH WILL IT ALL COST?
I want to share that I am a bit of a special case because when I went to go buy tools for the first time I purchased them from a stained glass shop that was going out of business. I got a killer deal and my initial investment before I ever even made a project was approx. $200. For most of you I would guess your initial cost will be at least around $500-$1,000 for everything if not more. If you aren’t sure you will even like making stained glass there are some options before you spend your money on lots of tools. Many local studios offer classes where tools are provided along with class fees or you can rent the tools from your instructor for a small price. I highly recommend exploring this option if you are nervous about the initial investment. This is the option my studio offers in our beginner classes! I took a big risk and I ended up getting a wonderful deal. You might be able to get the same sort of deal if you find somebody else trying to sell their used tools online via Craigslist or Facebook Marketplace so definitely keep your eyes out. If you aren’t able to find a good bargain don’t worry I have a list for you below to help guide you to the “necessity” items vs the “nice to have” items.
I’m going to break the supply list down by the different phases of glass making.
-
Planning and Pattern making
-
Glass Cutting
-
Grinding
-
Foiling
-
Soldering
-
Finishing touches
Note that if an item is suggested but not a necessity to own it will be indicated with an *
At the end of the day where you end up purchasing these items is your call whether it be from a local glass shop, Hobby Lobby, Amazon, etc. But to make things easy I will be providing links to Amazon so you can see the tools yourself and get an idea on the pricing (prices change daily so please use the links and google to determine the most up to date cost). So with that said let’s get started!
PLANNING AND PATTERN MAKING
The nice part about this section is some of these tools may already be sitting around your house so no need to go out and purchase them. During this phase of your project you will be doing a lot of paper cutting and drawing to prep for beginning your project.

1. Glass Pattern - This will be the master guide to your project as you are going along. You will be taking pieces of glass and cutting, breaking, then sanding them down to make them fit together like a puzzle. This template will act as a key to put your puzzle back together. Two copies are needed one will be your guide and one you will cut your pattern out of. Your pattern guide will be used until you get to the soldering step! See my blog post on pattern picking for more info on choosing and designing patterns.
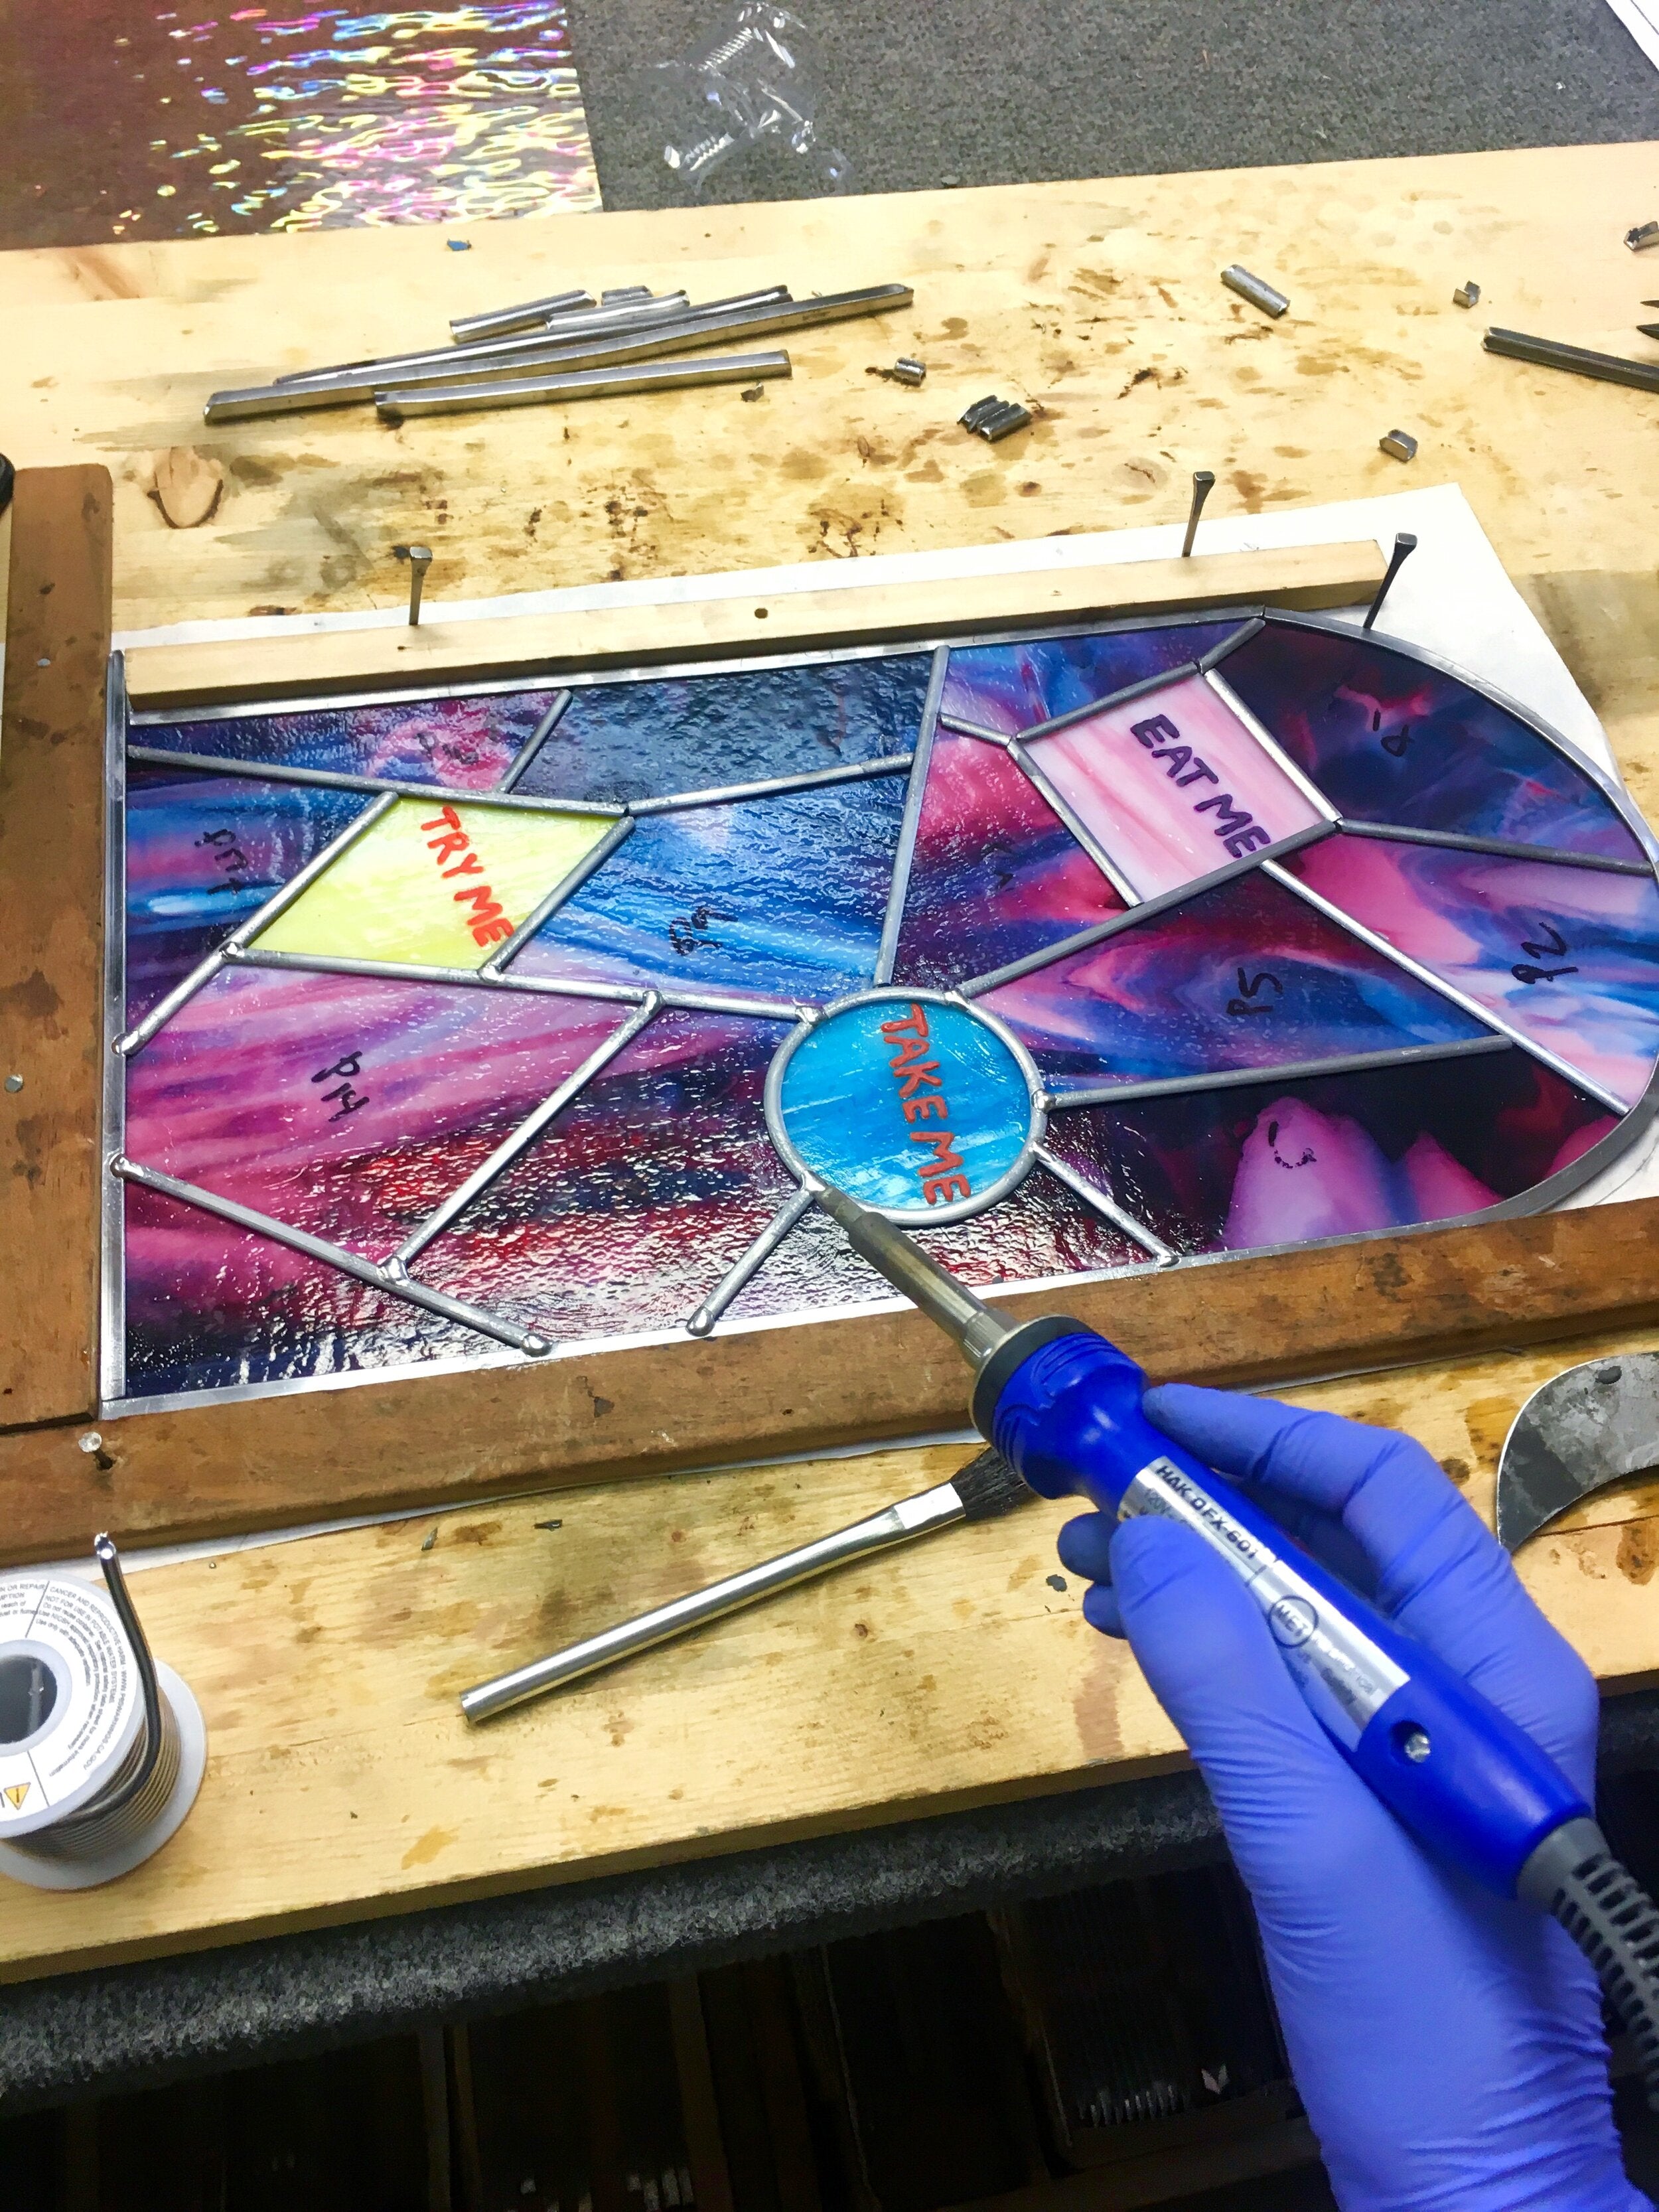
2. Project Board* - The purpose of a project board is to hold the pieces of your projects together firmly as you work (done by tacks, hammered wood boarders, or nails). This picture is of me working on my wooden project board - for this project I've used nails to help secure it as I work. This works for me but may not work for you depending on what you plan to create. I’d recommend a project board if you will be needing to make lots of exact and or square/rectangular cuts to help ensure your project stays square. I make a lot of funky shaped sun catchers so this isn’t always necessity to me and I don’t use it all the time mostly for soldering/lead came work. If you’d like to take a glance to see if it might be right for you here is a link so you can get an idea (find on Amazon) .

3. Framing Square Ruler/Ruler - If you draw your own designs this is a must for you. A ruler is going to help you keep your straight lines straight. Also nice to help measure the sizing of projects (find on Amazon) .
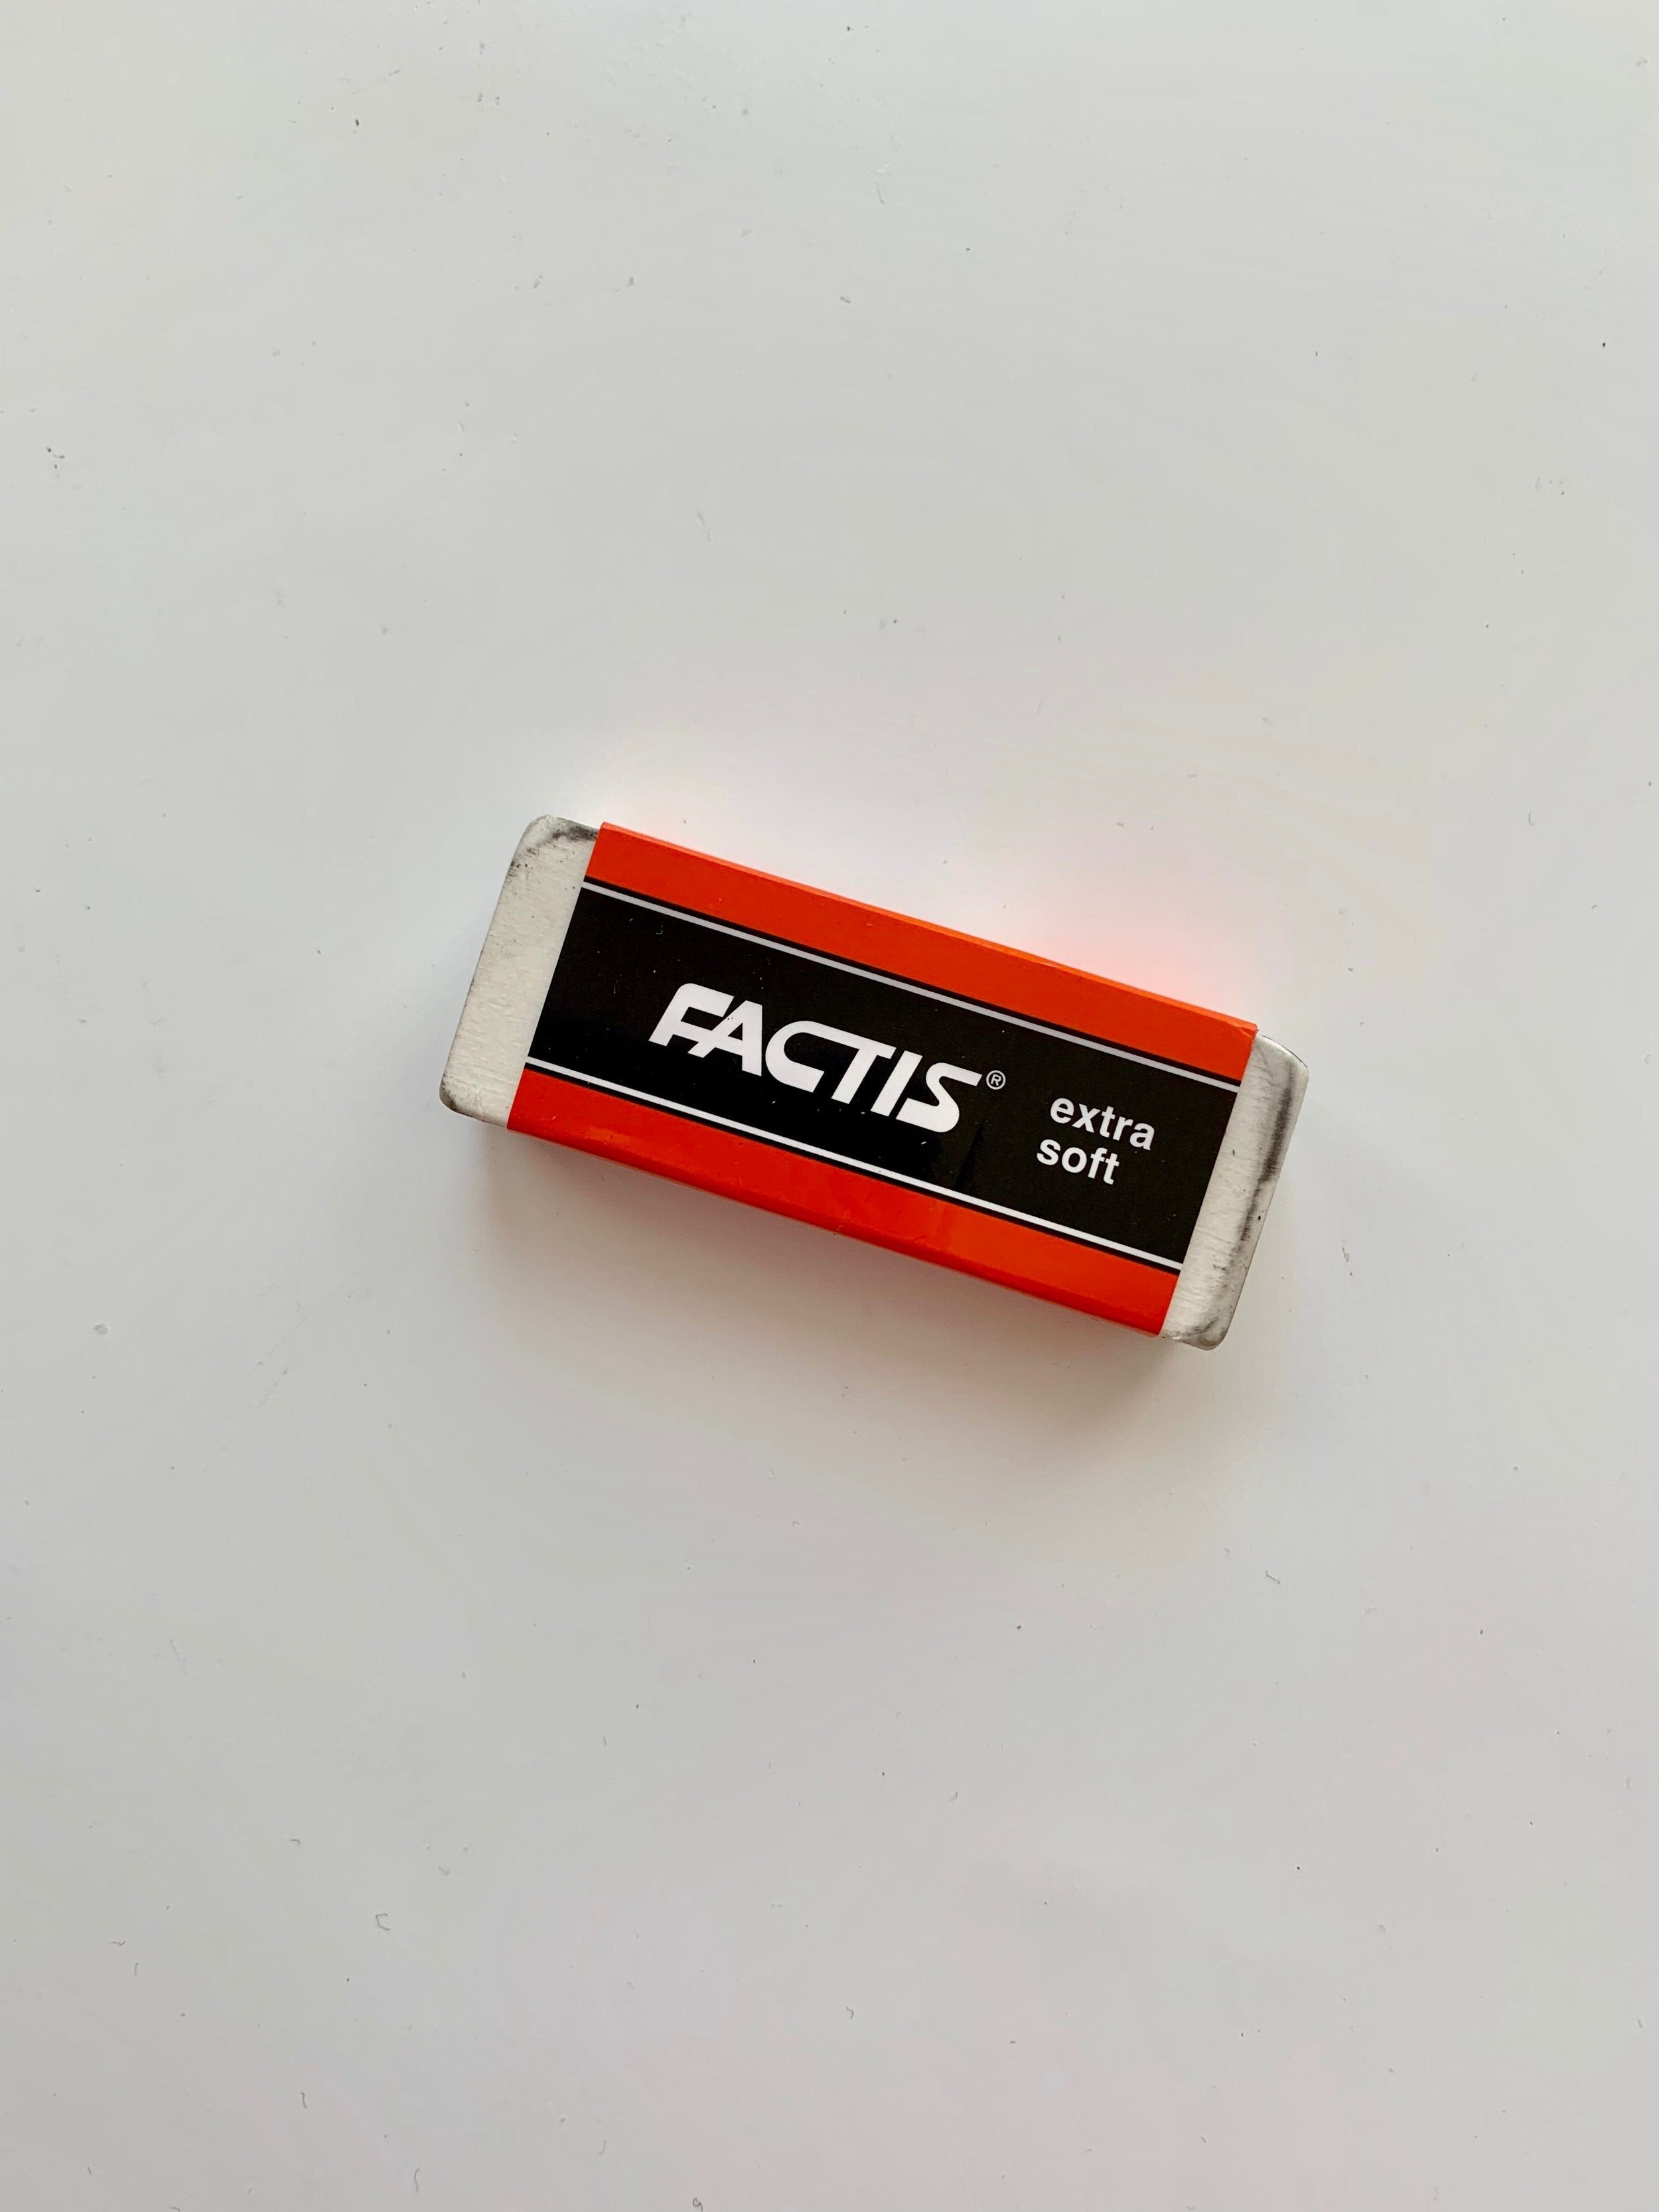
4. Eraser - You’ll get why you need one once you start pattern drawing if you are drawing by hand (find on Amazon) .

5. Strathmore Tracing Paper/Printed pattern* - Tracing paper is nice to have for pattern drawing by hand but I also happen to use it to transfer my cut patterns to glass at times. If you don’t want to use my method just stick with getting an additional copy of your pattern to cut out (find on Amazon) .

6. Scissors/Glass pattern scissors* - There are two options for scissors, one that is traditional school supply style and the other are scissors made specifically for cutting out stained glass projects. Pattern sheers will take you some practice to use but are really helpful to have, I know it might seem silly having two different kinds of scissors but it will save you time grinding down the road because its double bladed and helps take off excess paper --> leading to shorter grinding times aka a really good thing (find on Amazon) .

7. Pencils - Handy to have and a must if you are going to draw your own patterns (find on Amazon) .
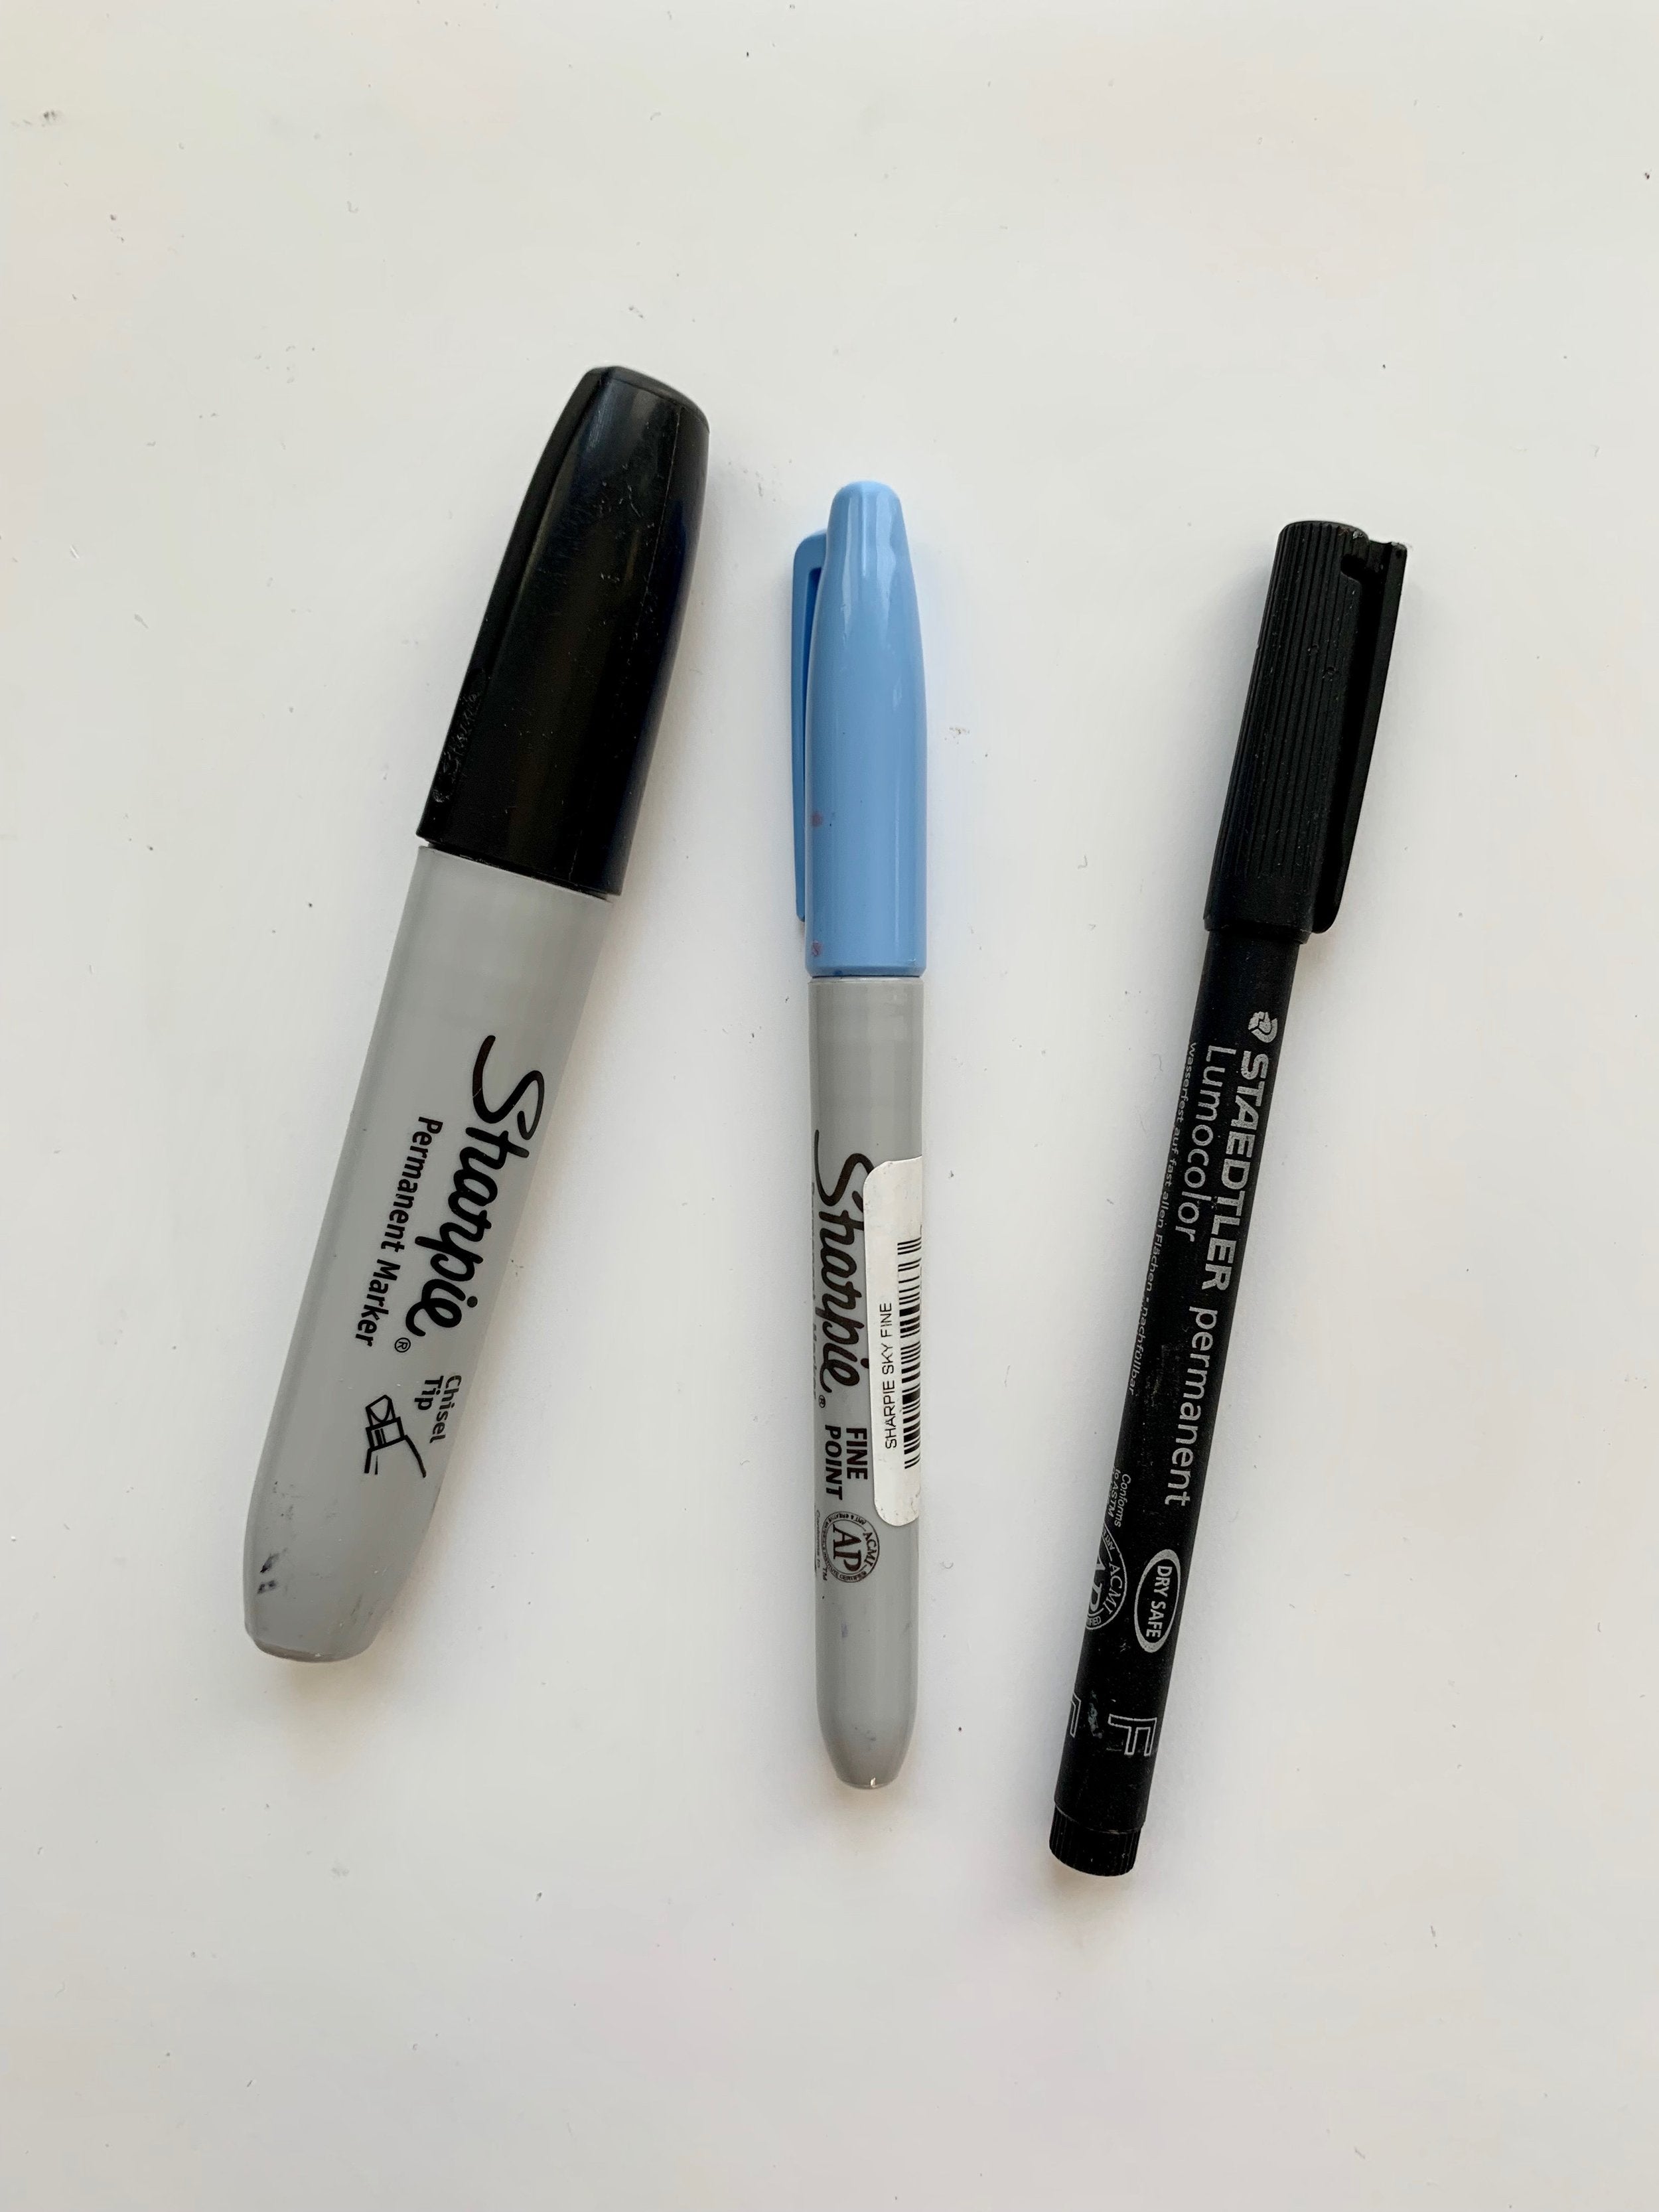
8. Glass Marker/Sharpie - You’ll use your marker to trace your patterns and/or once you get to grinding use it to mark the spots you need to grind down further. I recommend the glass marker it costs a little more but sticks a bit better when met with liquid (find on Amazon) but a Sharpie (find on Amazon) works fine too.

9. Tracing Box Light*- I highly recommend this if you’re going to be drawing your own designs, not an absolute necessity but dang does it make it easier to pattern trace. Also nice to have if you plan to work at night - it will help you pick colors without sunlight. Here is an example of me using it to see what my Mother Earth suncatcher will somewhat look like in the sun! (find on Amazon) .

10. Glass Handling Gloves* - I mentioned these on my last blog post about glass picking. They are amazing to have for handling glass and when you are glass shopping. They can mean all the difference in injuring yourself or not (find on Amazon) !
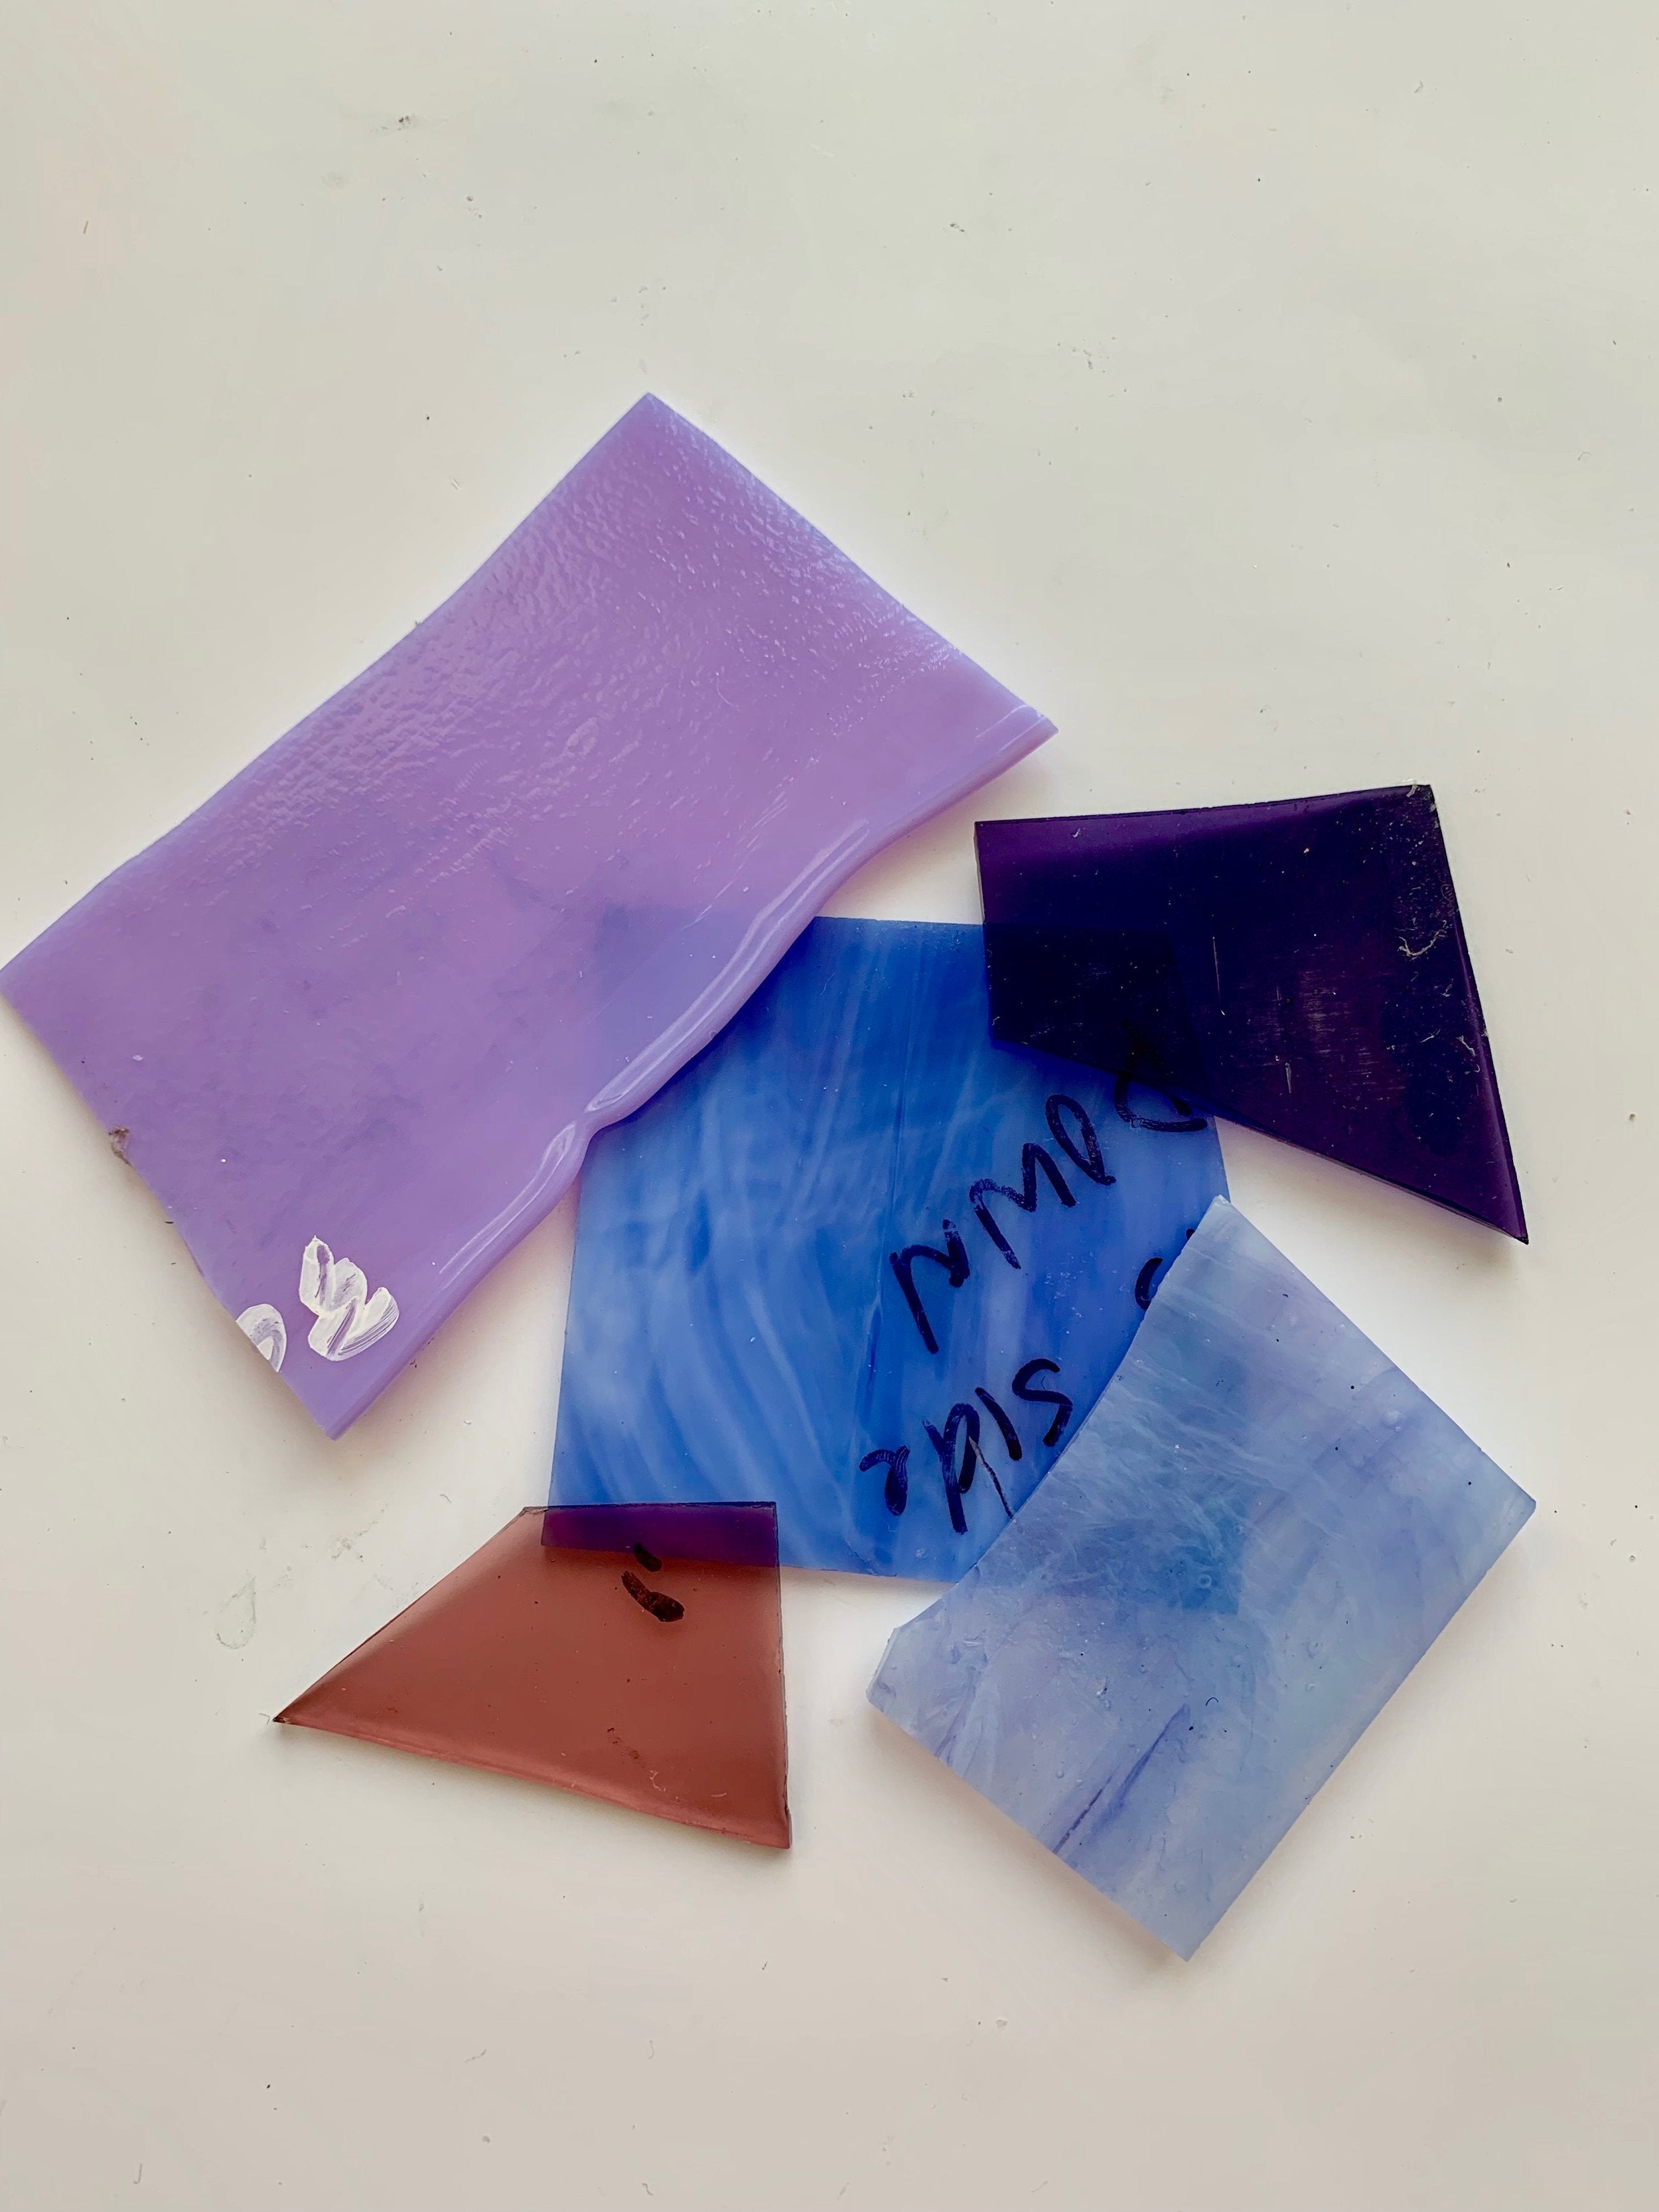
11. Sheet Glass - It helps to have the materials that are going to make up your project. You can find these at your local stained glass studio via a google search or check out my online sheet glass store (Shop our sheet glass) or see my glass shopping guide.
GLASS CUTTING
Once you’re ready to dig into actually beginning your project you will need some of the below tools to cut your pattern out of the sheets of glass you’ve chosen. Glass cutting doesn’t involve anything sharp…well minus glass shards.

1. Glass Cutter - You will need to use a glass cutter to cut pieces out of your glass. Glass cutting actually involves using a mini wheel in your cutter to “score” aka create a flaw in the glass to guide it to break in the shape you desire. This one is going to be a “pick your poison” situation. There are several different kinds of glass cutters and its up to you to test some of them out. Some hold like pencils or some use the placement between your thumb and finger. The image beside is a picture of a TOYO Pistol Grip Glass Cutter I personally like best but I will list a link to three kinds I’ve used. One (find on Amazon) , Two (find on Amazon) , Three (find on Amazon) .

2. Glass Cutting Oil - Cutter oil helps lubricate cutters wheel as you score the surface of your glass. This is a must for having your glass break correctly along the "scores" you create. I use a small container with a cotton ball to dip my glass cutter after every few cuts as I go. All cutters have built in internal reservoirs to hold the oil but I have found most of the time they leak and make a mess. My version is no mess (find on Amazon) .

2. Waffle Grid - See the little clear plastic mat with all of the glass shards in it, these creators waffle grids are a DREAM to have. They will make it so you won't need to be constantly clearing shards off your desk as you work, as you cut it catches the glass shards. (find on Amazon) .

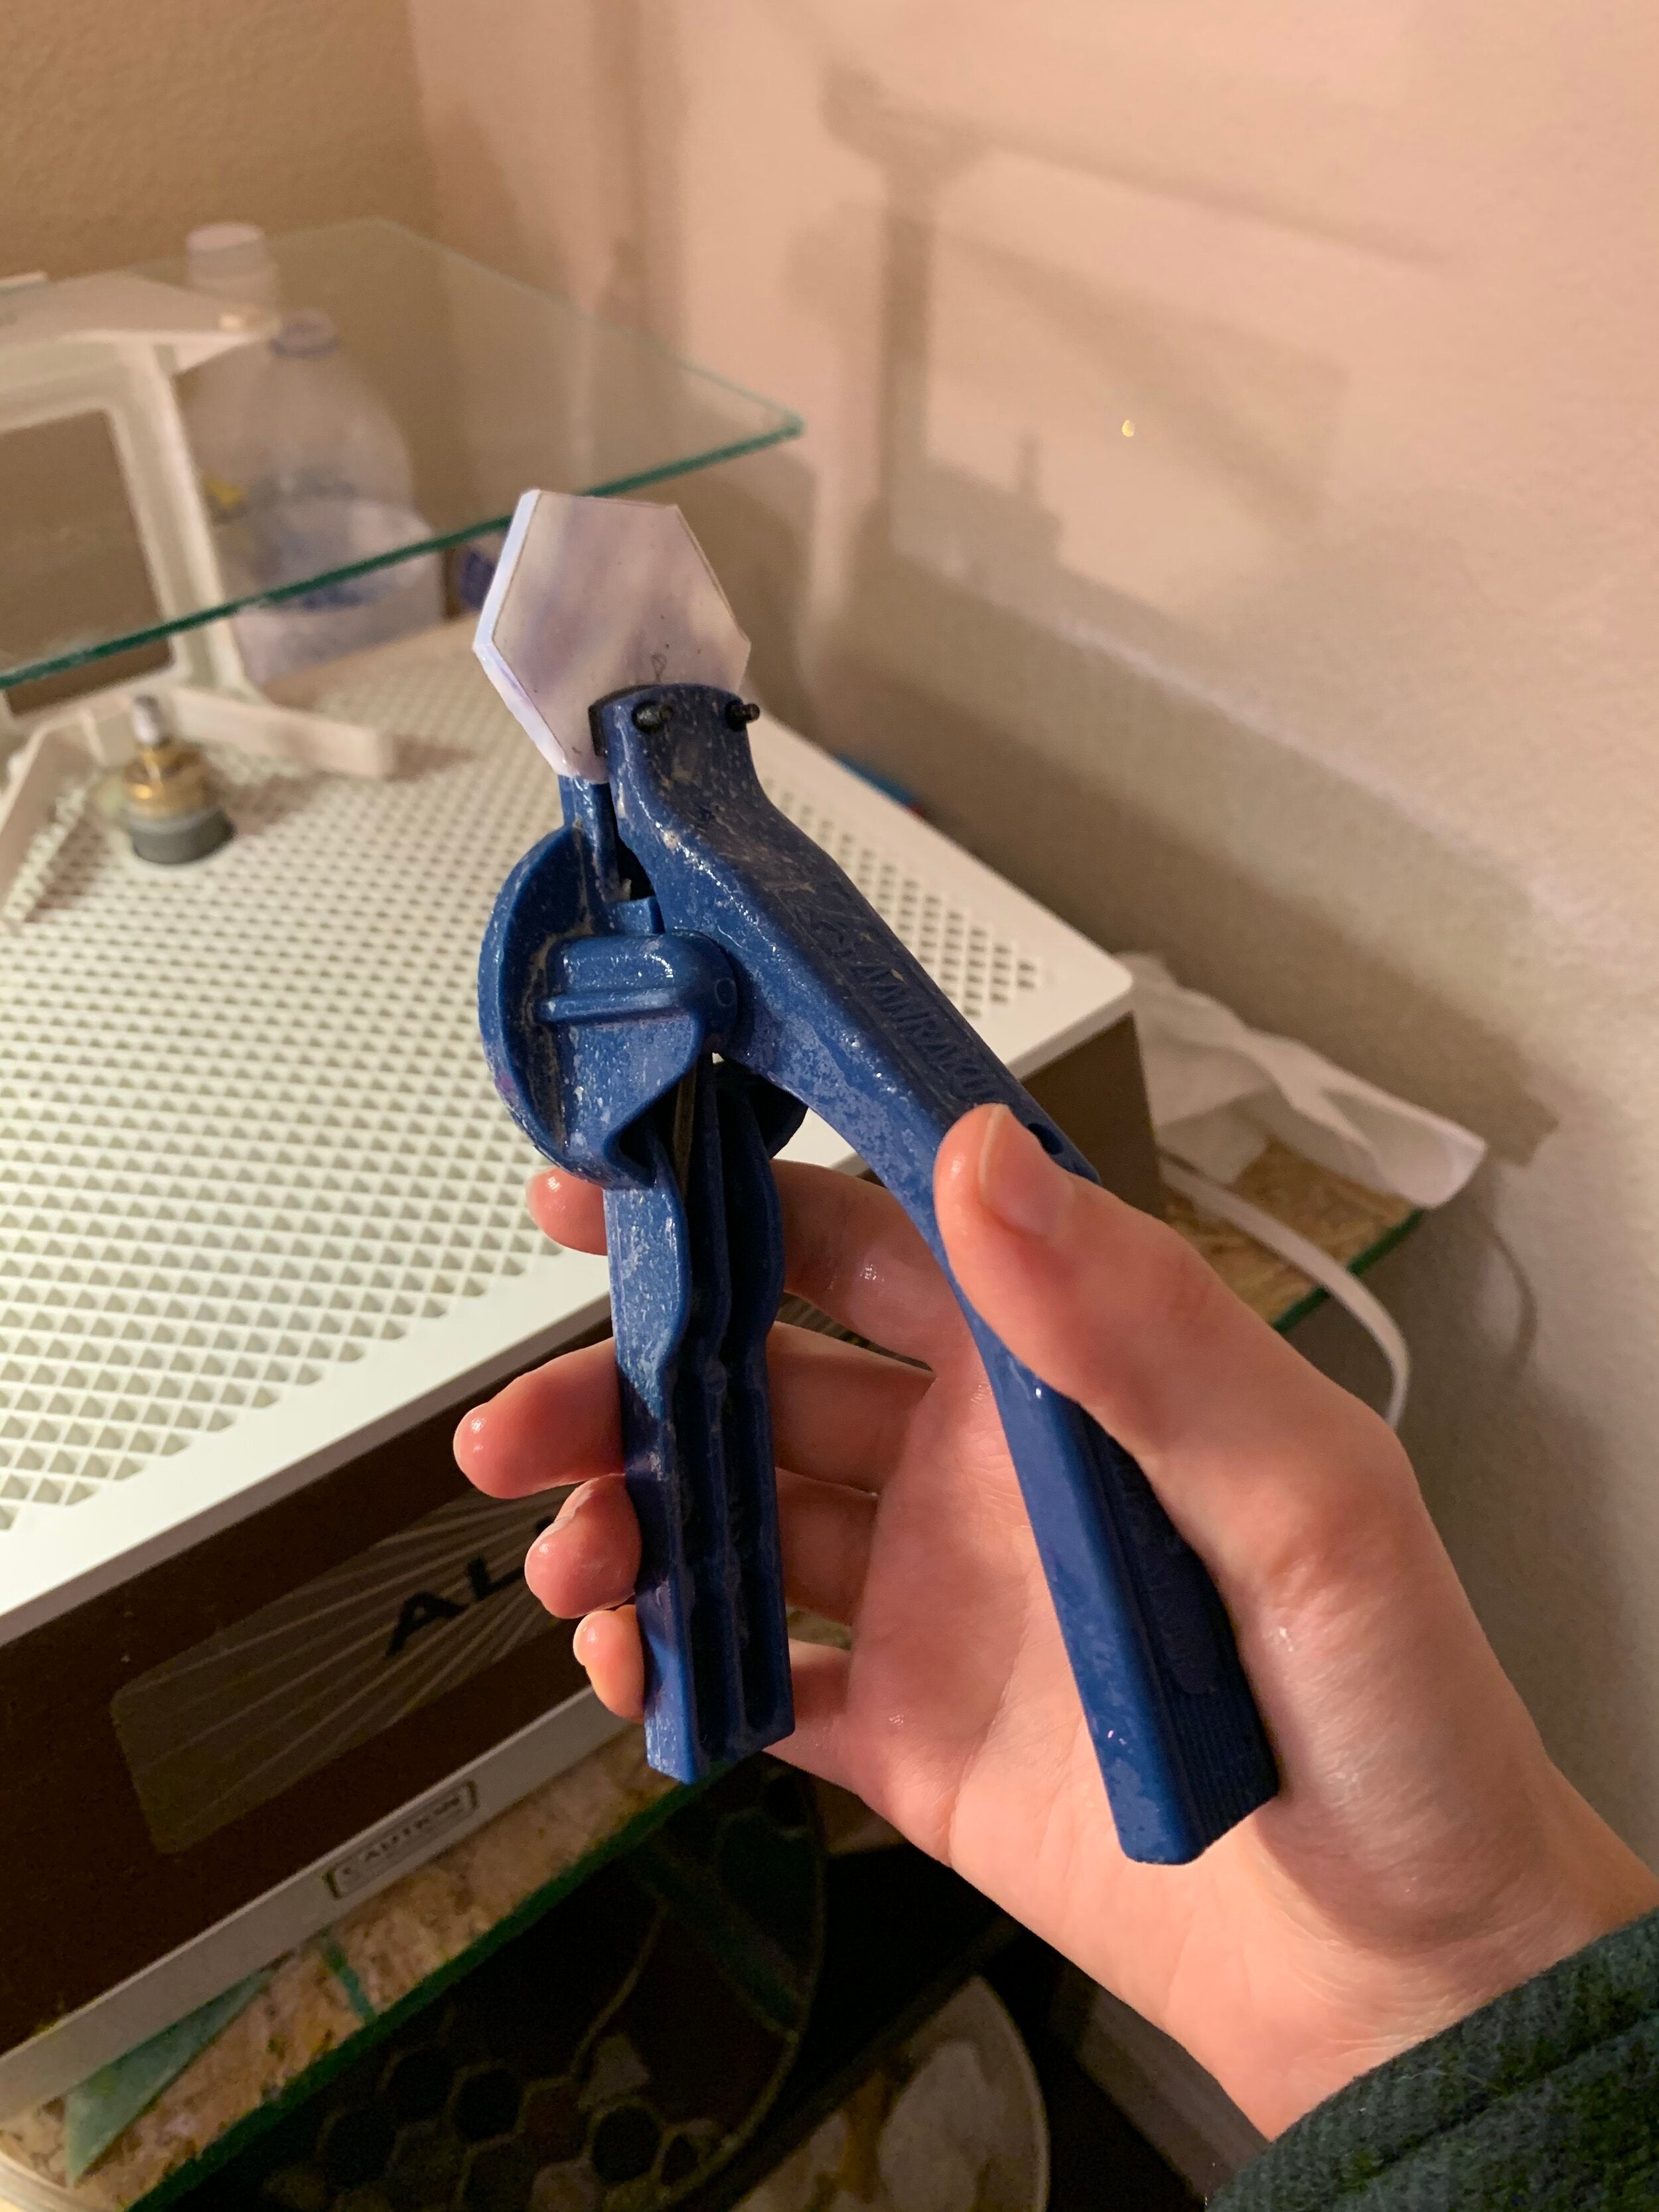
3. Running Pliers - These will be used to break your glass. Once you have run your glass cutter along your pattern lines on the glass its time to break the sheet. A little bit tricky to describe but they have a mouth that puts pressure on each side of the "score" to break down the middle on the line you made. These are handy for bigger cuts on large pieces of glass and straight lines (find on Amazon) .
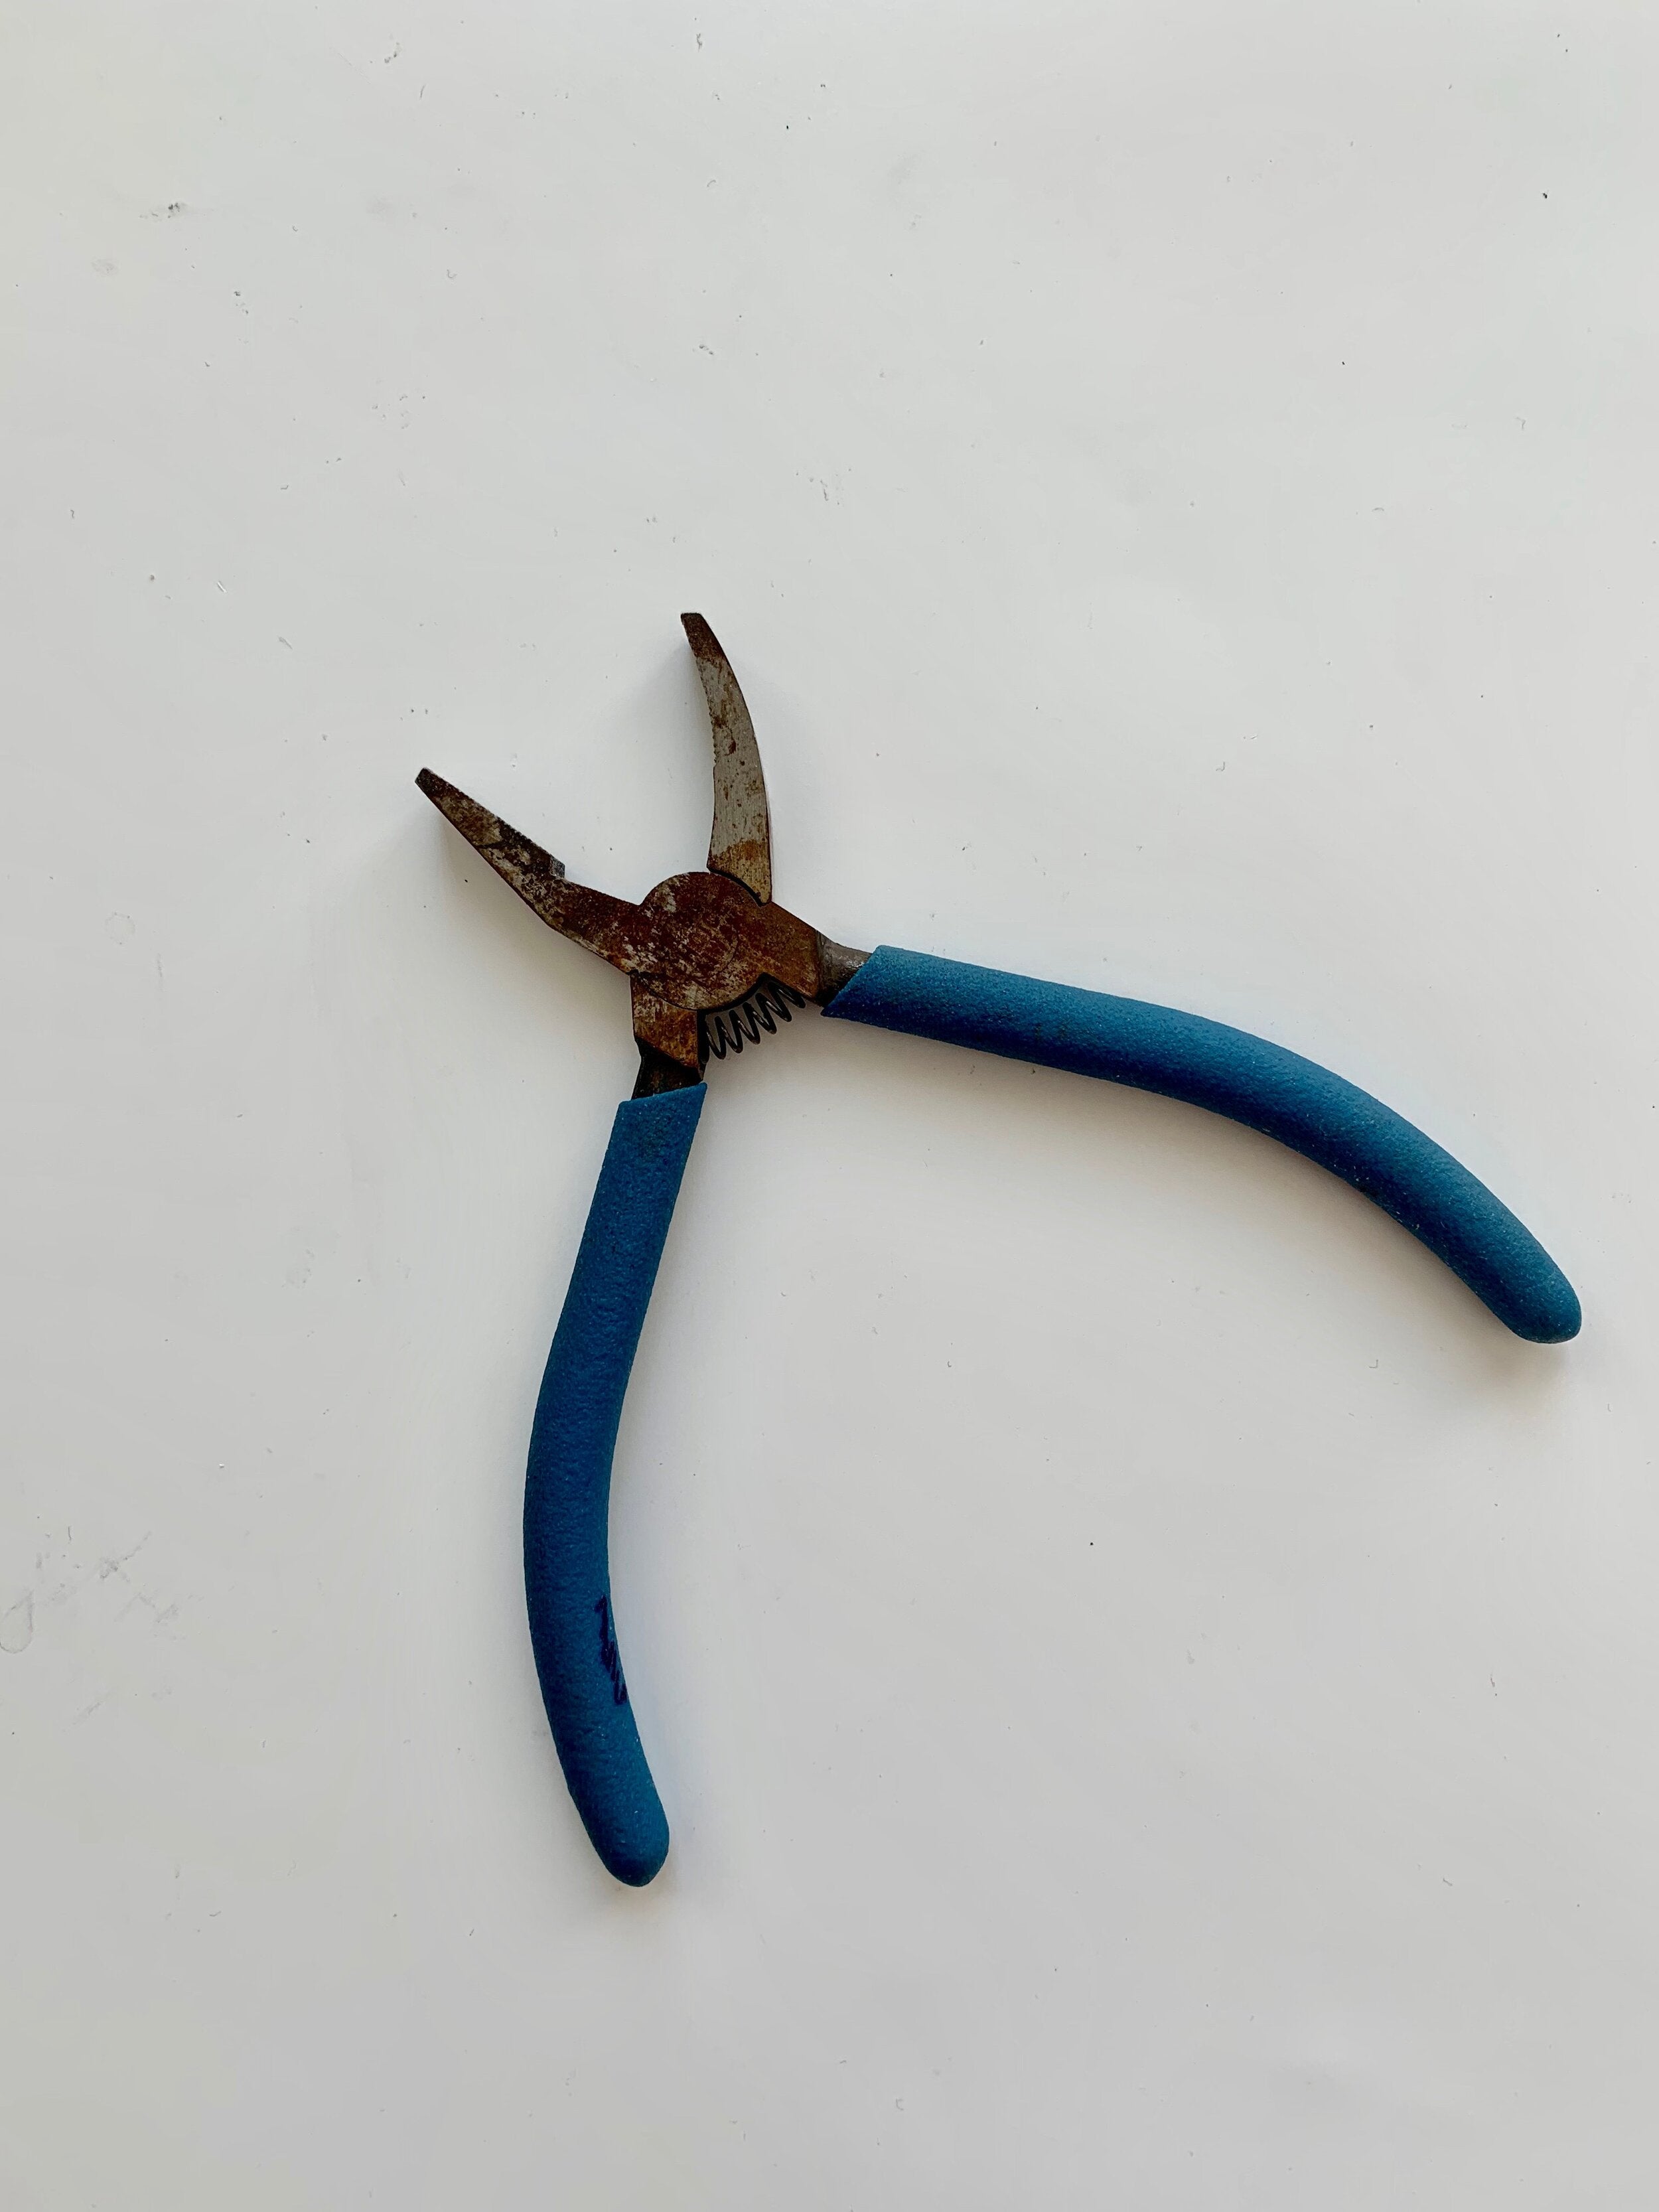
4. Grozing Pliers - These pliers are used for making smaller or curved breaks on your glass. You will apply equal pressure with your thumb and the plier to break the "score" line (find on Amazon) .

6. Eye Protection - A MUST! The amount of people I see not wearing eye protection during glass cutting and grinding is staggering. Please save yourself a trip to the ER and always wear eye protection when dealing with small shards of glass. I can tell you from watching my dad go into the ER after getting a piece of metal removed from his eye its, INCREDIBLY painful and expensive. Save yourself the monetary/physical punishment and just buy some safety glasses they cost less than medical treatment (find on Amazon) . We always wear eye protection while cutting, grinding, soldering, and more!

7. Fume/Dust Mask - If you’ve read my earlier posts you know I’m a safety sally and I always try to be as protected/educated as I can. When you are working with lead and glass you need to be worried about some of the toxins you’re exposed to. Lead exposure and glass dust are your biggest concerns. Lead can only be absorbed when ingested or inhaled, it does NOT go though your skin. The mask will provide protection from glass dust when you are cutting and grinding and then later when you are working with lead dust or potential fumes MASK: (find on Amazon) . CARTRIDGES: (find on Amazon) .
NOTE: Due to COVID - 19 it has been incredibly hard to find any sort of face mask, I reccomend if you cannot find it online or my links aren't working check out your local hardware store or Home Depot they should be sold there!
GRINDING
Since you aren’t a robot and or most likely don’t make perfect cuts this step will serve to make your pieces fit together better by sanding each of them down.
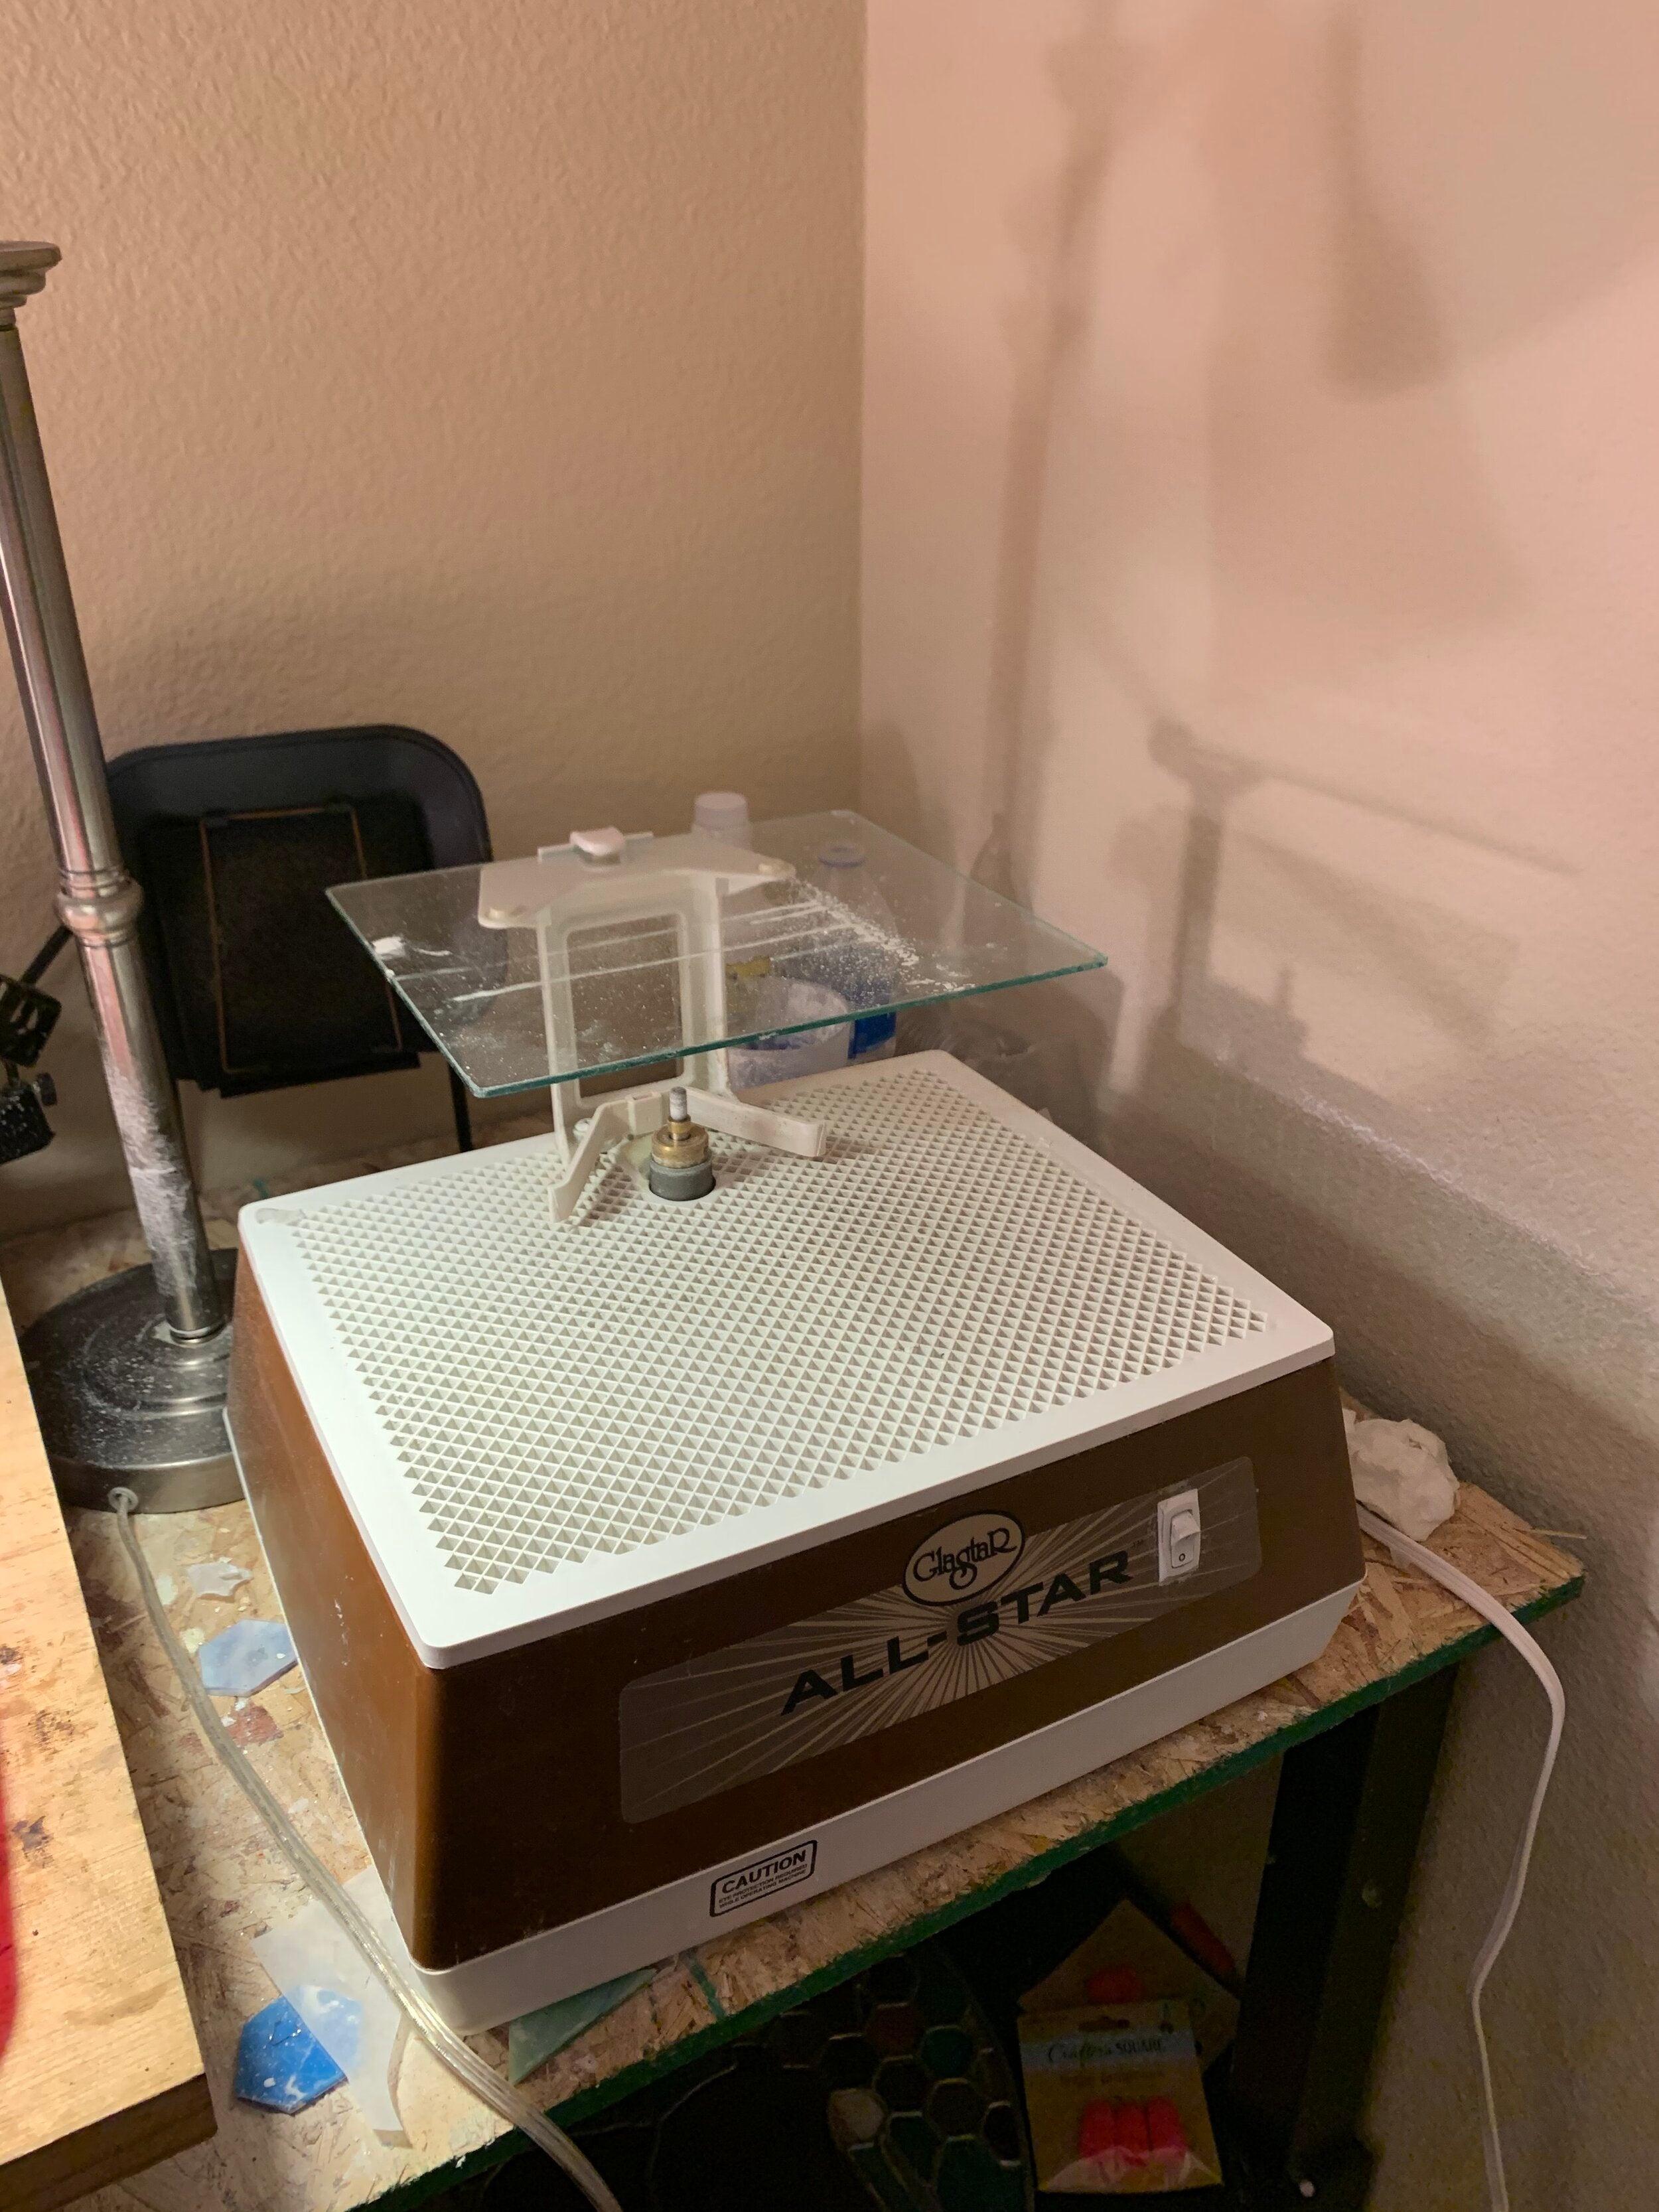
1. Grinder - A grinder is a mini wet sander. You will place a pieces of glass against the metal bit to help sand off the extra glass you don’t need therefore helping each piece fit into your pattern. The grinder does not hurt to use but it does sand your nails down. The grinder must have a wet sponge placed against it so water is constantly touching the bit. This helps prevent glass dust from going in the air. When you purchase a grinder, all of what you need (sponge, bits, etc.) should be included. Over time/use glass dust goop will collect and it will need to be cleaned then re-filled with water. This is a image of my old home studio grinder - these guys aren't made anymore. We have fully switched over to Techniglass grinders and they are AMAZING! find on Amazon here.

2. Grinder Shield* - They are basically a glass shield that attaches to your grinder to help prevent glass shards from flying at you, TOTALLY nice to have. Some folks use this in place of safety glasses when grinding I still like to use both. Note - some grinders come with a shield some don't (find on Amazon) .

3. Grinder Bits* - You will find yourself needing new bits over time - the more you grind the more frequently you will need to purchase them. Different sizes are fun to have but necessary but nice to have if you are trying to grind in small spaces that a regular bit is too large for. Usually your grinder will come with one smaller bit (find on Amazon) .

4. Rubber Finger Protectors* - If you don’t want your nails to get shaved off in the process of grinding these are a life saver to have. They are rubber so they crack over time but for the cost they are great to have (find on Amazon) .
5. Grinder mate* - If you don’t want your fingers near the grinder to preserve those finger nails, or have wrist pain, or an unsteady hand, or have a tiny piece that needs grinding I recommend using a Grinder Mate to help hold your glass to the grinder bit. I have one yes, do I use it no (just being honest!). (find on Amazon) .
6. Eye Protection and Face Mask (repeat)
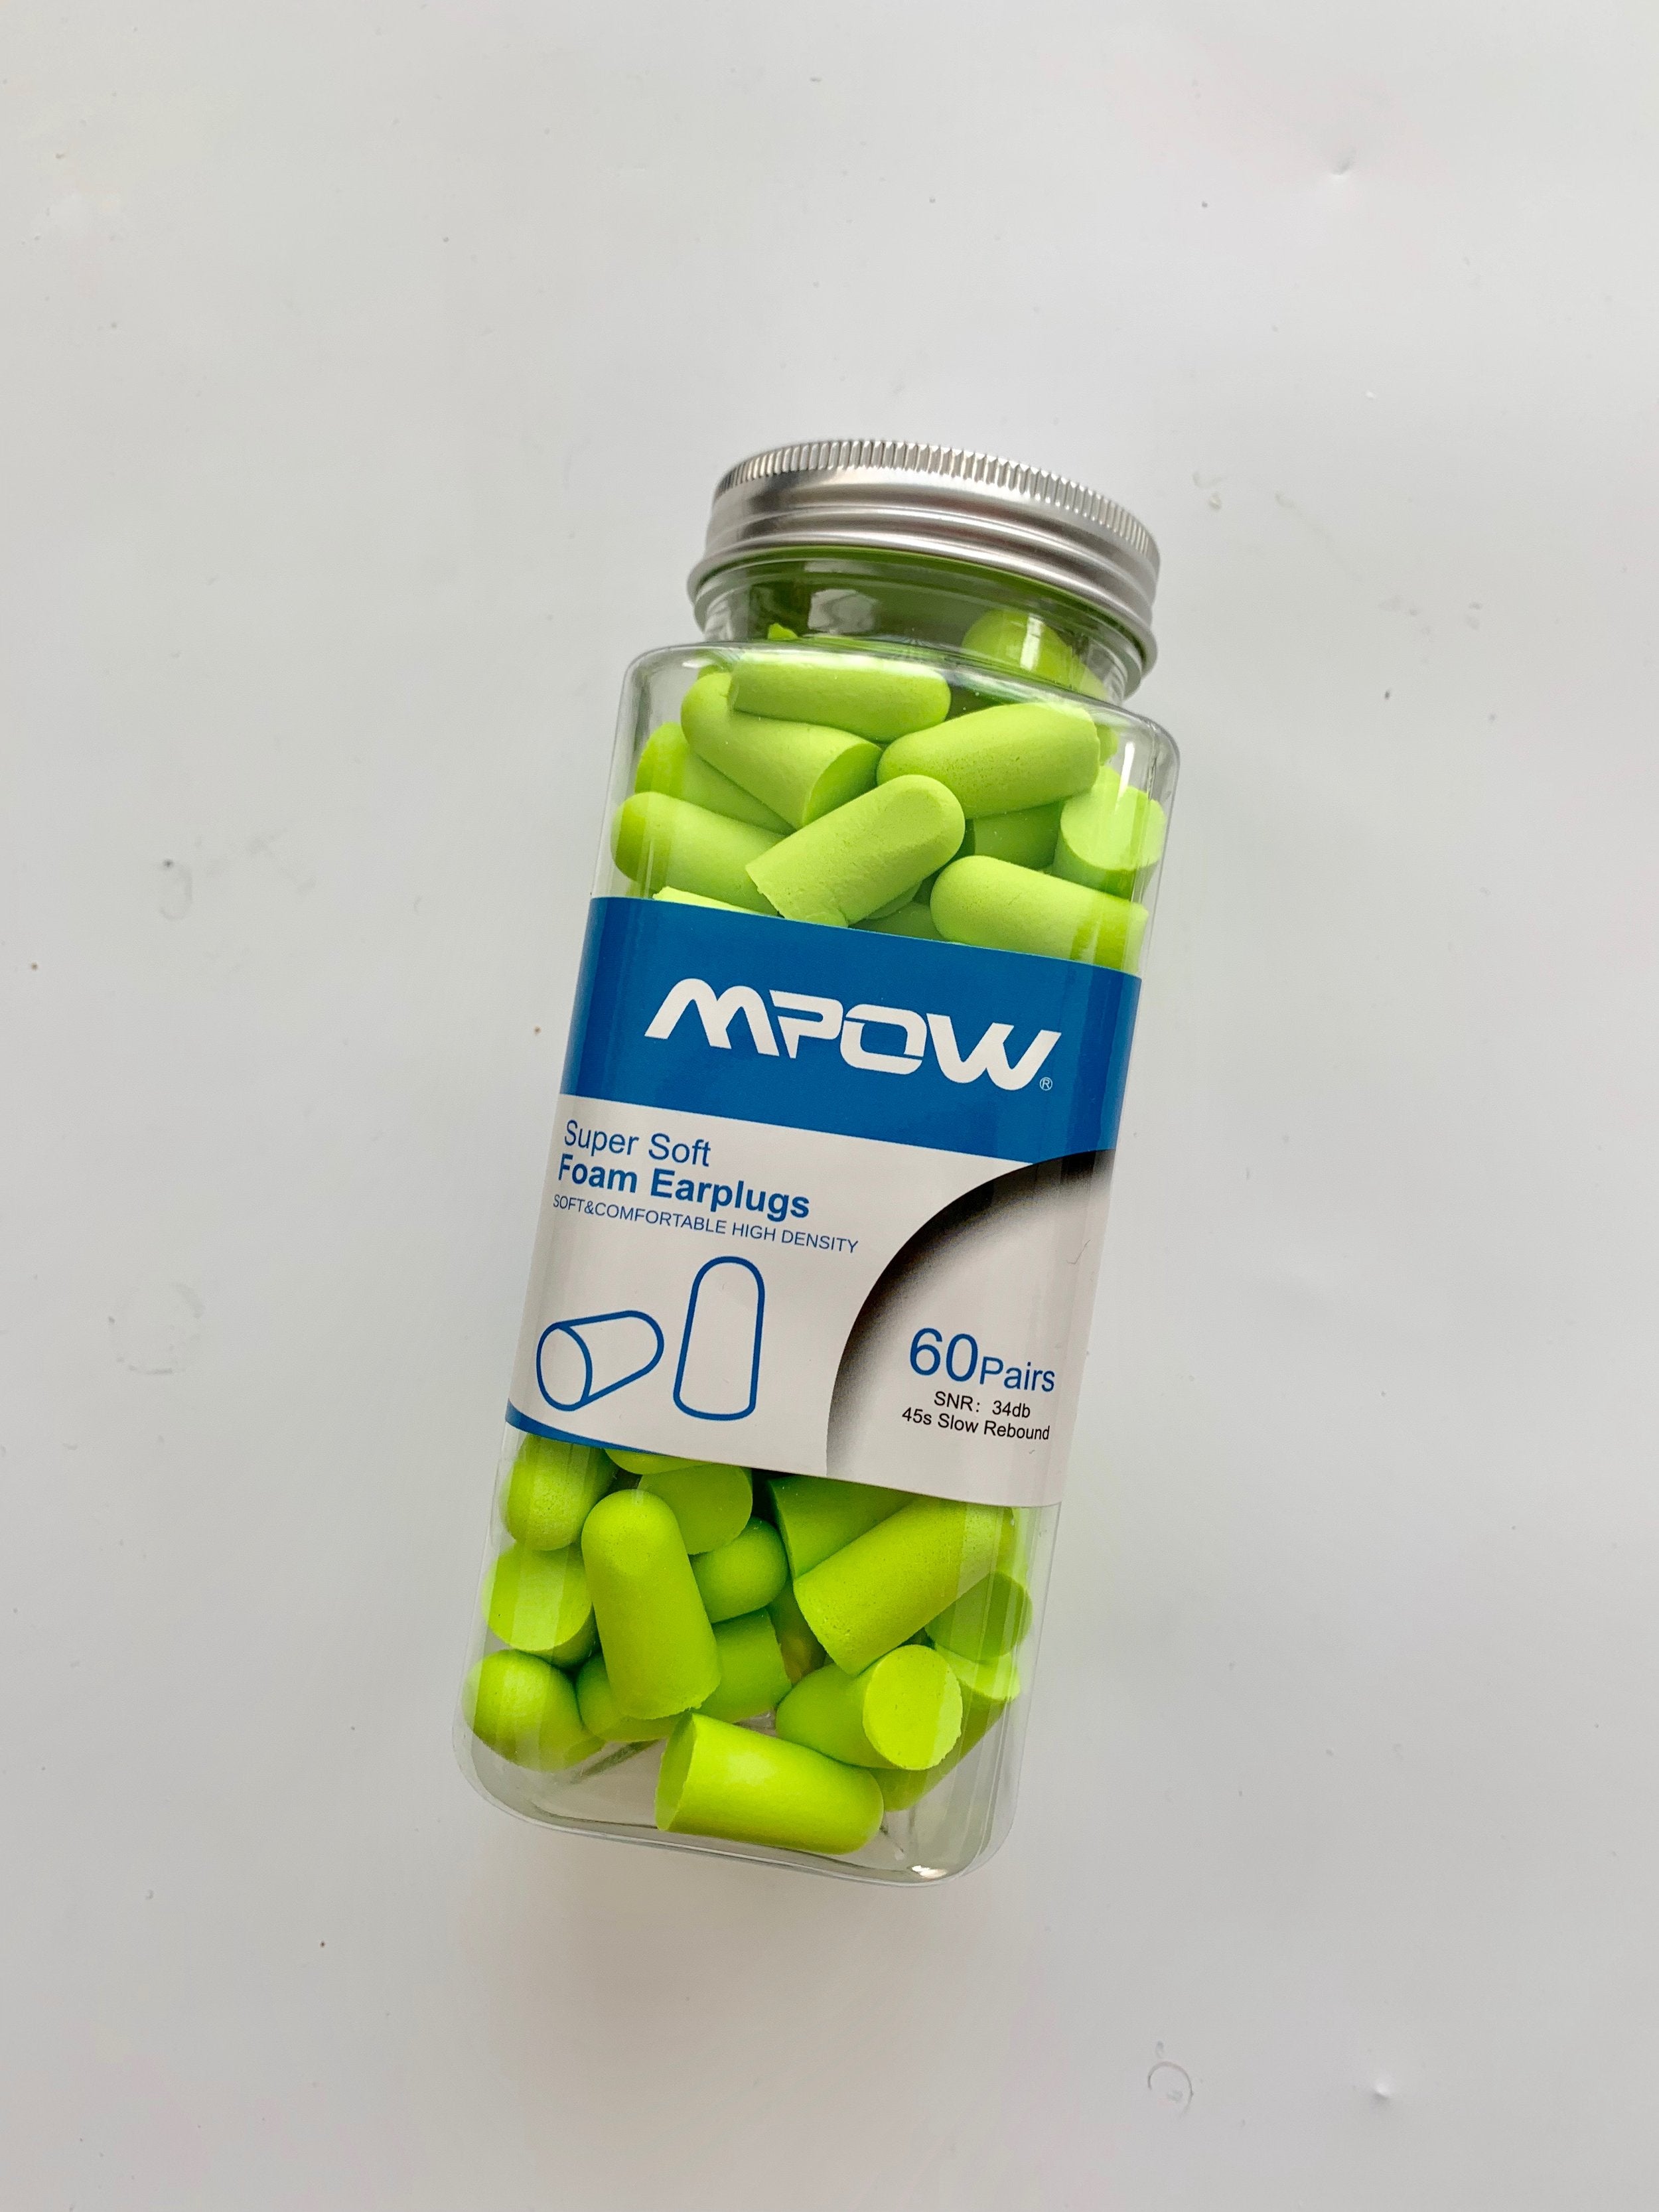
7. Ear Protection* - The grinder can be loud and if you care about protecting your hearing I would suggest wearing ear plugs (find on Amazon) .
FOILING
The prettiest and most relaxing part of making stained glass (in my opinion). This phase helps get your glass pieces taped up so they are ready to be soldered together with lead.

1. Copper Foil - Fun fact: lead does not stick to glass. Your trusty roll of copper tape will help bond the two together. Copper foil is fancy tape that is sticky on one side and copper faced on the other side. You will very carefully wrap the edges of each glass piece in tape. Copper tape comes in different sizes and sticky side colors (black, silver, and copper). If you’re starting out and have no idea on what to go with my best recommendation is black backed copper tape and 7/32nd in X 36 yd or 1/4th inch x36 yd for the sizing. When you play with patina later on you might want to choose different colored tape backings to match your lead lines. For sizing when it comes to thinner glass you’ll want smaller copper tape and for thicker glass you’ll want larger copper tape. Last thing to note whatever you do DO NOT PURCHASE Studio Pro Copper foil, I know its cheaper but its horrible and will peel up (trust me you really don't want that to happen). Spend the extra $5 on the good stuff AKA Edco copper foil (find on Amazon) .

2. Fid- You will use this tool to firmly flatten down the copper tape on each piece of glass after its wrapped. It is very important to have your copper tape stuck firmly to the glass because if it isn’t your lead won’t stick to your glass and will fall off with the loose tape (find on Amazon) .

3. Painters/Masking Tape* - When all your glass pieces are wrapped in copper tape and have been pressed with the fid, you will put all of the glass pieces back together using your original stained glass pattern as a guide. Once your project is in place you will use the tape to make sure it is firmly held together/ready for soldering. For me I use painters tape in place of tacks or nails to secure for soldering so if you are using those to hold your project together instead you can bi-pass using tape (find on Amazon) . I always love/loved using painters tape because it makes for easy transport if you solder in a different area, easy clean up, AND I solder on the back of my project to start so the front is completely flush!

4. X-Acto Knife* - I keep an X-Acto knife near by to cut off overlapping copper tape edges on my glass pieces. If you aren’t a master at foiling your glass pieces these are nice to have to fix up bad taping (find on Amazon) .
5. Scissors (repeat) - Used for cutting copper tape from the roll as you go
SOLDERING
I feel this is by far the trickiest part of creating stained glass art. In this phase you will turn all of your copper covered glass pieces into one solid leaded piece. Soldering is the act of melting liquid lead along your copper tape lines (between the pieces of glass) to bond the glass together. Here are the items you need to be able to get down to business…
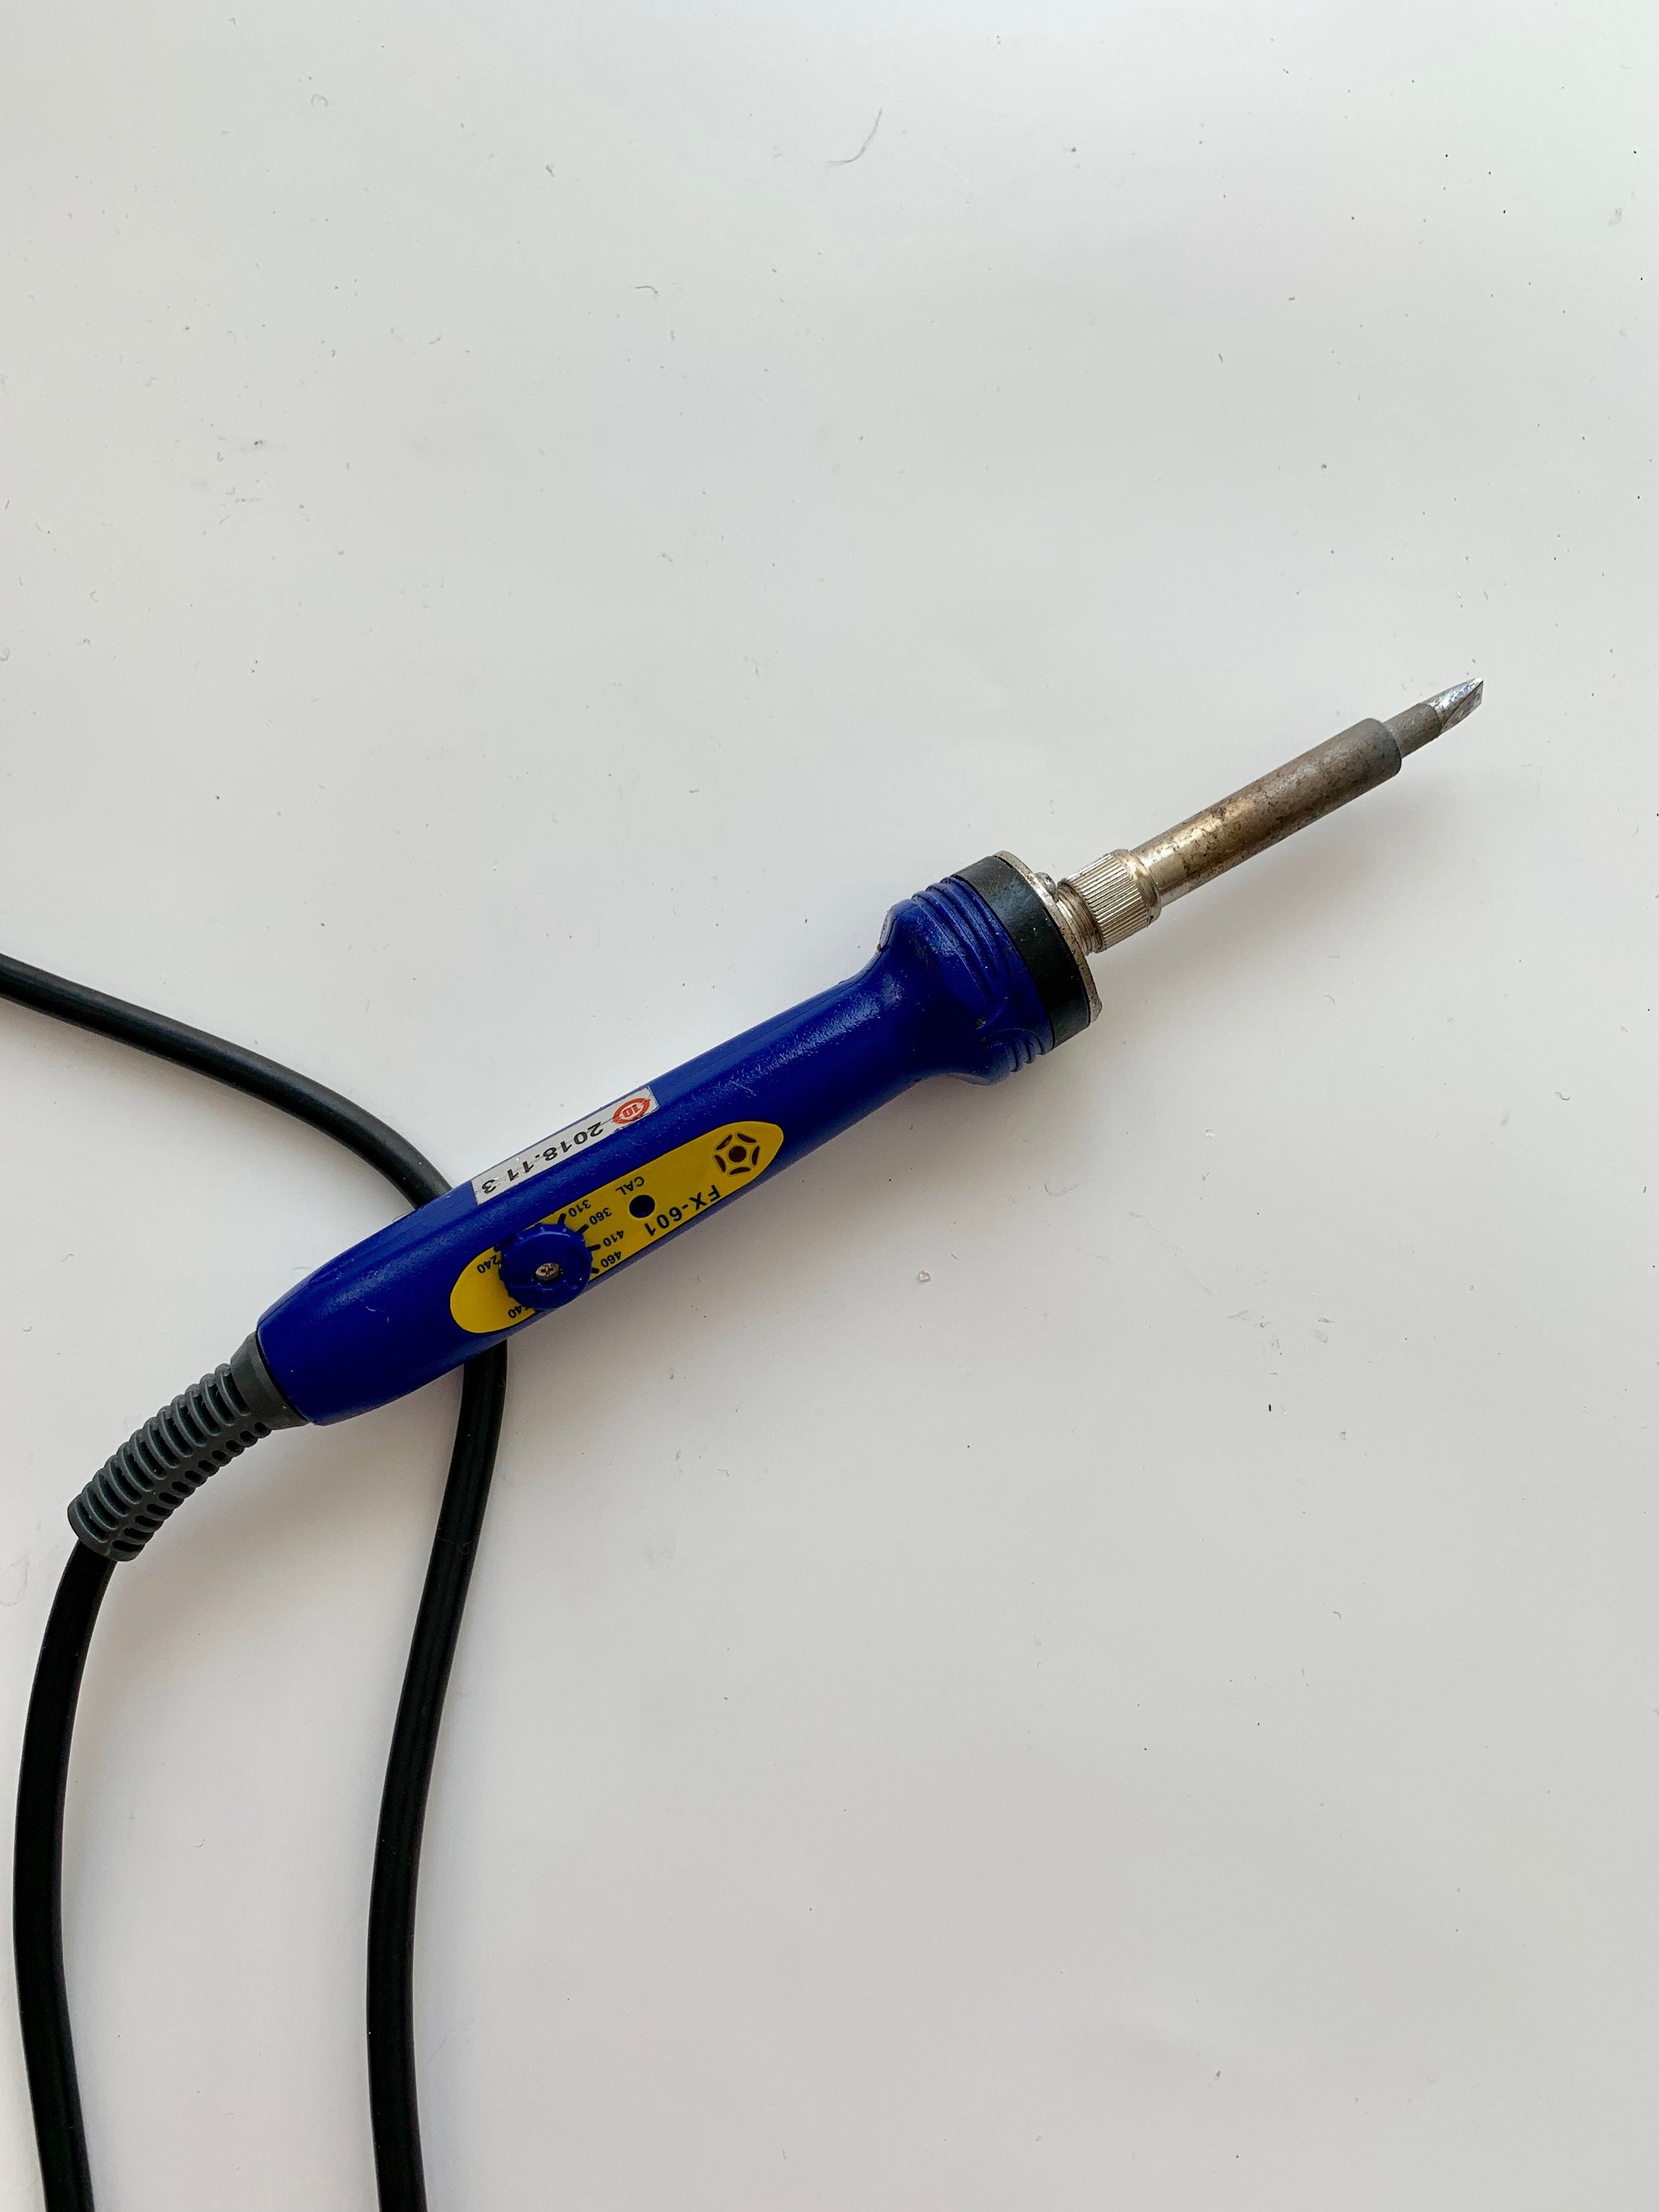
1. Soldering Iron - You’ll use this tool to melt the lead off your lead spool along your projects copper tape lines. The soldering iron is set a a very high temperate so always be careful when handling. When it comes to pricing soldering irons vary quite a bit. If you are able to splurge on one item this should be the item you choose to invest in. A good quality soldering iron can mean the difference between sloppy/frustrating leading and beautiful/easy leading. In my oppinion the Hakko FX601 Adjustable Temperature Controlled Soldering Iron is the Mercedes-Benz of soldering irons. The temperature control keeps this iron consistently hot and easy to work with. Reads like an ad but hot damn well worth the money (find on Amazon) .
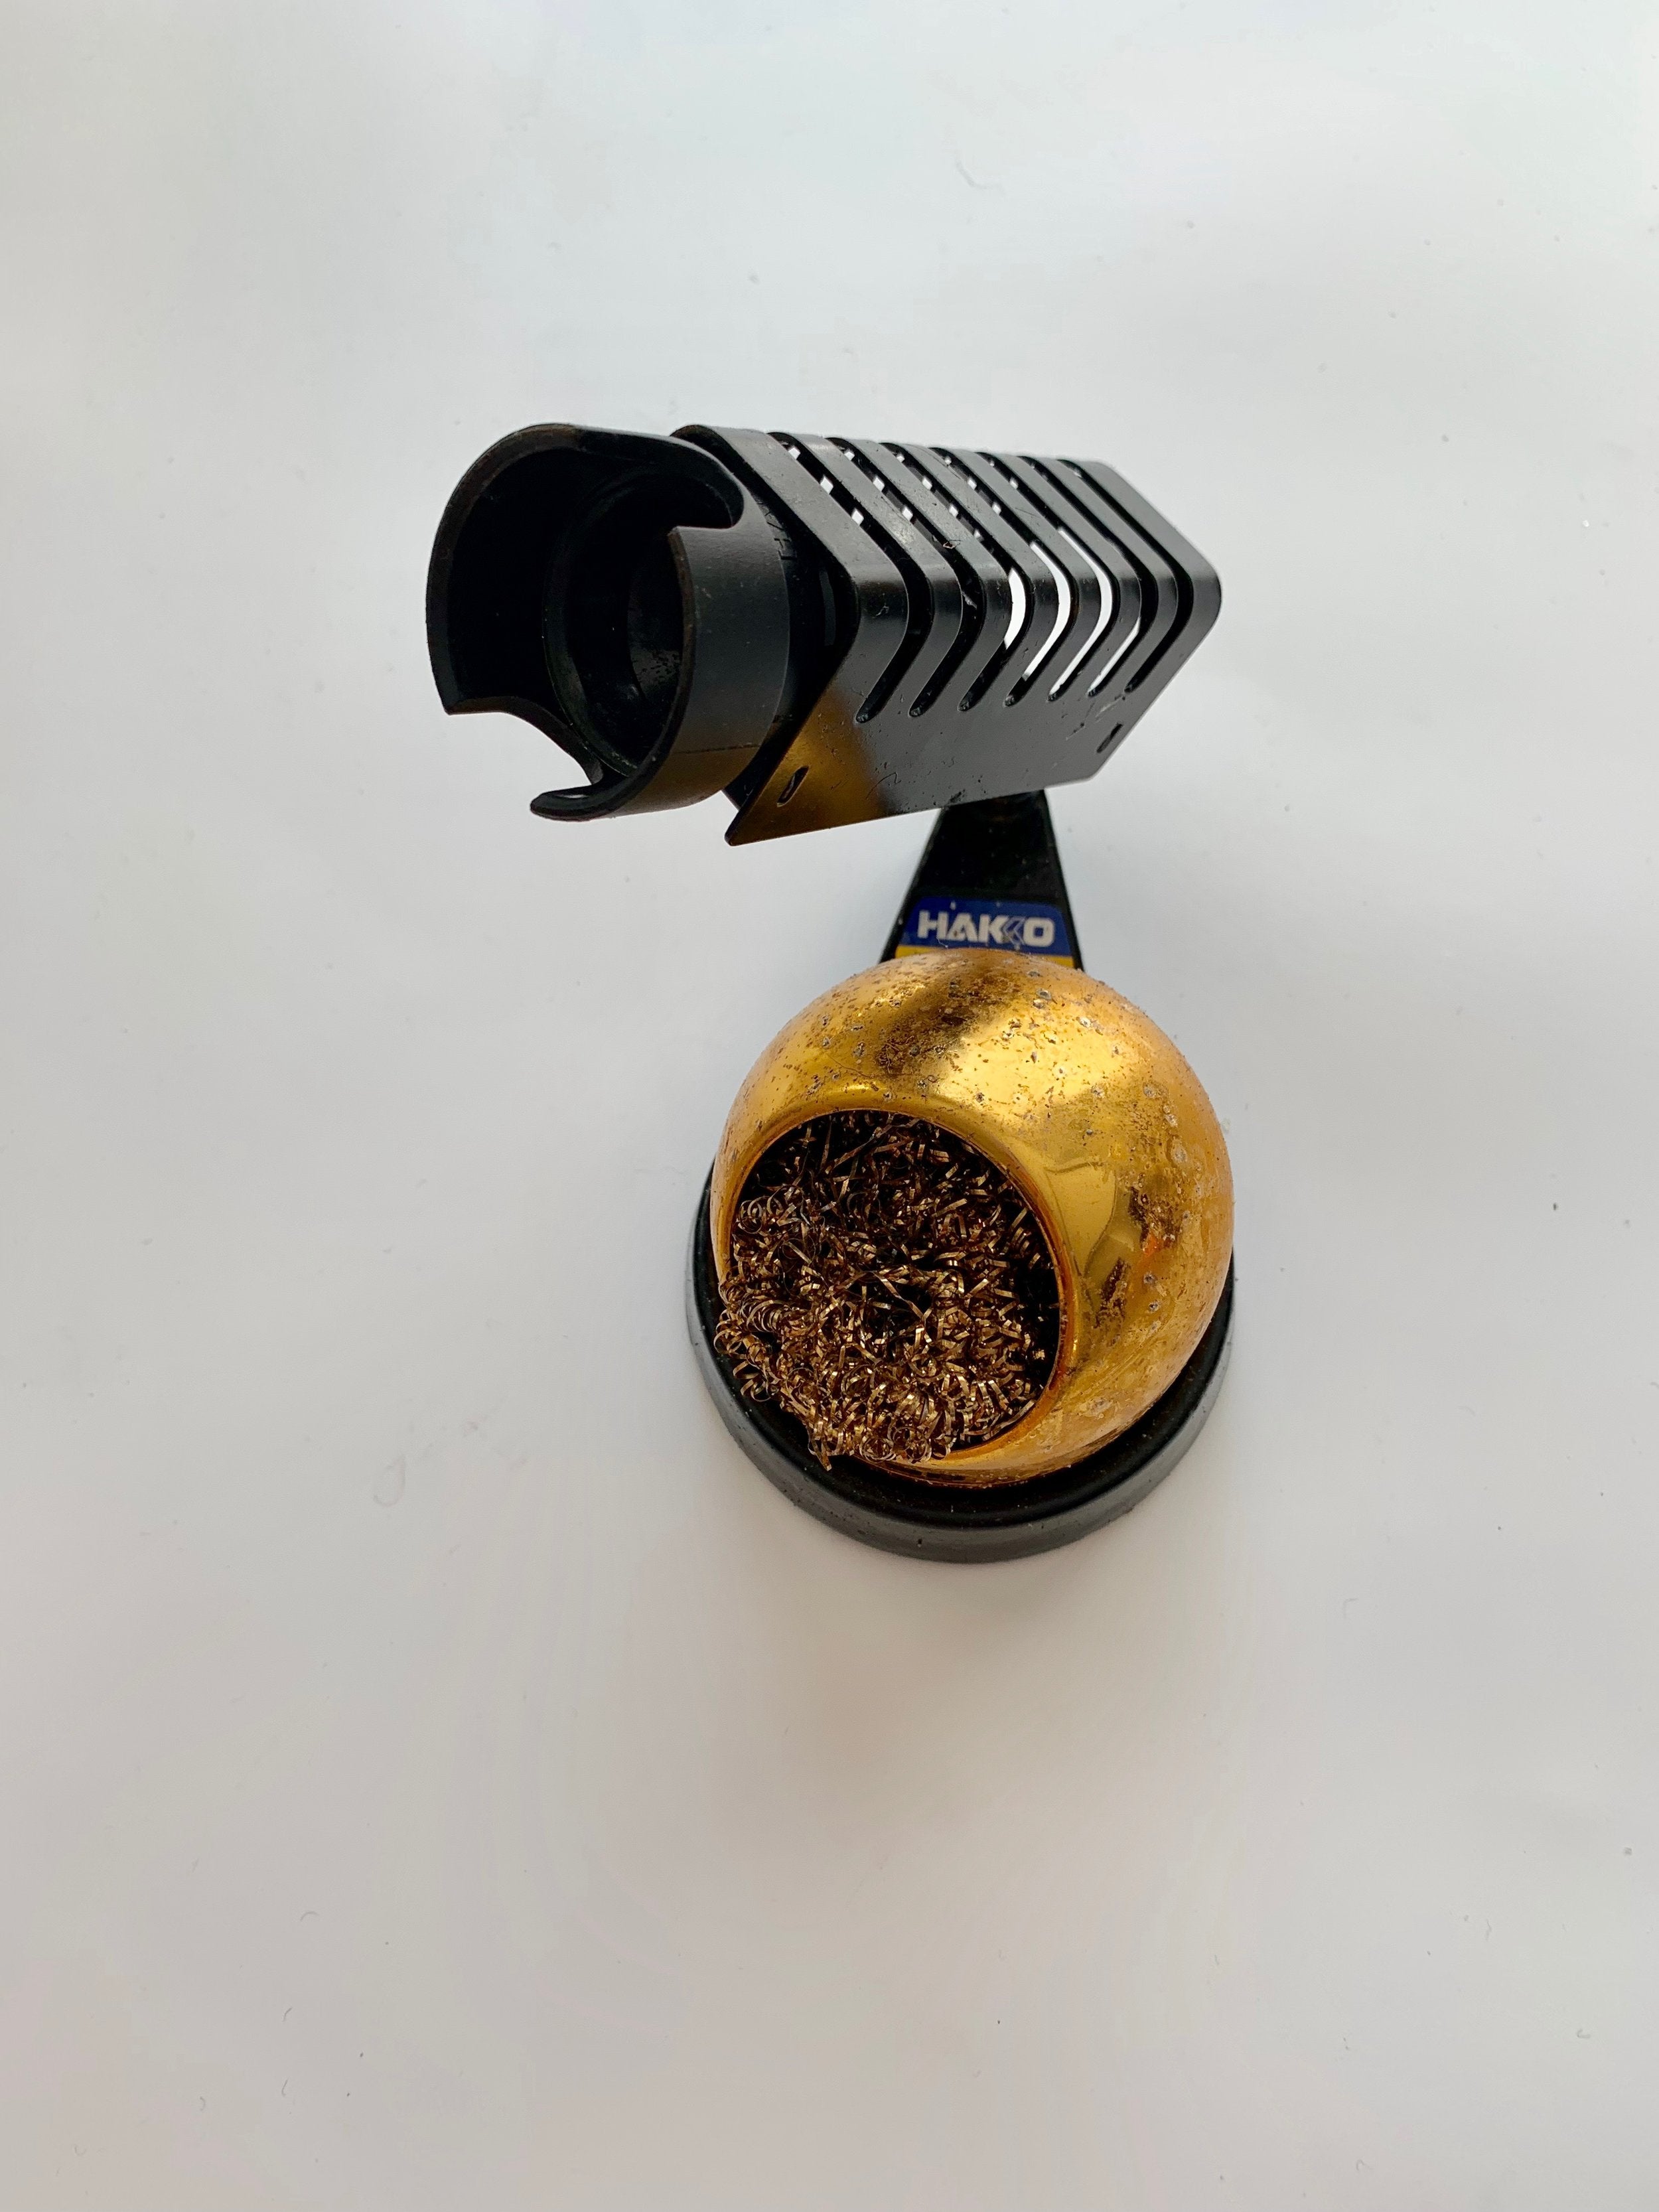
2. Soldering Iron Stand/Tip Cleaning Wire or Sponge - The soldering stand will help hold your extremely hot soldering iron while you are not using it. Generally stands come with a tip cleaning spot either a wet sponge or a wire cleaning pad for keeping the tip of your soldering iron clean as you work (find on Amazon) .
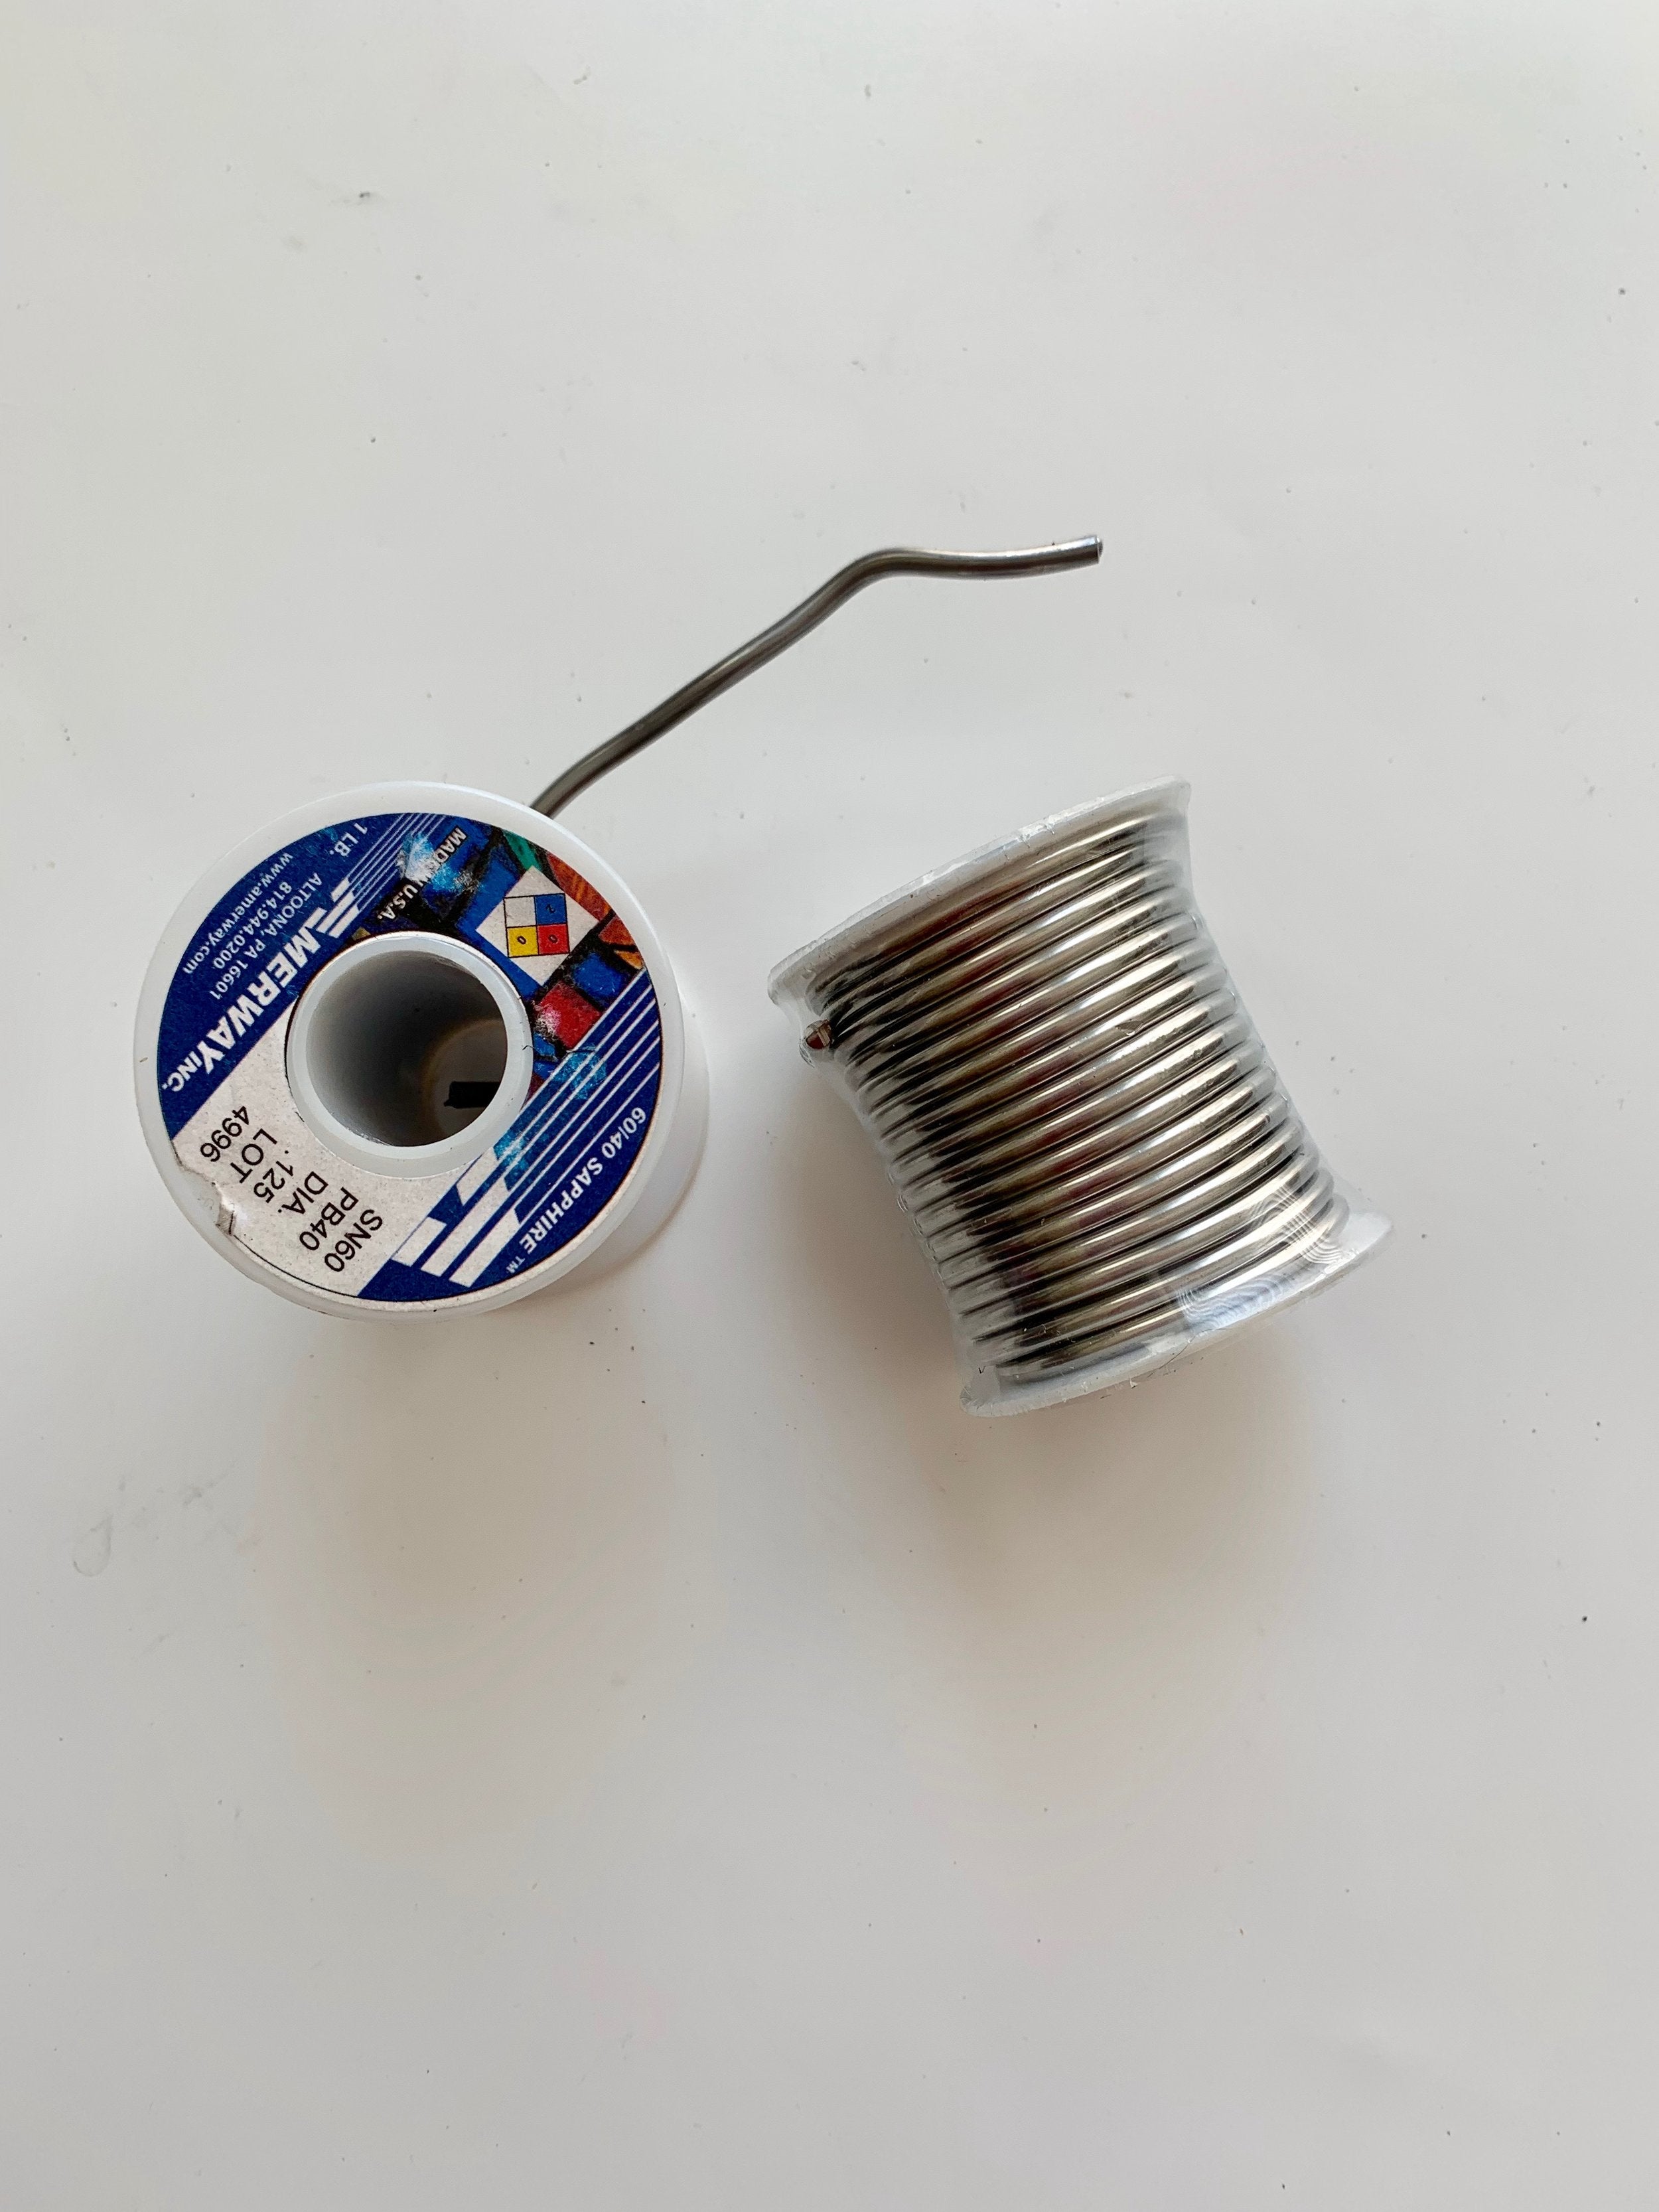
3. Lead - a spool of solid metal lead that you will melt to hold your project together. You cannot just go out and purchase any kind of lead it must be 60/40 soldering lead specifically for purposed for stained glass. Its important to purchase good quality lead as it will run easier in comparison to say cheaper brands of lead. I've been happy with the quality of lead made by both Canfield, Choice, and Amerway Inc (find on Amazon) . Note you can purchase "lead free" solder, it has a higher silver content and tricky to work with + double the price of standard lead.
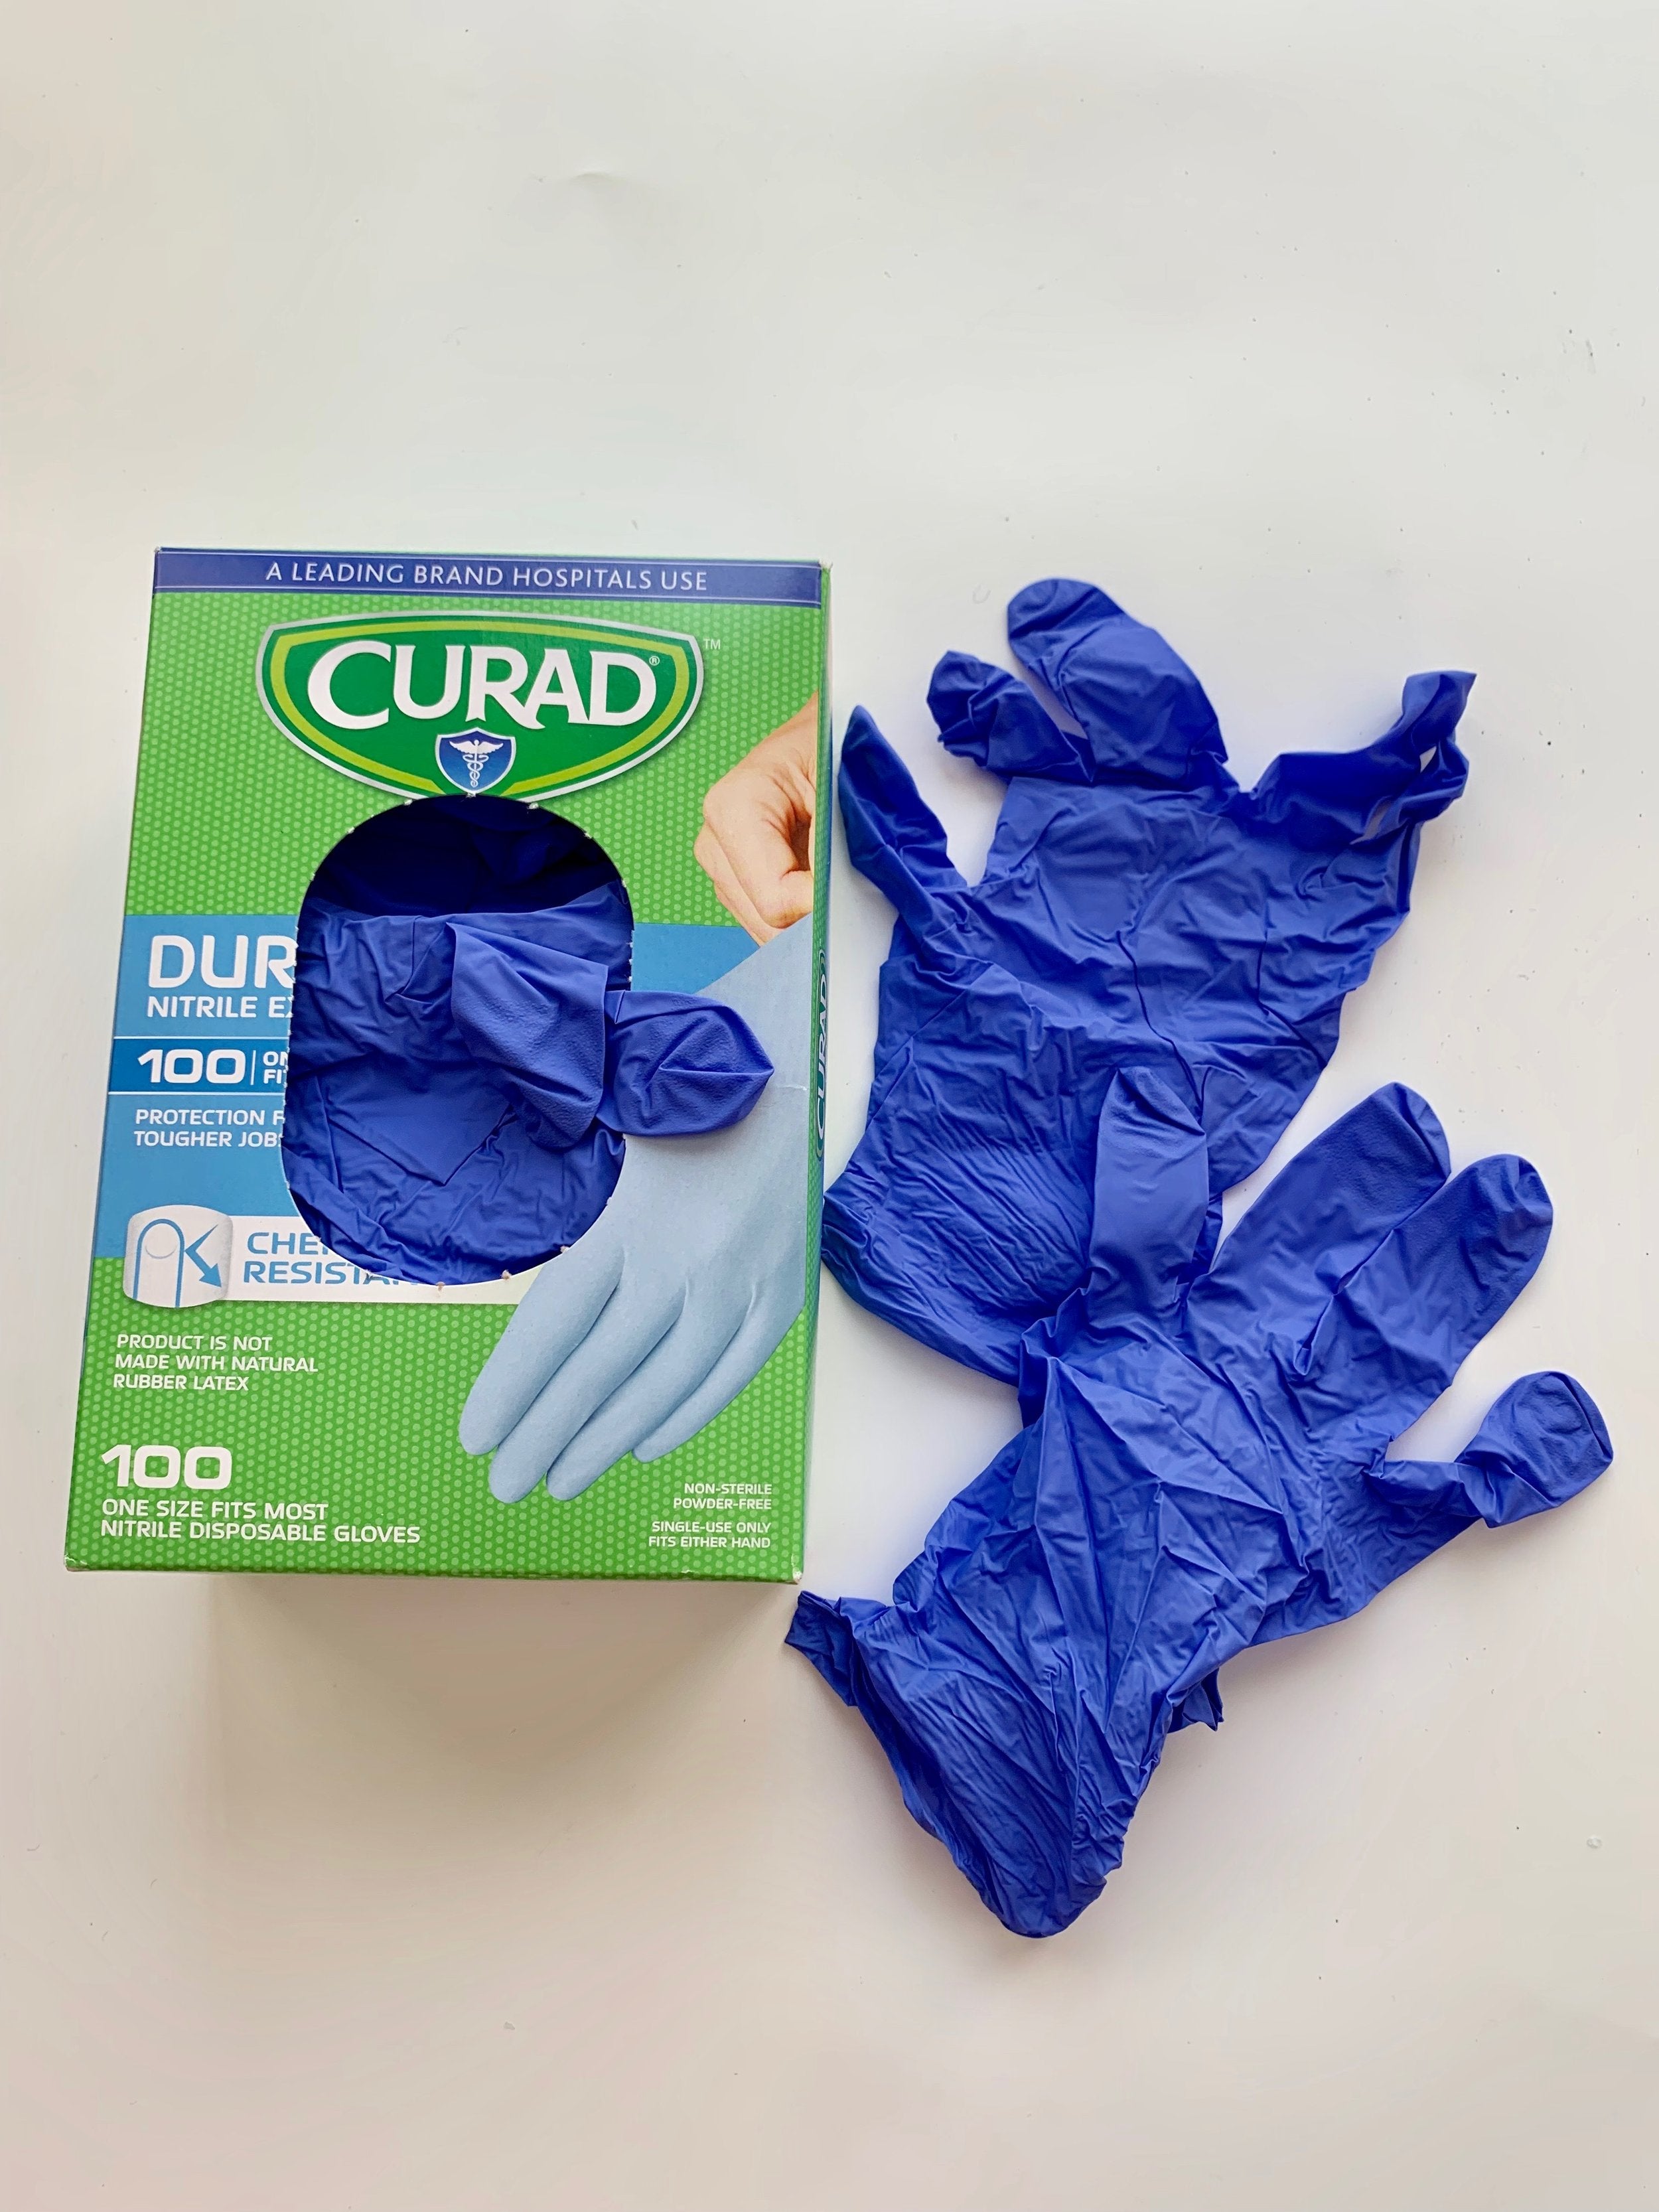
4. Rubber Gloves - Important to wear gloves to protect your hands from the acidic flux that will irritate it. Plus wearing gloves makes for a much easier clean-up (find on Amazon) .
5. Eye Protection and Face Mask (repeat)

6. Flux - a liquid substance you must paint over your copper tape that helps bind the lead to the copper . Using a good quality flux really makes all the difference as well in ease of soldering. The Classic 100 Gel Flux I use is by far my favorite and creates less flux fumes than other brands I've used in the past (find on Amazon) .

7. Flux Brush - Used for painting the flux on your project (find on Amazon) .

8. Valtcan Fume Extractor* - This is an optional one but I highly recommend it. This device helps pull flux fumes and lead dust out of the air as you work. Flux fumes can cause headaches and generally are not good to breath in. No you cannot substitute a box fan as it will just circulate the fumes in air. This trusty extractor sucks and filters the fumes. (find on Vaulcan directly) . Bonus: Take 10% off your purchase with code COGW10

9. Fume Extractor Filter Pads* - Extra filter pads, important to change your extractor's filter out after several projects (find on Amazon) .

10. Flux Cleaner* - Awesome at cleaning up the messy flux covering your project. An alternative is using Windex THEN 90% isopropyl alcohol. I find the flux cleaner cuts down on time and is more effective, I love this stuff (find on Amazon) .
11. Paper Towels - To help clean off flux.
FINISHING TOUCHES/CLEAN UP
You’re in the home stretch! Some final touches to protect your hard work and your stained glass project will be complete. Note this section contains many optional items depending on how you’d like your finished project to look.

1. Lead Came or Zinc Framing* - Projects that have unusual shapes (i.e. the honeycomb sun-catchers) will not be able to be framed and will stick to the lead covered copper tape so you can skip this part. If you’ve made a square, circular, or triangular shaped project you most likely will want to complete it with a frame. I highly recommend making a trip to a local stained glass shop to purchase lead came or zinc came for ease of process. For those of you who are newbies I’d suggest working with a local shop to help you measure and frame your completed piece as well and get your footing on lead. My website sells hobby came and lead came strips to help you get your lead framing fix if you have no local options :). Click here!
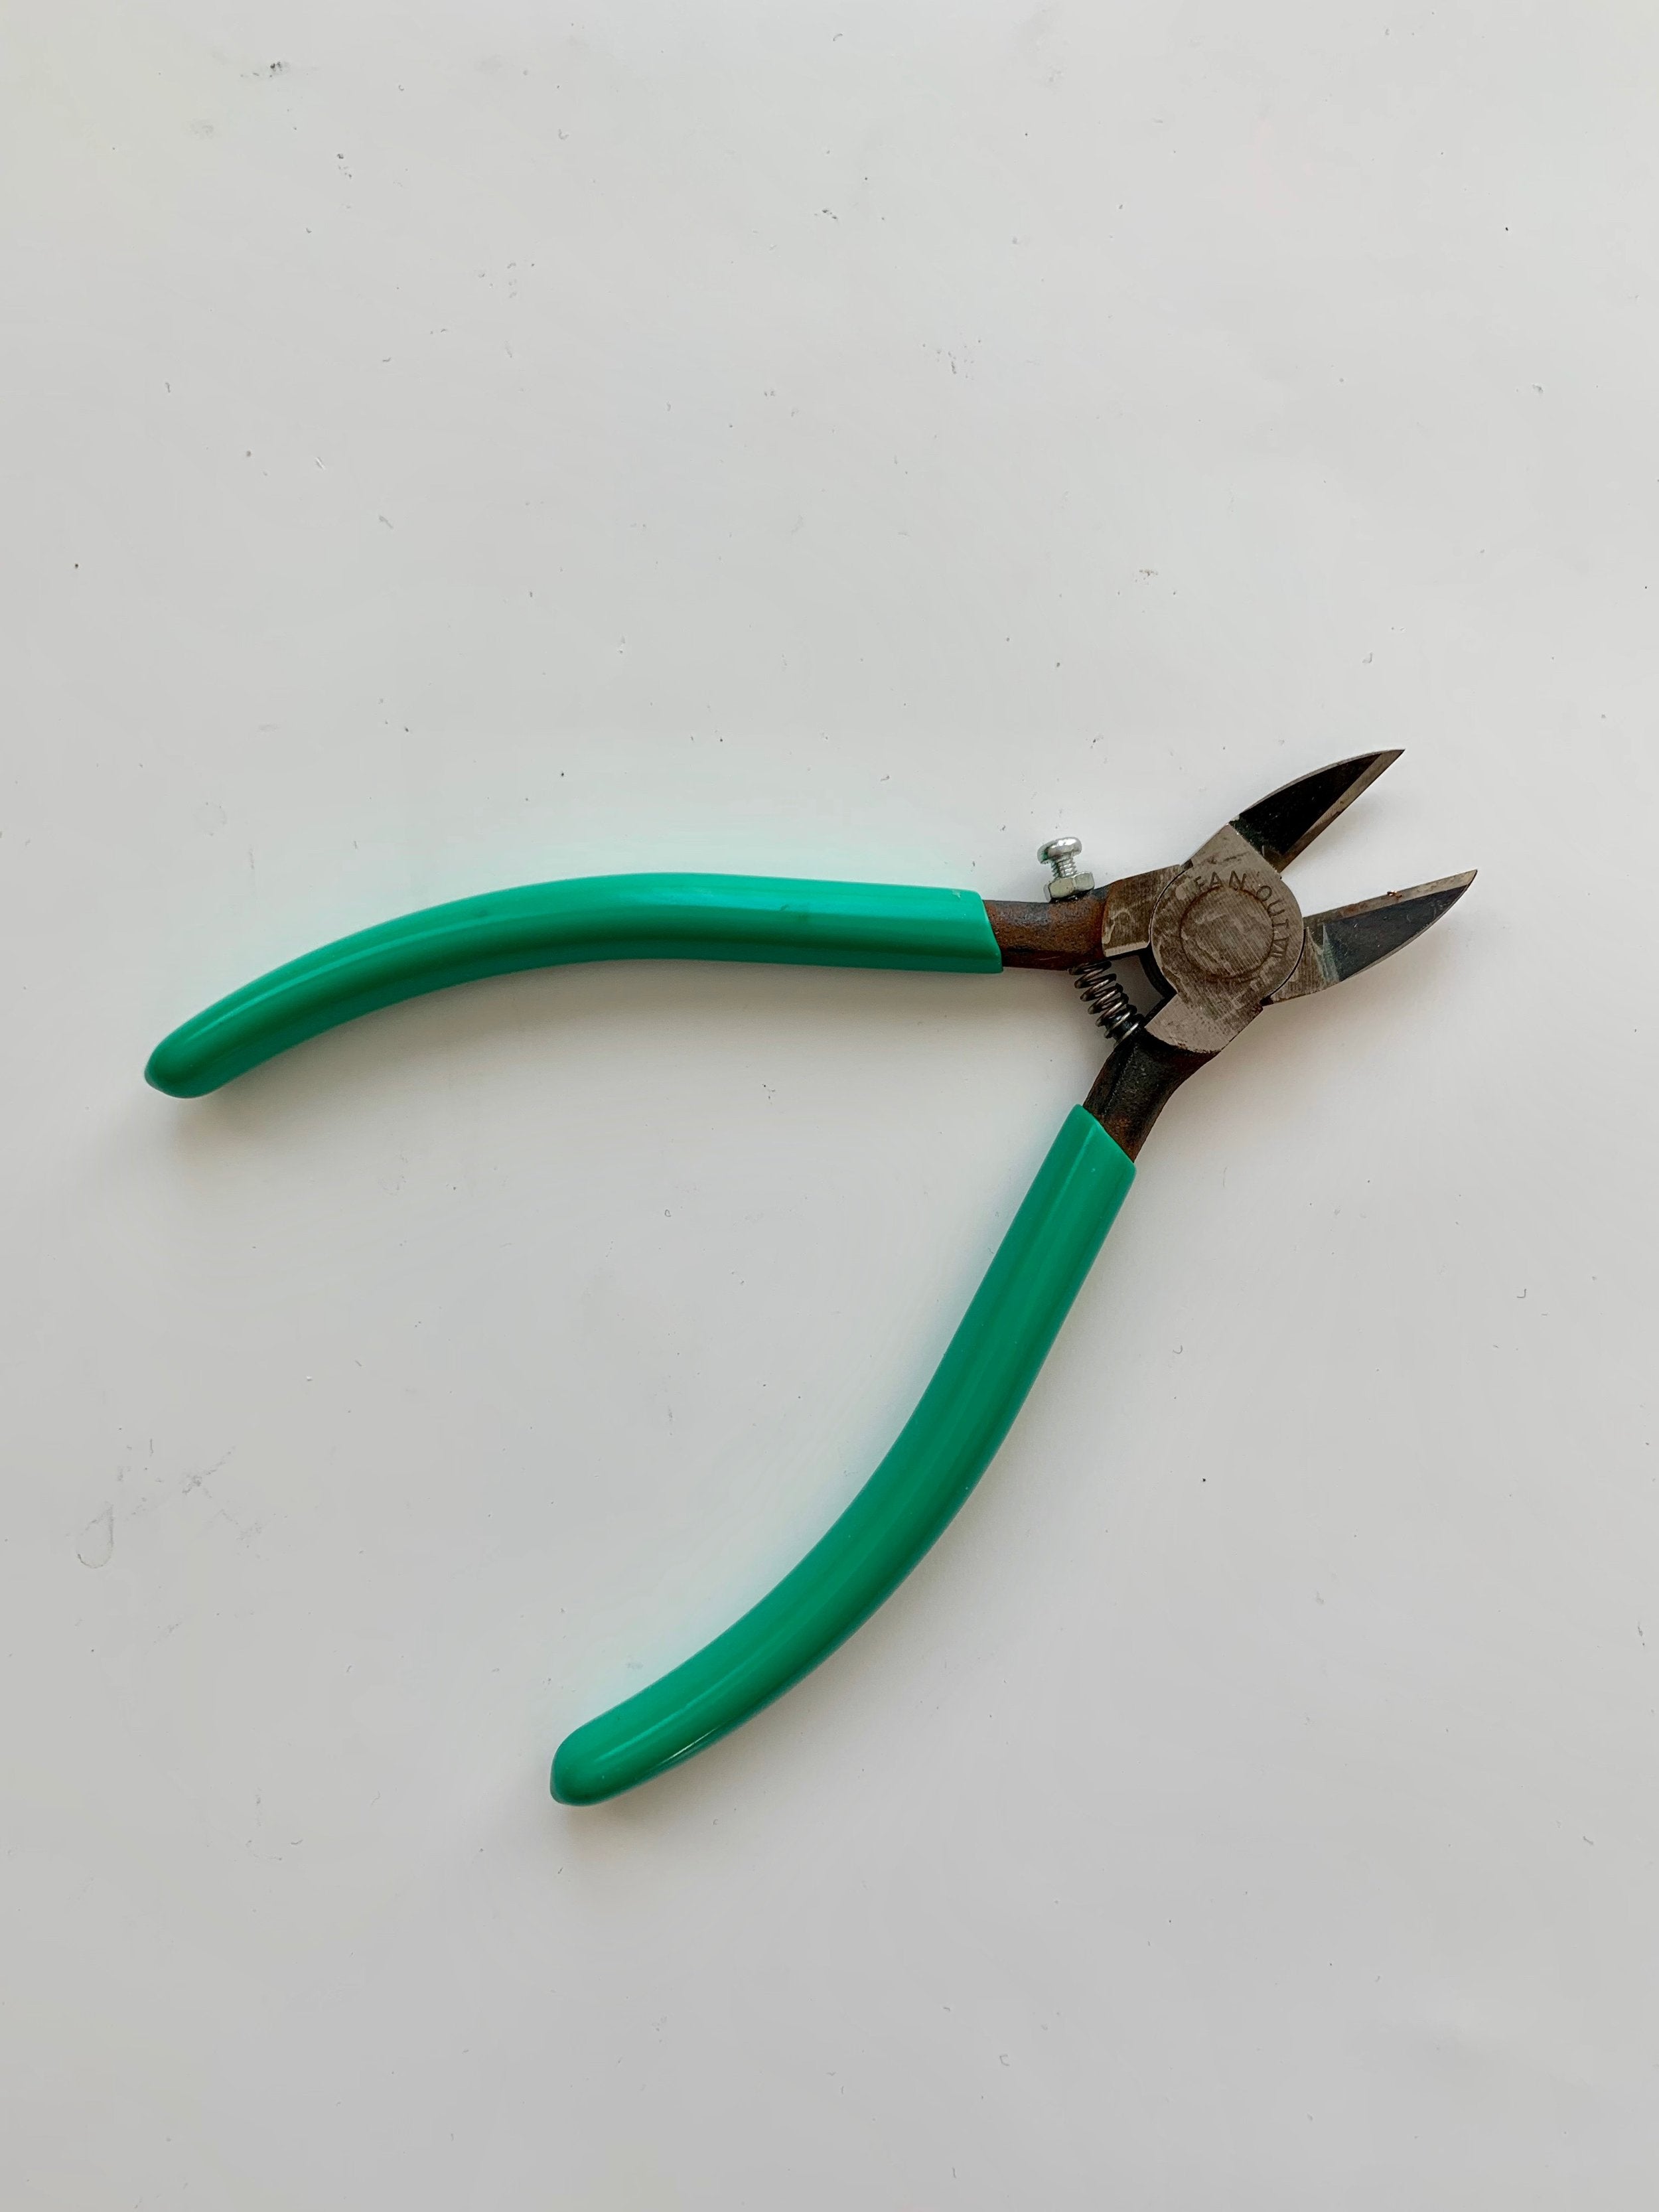
2. Lead Nipper Pliers - These are used to cut the lead came you can frame your piece with. They also can be used for cutting the tinned copper wire that you'll use create loops to hang your project. Sharp and very handy to have (find on Amazon)


2. Tinned Wire or Jump Rings* - You’ll need a way to hang your project if you want it to catch sunlight in a window. For this there are two options that I can recommend per my own methods. For small projects like feathers I use Jump Rings. These are little metal loops that are used for jewelry making. Don’t use these to hang bigger projects as they will offer zero support and most likely rip the copper tape off your finished project. For bigger/heavier projects I recommend making your own loops with tinned wire. (find on my website) and (find on Amazon) .

3. String to Hang Your Piece* - What kind of “string” you use will really come down to your own style. I have recently started using some faux leather string for some of my projects. A lot of the time I use twine because I enjoy how it looks. I’ve seen ribbon, chain, and fishing wire used. Try to use something sturdy though (find on Amazon) . Or (find on Amazon) .

4. Glass Wax - This will be used to shine and protect your project. You will use rags to wax on/wax off. Waxing your project not only leaves it shiny and beautiful but helps protect from pesky lead dust (find on Amazon) .

5. Old rags for Cleaning and Polishing - Helpful for buffing/cleaning. Or new micro fiber clothes which are AWESOME for that wax on, wax off motion! (find on Amazon)

6. Patina* - Never required but if you would rather your project’s lead be a different color the way to do it is with patina. Patina is a liquid solution that causes a chemical reaction to happen with lead in your project resulting in a color change. Your options other than silver are copper and black. I hope to do a whole post on using patina in the future because there is so much to say about them but these are SERIOUS chemicals. I’ll say it here as it is majorly important but always wear gloves when working with these chemicals, wear eye protection, and be in a well ventilated area (find on Amazon) .

7. Cotton Balls* - I use cotton balls or paper towels to apply patina, you can pick these up at your local grocery store or online. For the lazy (find on Amazon) .

8. 91% Isopropyl Alcohol* - After you have used patina its important to clean it off your project. That is best done with 91% Isopropyl Alcohol, yes it must be 91% specifically (find on Amazon) .

10. Window Suctions* - How you hang your project is up to you, if you go for suction cups its important to check the suctions now and then to be sure they still have a firm hold (find on Amazon) . I usually opt for a nail above the window for the most security!
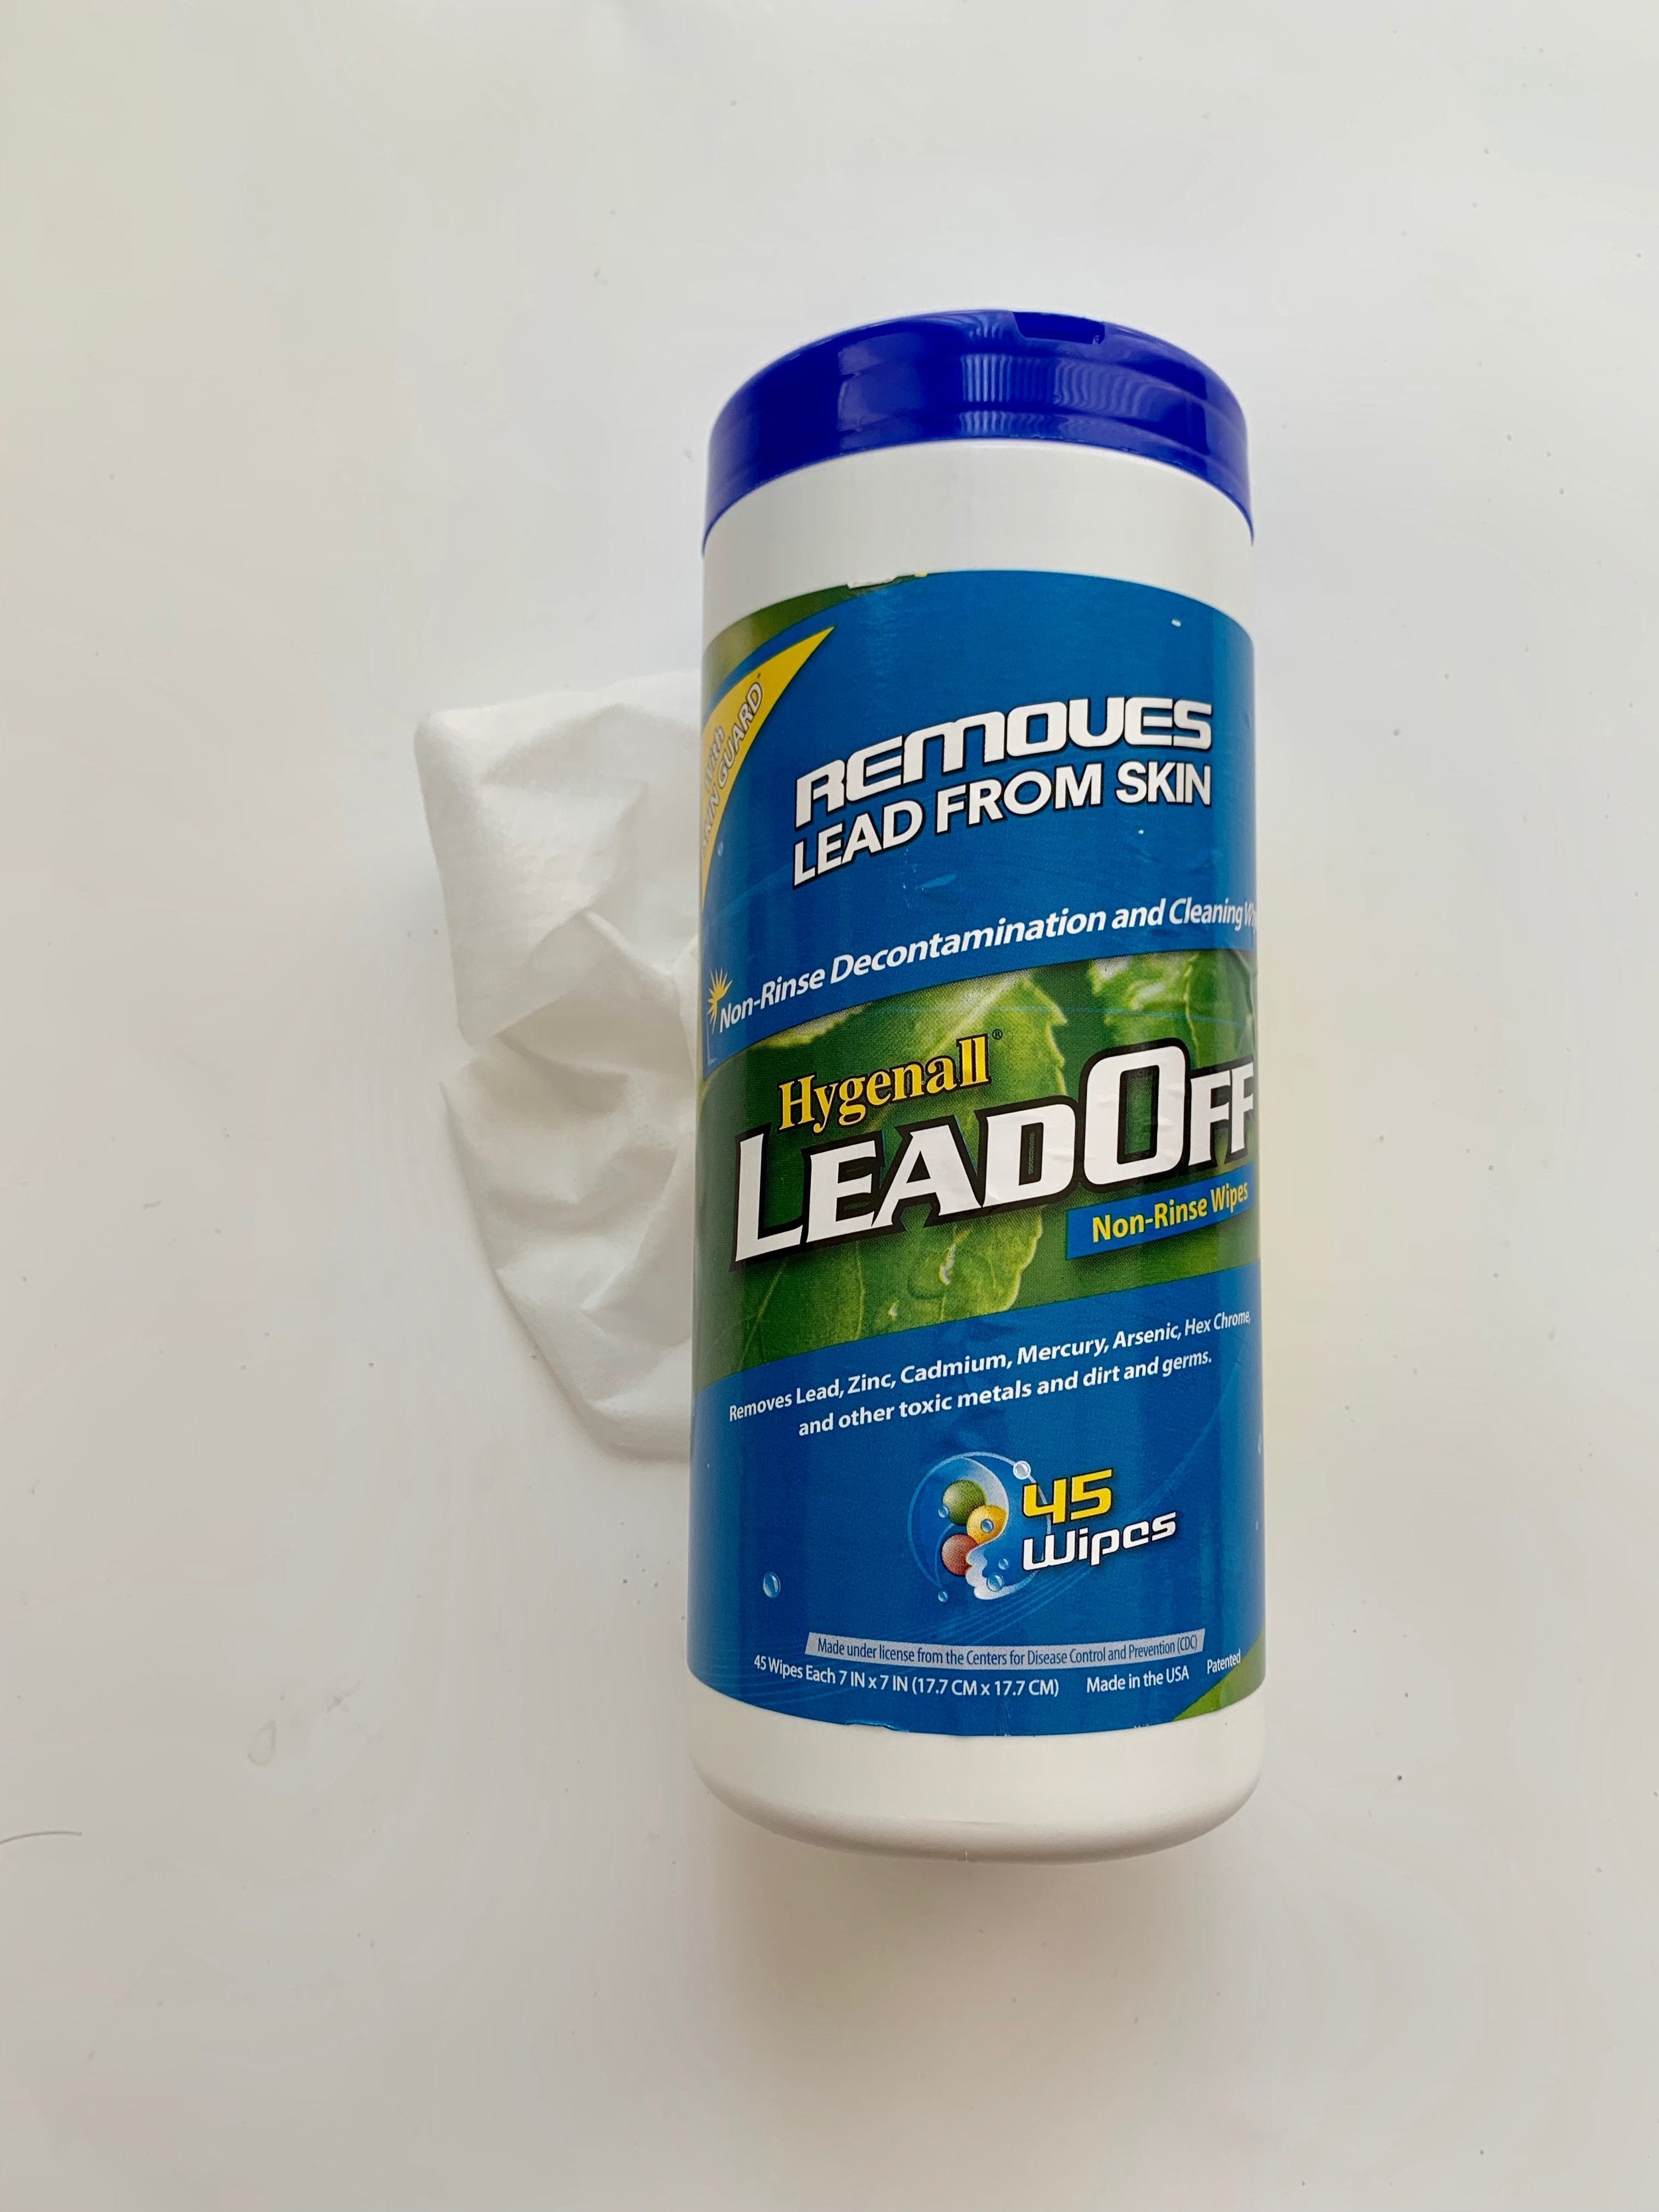
11. Lead Off Wipes* - When you’re messing around with lead its really important to be as safe as you can. In addition to washing your hands when you have a lot of lead exposure its important to have a way to wipe the dust and chemicals off yourself. From what I understand lead dust can be sometimes tricky to get off. These lead wipes are amazing I use them all the time to wipe down my phone or hands after touching lots of lead. These wipes also happen to have a nice smell to them. The way I feel about the Hakko Soldering Iron is shared with Hygenall’s Lead off Wipes. They work great and when I have tested my blood levels for lead the results have come back completely normal so they definitely do what they are suppose to. The brand I like to use (Hygenall) (find on Amazon) .

12. Lead Off Soap* - I use this soap after I handle lead as well and also when I’m in the shower post soldering. Its a foaming soap that helps pull heavy metals off you. This soap is also made by Hygenall and smells great/does its job (find on Amazon) .
BONUS:

12. WazerPro** - For my folks who might have a large unlimited budget and want to be able to create glass art without boundaries and in big batches (think teaching or fusing). The WazerPro is a powerful, desktop waterjet cutter that works by pushing a high-pressure stream of water mixed with abrasive sand through materials, achieving extreme precision in cutting. Think of it like a high-powered laser cutter, but instead of heat, it uses water! This technology lets you cut through a wide range of materials—metal, glass, ceramics, stone, plastics, and composites. For stained glass and fused glass artists, the WazerPro is especially appealing for intricate, detailed cuts that would be difficult or even impossible to achieve by hand. TL;DR: This machine can cut almost any design you dream up in glass and beyond! Note I am a brand partner with Wazer and am compensated but recommending as a user of this awesome tool :). For more info check out https://wazer.com/waterjets/
READY TO DIVE IN?
There you have it, a big long visual list of the must have and optional supplies needed to create stained glass. Hopefully my list gives your a better idea of what kind of investment you need to make if you’d like to get into this hobby. Keep in mind if you can’t afford or are scared to drive into investing there are other options. If I missed anything important feel free to let me know in the comments below or add any of your must have! Thanks for reading!
<3 Meggy
stained glass tools, stained glass supplies, beginner stained glass guide, stained glass hobby, how to make stained glass, stained glass art for beginners, stained glass techniques, copper foil stained glass, stained glass project ideas, stained glass tool list, buy stained glass tools online, stained glass tools for sale, stained glass supplies near me, stained glass kits for beginners, best stained glass tools, stained glass tool reviews, where to buy stained glass supplies, stained glass starter kits, affordable stained glass supplies, stained glass tutorial, stained glass step-by-step guide, stained glass tips and tricks, stained glass safety tips, how to cut stained glass, stained glass soldering tips, stained glass pattern making, stained glass cutting techniques, stained glass grinding tools, stained glass foiling process, stained glass classes near me, stained glass private lessons, advanced stained glass techniques, stained glass supplies small business, support small businesses stained glass, stained glass supplies vs Amazon, DIY stained glass supplies, how to get started with stained glass art, must-have tools for stained glass beginners, budget-friendly stained glass supplies, essential tools for copper foil stained glass, beginner mistakes in stained glass, best stained glass soldering iron, where to find stained glass patterns, stained glass community support, join stained glass Patreon, learn stained glass online, stained glass DIY projects, stained glass home decor ideas.